Введение
Use this guide to replace the battery in a Logitech K800 wireless keyboard.
For your safety, discharge the battery below 25% before disassembling your keyboard. This reduces the risk of a dangerous thermal event if the battery is accidentally damaged during the repair. If your battery is swollen, take appropriate precautions.
Выберете то, что вам нужно
-
-
Use a Phillips driver to remove the 5.7 mm screw securing the rear compartment.
-
-
-
Slide the rear compartment toward the top of the keyboard and remove it.
-
-
-
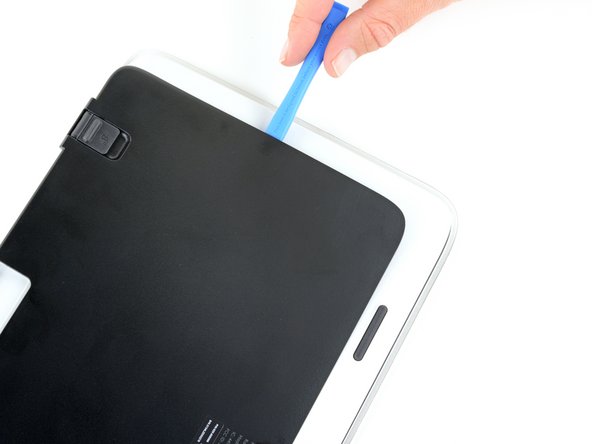
Slide the edge of an opening tool underneath the bottom edge of the rear cover and pry the cover up to create a gap.
-
-
-
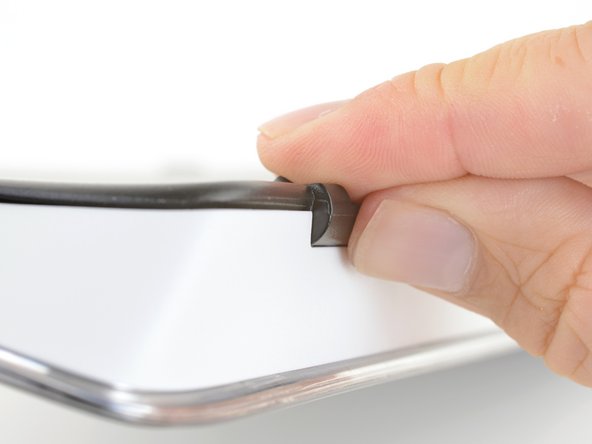
Keeping the opening tool under the rear cover, slide it around the right side of the cover to separate the adhesive and clips on that side.
-
It may help to push the tool farther under the cover, toward the middle of the keyboard.
-
-
-
Keeping the opening tool under the rear cover, slide it around the left side of the cover to separate the adhesive and clips on that side.
-
It may help to push the tool farther under the cover, toward the middle of the keyboard.
-
-
-
Hinge the bottom of the rear cover up until the clips along the top edge of the cover disengage, then lift the whole cover up to remove it.
-
-
-
Place the top edge of the cover slightly above the top edge of the keyboard, then slide it down into place.
-
-
-
-
Use a Phillips driver to remove the twelve 5.7 mm screws securing the front cover.
-
Use a Phillips driver to remove the three 4.7 mm screws securing the keyboard keys.
-
-
-
Slide an opening tool into the seam along one edge of the front cover. Pry the cover up to create a gap.
-
-
-
Slide the opening tool around the perimeter of the front case to release all the clips securing the front cover.
-
-
-
Use a Phillips driver to remove the six screws securing the keyboard keys.
-
Four 5.7 mm screws
-
Two 4.7 mm screws
-
-
-
Gently flip the keyboard keys up and over the top of the keyboard to reveal the backlight.
-
-
-
Gently flip the backlight up and over the top of the keyboard to reveal the keyboard backplate.
-
-
-
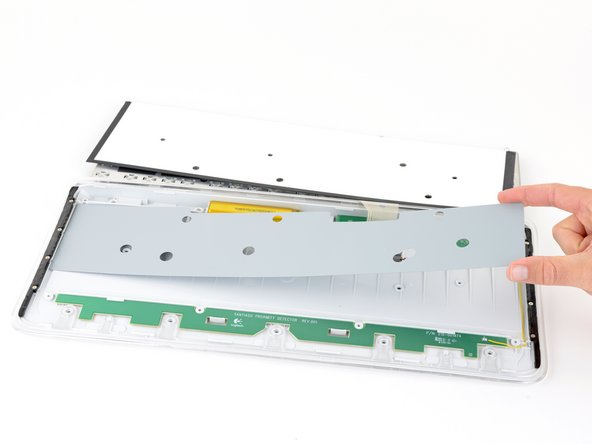
Grasp one end of the backplate and lift it off of the keyboard case.
-
Remove the backplate.
-
-
-
Grasp the top edge of the battery connector with your fingers or a tweezer.
-
Pull the connector straight out of its socket on the motherboard.
-
-
-
Use tweezers to remove the tape securing the battery cable to the case.
-
-
-
Heat an iOpener and apply it to the keyboard case underneath the battery for two minutes.
-
-
-
Use a spudger to pry the battery away from the keyboard case.
-
If you encounter significant resistance, stop and apply more heat.
-


Compare your new replacement part to the original part—you may need to transfer remaining components or remove adhesive backings from the new part before installing.
To reassemble your device, follow the above steps in reverse order.
Take your e-waste to an R2 or e-Stewards certified recycler.
Repair didn’t go as planned? Check out our Answers community for troubleshooting help.
Отменить: Я не выполнил это руководство.
15 участников успешно повторили данное руководство.

12 Комментариев
the original took 2 lithium AA rechargeables. their update just creates ewaste
not lithium! Just standard Ni-MH AA's. I was pretty disappointed when I bought the second keyboard (the fist one was already pretty beaten up) only to discover that below the battery door there is just plastic and no battery! bastards... I used the keyboard from time to time as 2xAA charger (as most of the time it was connected to power) and I swapped those fully charged batteries with discharged ones from other devices that take 2xAAs aswell
Do you have a part number for the replacement battery?
https://www.canadianbatteries.com/logite...
Search engines are your friend
Gord N -
The part in the canadianbatteries.com link is not the correct part for this keyboard.
The correct PN is 533-000141, this has longer leads on the battery and the battery capacity is larger than the one linked. Aliexpress is the only place I have been able to locate a new one.