Введение
Use this guide to upgrade or replace the solid-state drive in a MacBook Pro 13” Late 2012. This MacBook Pro uses a proprietary storage drive connector, and is therefore not compatible with common M.2 drives without the use of an adapter.
Before you perform this repair, if at all possible, back up your existing SSD. Then, either familiarize yourself with internet recovery or create a bootable external drive so you’ll be ready to install macOS onto your new drive and migrate your data to the new SSD.
Finally, we strongly recommend installing macOS 10.13 High Sierra (or a later macOS) before replacing the original SSD from your MacBook Pro. Most new SSDs require updated storage drivers not found in versions of macOS prior to High Sierra.
Выберете то, что вам нужно
-
Инструмент, используемый на этом этапе:Magnetic Project Mat$16.96
-
Remove the following ten screws securing the lower case to the upper case:
-
Two 2.3 mm P5 Pentalobe screws
-
Eight 3.0 mm P5 Pentalobe screws
-
-
-
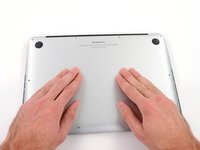
Wedge your fingers between the upper case and the lower case.
-
Gently pull the lower case away from the upper case.
-
Remove the lower case and set it aside.
-
-
-
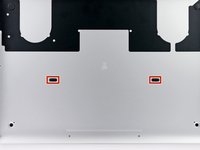
The lower case is connected to the upper case at the center, with two plastic clips.
-
-
-
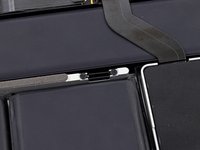
Remove the plastic cover adhered to the battery contact board.
-
-
-
Remove the following screws securing the battery connector board to the logic board:
-
Two 2.8 mm T6 Torx screws
-
One 7.0 mm T6 Torx shouldered screw
-
-
Инструмент, используемый на этом этапе:Tweezers$4.99
-
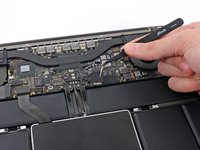
Use tweezers to remove the small plastic cover located near the bottom right of the battery connector board.
-
-
-
-
Remove the wide head 6.4 mm T6 Torx screw securing the battery connector to the logic board assembly.
-
-
-
Carefully lift the battery connector board up off the logic board.
-
It is recommended to bend the battery cables just slightly, to keep the board suspended up above the logic board and out of the way.
-
-
Инструмент, используемый на этом этапе:Tweezers$4.99
-
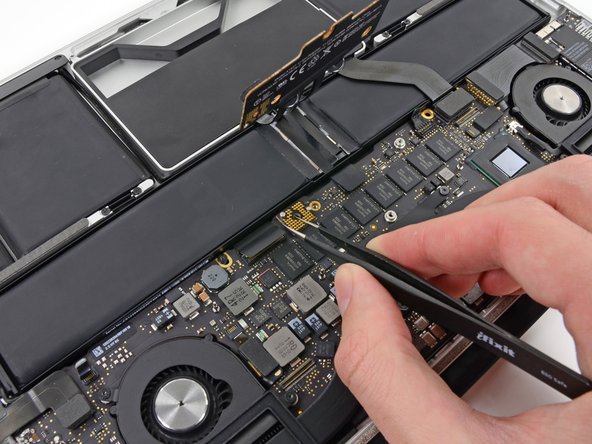
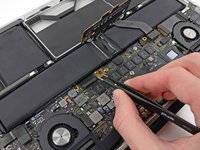
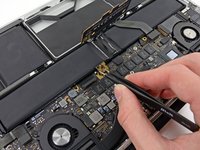
Grasp the Interposer with tweezers.
-
Lift the Interposer off the logic board and remove it.
-
-
-
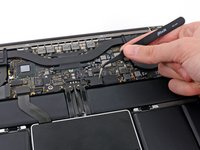
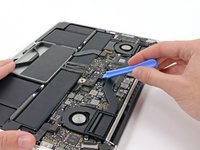
Use the flat end of a spudger to pry the SSD cable connector up from its socket on the logic board.
-
-
-
Use your thumb or finger to bend the plastic spring bar on the SSD tray, freeing the two clips at the front side of the device.
-
While holding the spring bar depressed, tilt the SSD assembly up out of its cavity.
-
-
-
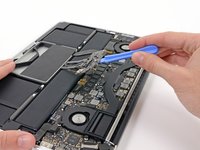
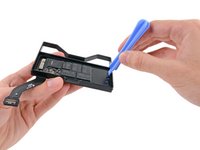
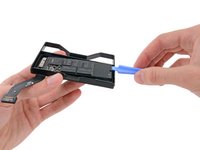
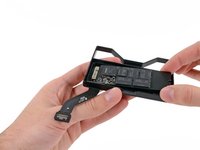
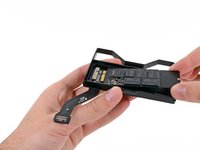
Insert the edge of plastic opening tool between the SSD and the SSD tray, opposite to the socket side of SSD tray.
-
Pry the side of the SSD opposite the SSD tray socket out of the SSD tray.
-
To reassemble your device, follow these instructions in reverse order.
Отменить: Я не выполнил это руководство.
106 человек успешно провели ремонт по этому руководству.
9 Комментарии к руководству
I followed the guide and was able to upgrade my wife's MacBook from 128GB to 240 GB!
One thing I noticed was that when I removed the plastic clip in step 6, it left behind a glue dot on the screw head I had to remove in step 7. I wasn't sure why my screwdriver kept rotating until I realized the clear dot was covering the screwed! Then I tweeze the dot off, and put it in the recess on the underside of the clip and all was good.
Everything went to the letter after, until it came time to restart and initialize the new disk. It turns out the old disk had some directory damage, so when it was copied to the new internal SSD, then the Mac wouldn't boot from it until I did a couple FSCK and Repair Disk fixes.
Vignesh,
Here is an option to recover your data and get a tiny speedy external SSD drive for 28.85
Sam,
The 2012 MacBook Pro uses an PCI Express Mini Card connection between the logic board and the SSD.
"Some notebooks (notably the Asus Eee PC, the MacBook Air, and the Dell mini9 and mini10) use a variant of the PCI Express Mini Card as an SSD. This variant uses the reserved and several non-reserved pins to implement SATA and IDE interface passthrough, keeping only USB, ground lines, and sometimes the core PCIe 1x bus intact.[11] This makes the 'miniPCIe' flash and solid state drives sold for netbooks largely incompatible with true PCI Express Mini implementations."
I fully agree, Especially as it turned out to be a little tricky to get the connector back in his position properly. Don't think there is a higher risk of damage through electric shock or so. Next time I will for sure skip it ;-)
Timpetou -
Aren’t steps 4-10 completely unnecessary?


