Перейти к основному содержанию

Moto C Motherboard Assembly Replacement

Выберете то, что вам нужно

  1. Moto C Motherboard Assembly Replacement, Back Cover: шаг 1, изображение 1 из 3 Moto C Motherboard Assembly Replacement, Back Cover: шаг 1, изображение 2 из 3 Moto C Motherboard Assembly Replacement, Back Cover: шаг 1, изображение 3 из 3
    • Power off your phone before beginning disassembly.

    • Insert a thumbnail, or spudger, into the notch on the bottom right corner to start separating the phone unit from the back cover.

    • Move it to the bottom left corner and pry the phone unit out of the back cover until you can get a good grip.

  2. Moto C Motherboard Assembly Replacement: шаг 2, изображение 1 из 2 Moto C Motherboard Assembly Replacement: шаг 2, изображение 2 из 2
    • Lift the phone out of the back cover.

  3. Moto C Motherboard Assembly Replacement, Battery: шаг 3, изображение 1 из 3 Moto C Motherboard Assembly Replacement, Battery: шаг 3, изображение 2 из 3 Moto C Motherboard Assembly Replacement, Battery: шаг 3, изображение 3 из 3
    • Use a finger or spudger to lever the battery out of its recess and remove it.

  4. Moto C Motherboard Assembly Replacement, Motherboard Cover: шаг 4, изображение 1 из 1
    • Remove the six 3.5 mm long Torx T5 screws.

  5. Moto C Motherboard Assembly Replacement: шаг 5, изображение 1 из 2 Moto C Motherboard Assembly Replacement: шаг 5, изображение 2 из 2
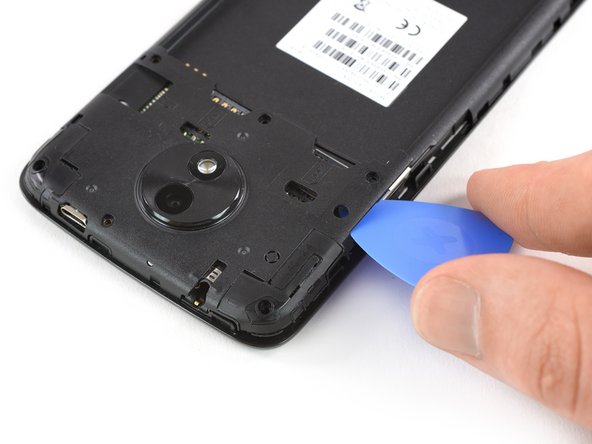
    • Insert an opening pick between the cover and the motherboard near the SIM 2 slot where the power buttons are located.

    • Slide and twist the opening pick to pry open the plastic clips securing the cover.

  6. Moto C Motherboard Assembly Replacement: шаг 6, изображение 1 из 2 Moto C Motherboard Assembly Replacement: шаг 6, изображение 2 из 2
    • Slide an opening pick between the cover and the motherboard on the opposite side next to the SD card slot.

    • Twist the opening pick to pry open the plastic clips securing the cover.

  7. Moto C Motherboard Assembly Replacement: шаг 7, изображение 1 из 2 Moto C Motherboard Assembly Replacement: шаг 7, изображение 2 из 2
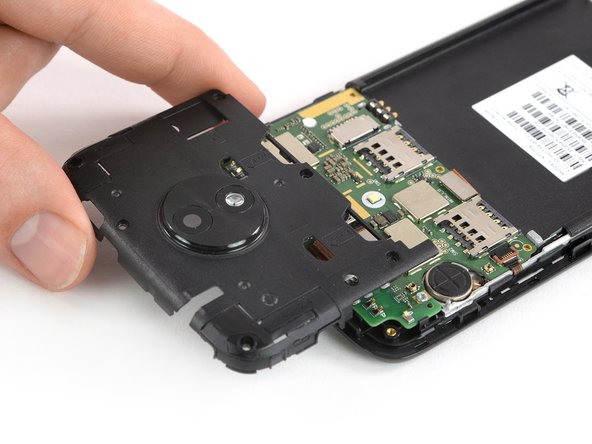
    • Remove the motherboard cover.

  8. Moto C Motherboard Assembly Replacement, Motherboard Assembly: шаг 8, изображение 1 из 1
    • Remove the three 2.5 mm long T5 Torx screws.

  9. Moto C Motherboard Assembly Replacement: шаг 9, изображение 1 из 2 Moto C Motherboard Assembly Replacement: шаг 9, изображение 2 из 2
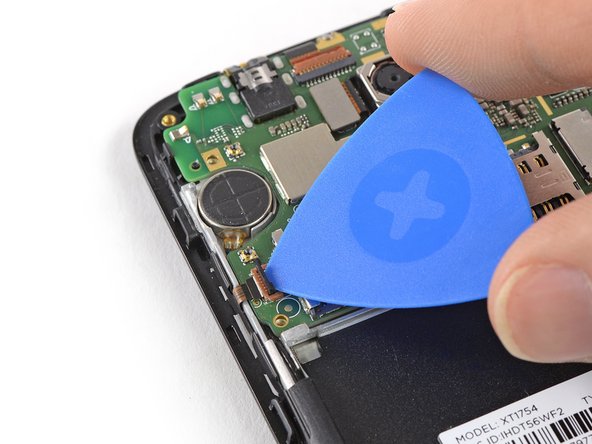
    • Use the tip of an opening pick to pry up and open the black lever of the ZIF connector located on the bottom left of the motherboard.

  10. Moto C Motherboard Assembly Replacement: шаг 10, изображение 1 из 2 Moto C Motherboard Assembly Replacement: шаг 10, изображение 2 из 2
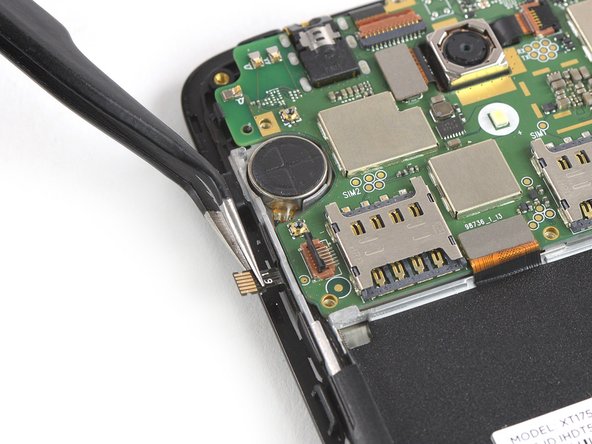
    • Use a pair of tweezers to pull the power and volume button flex cable out of the ZIF connector.

    • Fold the power and volume button flex cable out of the way.

  11. Moto C Motherboard Assembly Replacement: шаг 11, изображение 1 из 2 Moto C Motherboard Assembly Replacement: шаг 11, изображение 2 из 2
    • Use the flat end of a spudger to pry up and disconnect the display flex cable located at the bottom of the motherboard.

  12. Moto C Motherboard Assembly Replacement: шаг 12, изображение 1 из 2 Moto C Motherboard Assembly Replacement: шаг 12, изображение 2 из 2
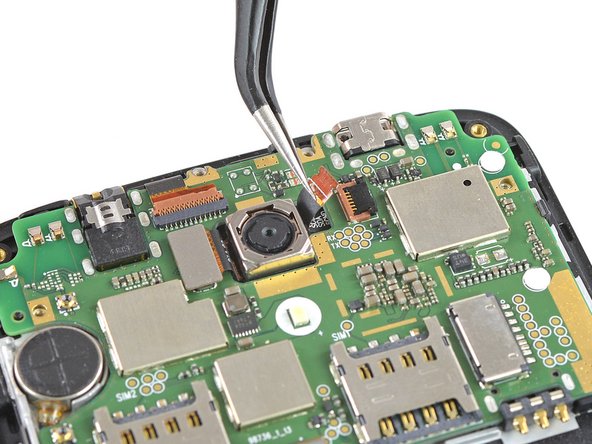
    • Use the tip of an opening pick to pry up and open the black lever of the ZIF connector located at the top of the motherboard next to the rear camera.

  13. Moto C Motherboard Assembly Replacement: шаг 13, изображение 1 из 2 Moto C Motherboard Assembly Replacement: шаг 13, изображение 2 из 2
    • Use a pair of tweezers to pull the digitizer flex cable out of the ZIF connector.

  14. Moto C Motherboard Assembly Replacement: шаг 14, изображение 1 из 1
    • Prepare an iOpener and apply it to the upper half of the display for at least two minutes to loosen the adhesive beneath the vibration motor and the rear facing camera.

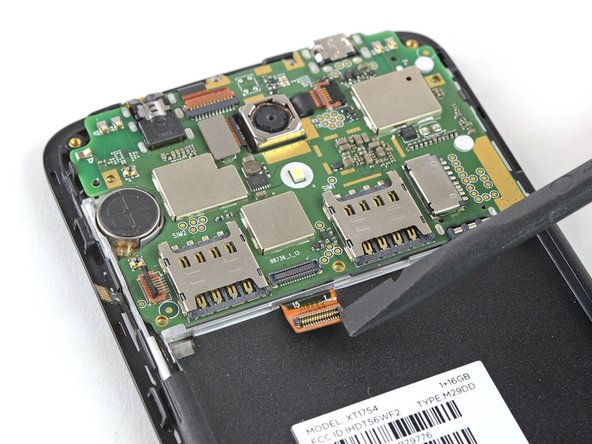
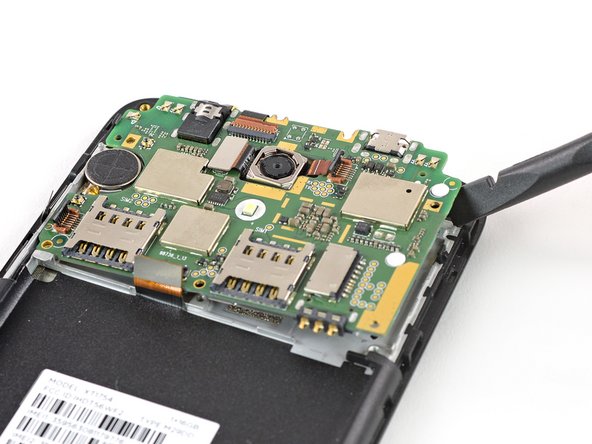
  15. Moto C Motherboard Assembly Replacement: шаг 15, изображение 1 из 2 Moto C Motherboard Assembly Replacement: шаг 15, изображение 2 из 2
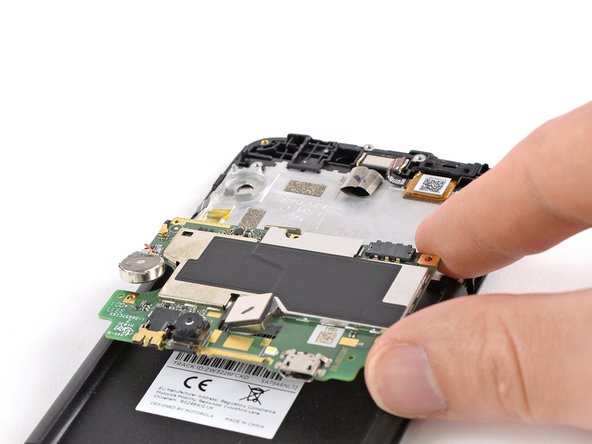
    • Don't try to remove the motherboard all the way yet. The antenna cable is still connected to its rear side.

    • Use a spudger to carefully lift the motherboard until you can get a good grip. Avoid to damage the cables next to the motherboard.

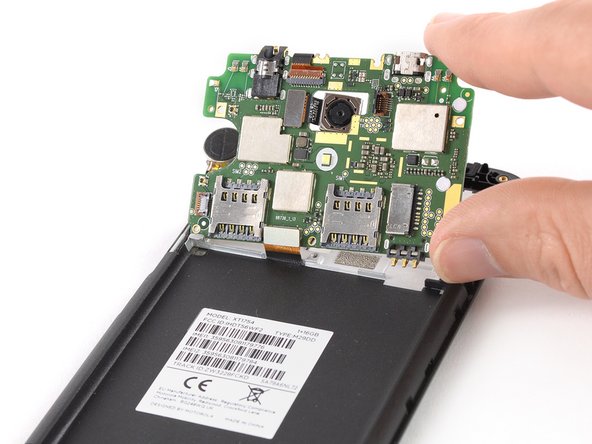
  16. Moto C Motherboard Assembly Replacement: шаг 16, изображение 1 из 3 Moto C Motherboard Assembly Replacement: шаг 16, изображение 2 из 3 Moto C Motherboard Assembly Replacement: шаг 16, изображение 3 из 3
    • Fold the motherboard over the battery cavity to access the coaxial cable connectors.

  17. Moto C Motherboard Assembly Replacement: шаг 17, изображение 1 из 2 Moto C Motherboard Assembly Replacement: шаг 17, изображение 2 из 2
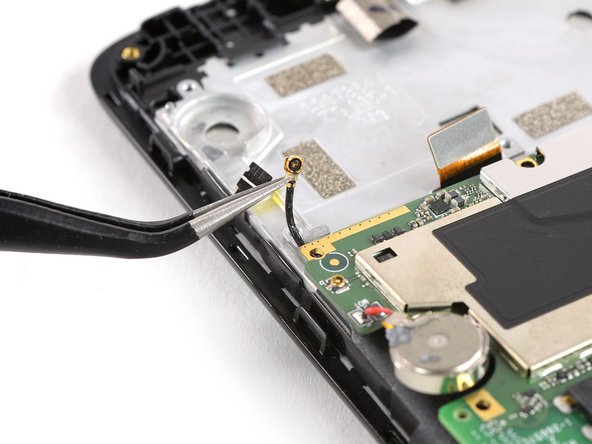
    • Use a pair of tweezers to pry up and disconnect the antenna cable from the back of the motherboard.

  18. Moto C Motherboard Assembly Replacement: шаг 18, изображение 1 из 1
    • Remove the motherboard.

Заключение

To reassemble your device, follow these instructions in reverse order.

Take your e-waste to an R2 or e-Stewards certified recycler.

Repair didn’t go as planned? Check out our Answers community for troubleshooting help.

Еще один человек закончил это руководство.

Dominik Schnabelrauch

Участник с: 11/23/16

203 329 Репутация

Автор 682 руководств

Команда

iFixit Участник iFixit

Staff

135 членов

Автор 16 817 руководств

0 Комментариев

Добавить комментарий

Просмотр статистики:

За последние 24часов: 1

За последние 7 дней: 7

За последние 30 дней: 20

За всё время: 1,750