Эта версия возможно содержит некорректные исправления. Переключить на последнюю проверенную версию.
Выберете то, что вам нужно
-
Этот шаг не переведен. Помогите перевести
-
Use a SIM card eject tool, to pop out and remove the SIM card tray.
-
Use an iOpener to loosen the adhesive underneath the small plastic cover at the bottom of the phone.
-
-
Этот шаг не переведен. Помогите перевести
-
Insert a knife between the phone and the plastic cover. Pry up the plastic cover until you can insert an opening pick.
-
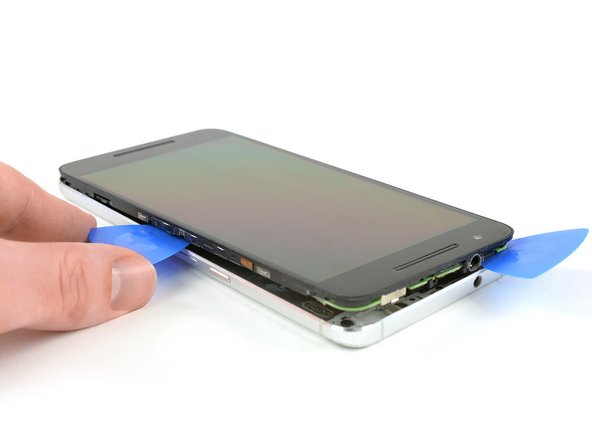
Slide the opening pick underneath the plastic cover to cut the adhesive.
-
-
Этот шаг не переведен. Помогите перевести
-
Use an iOpener to loosen the adhesive underneath the glass cover at the top of the phone.
-
Insert a knife between the phone and the glass cover. Pry up the glass cover until you can insert an opening pick.
-
-
-
Этот шаг не переведен. Помогите перевести
-
Slide the opening pick underneath the glass cover and use it to cut the adhesive underneath.
-
Pry off the glass cover.
-
-
Этот шаг не переведен. Помогите перевести
-
Remove the six Phillips #00 screws.
-
Use tweezers to remove any stickers covering the screw to allow better seating for the driver.
-
-
Этот шаг не переведен. Помогите перевести
-
Insert a razor knife between the metal back cover and the front glass to create a gap. Insert an opening pick into the gap and slide it to the top right corner.
-
Insert a second opening pick and slide it to the top left corner.
-
Slide the opening picks along the edges to seperate the plastic clips, holding back cover and midframe together.
-
Remove the rear cover.
-
-
Этот шаг не переведен. Помогите перевести
-
Remove the Philipps #000 screw.
-
Use tweezers to remove the metal plate.
-
Use the flat end of a spudger, to disconnect the battery flex cable.
-