Перейти к основному содержанию

Ninja Foodi DZ401 Power Cord Replacement

Выберете то, что вам нужно

  1. Ninja Foodi DZ401 Power Cord Replacement, Top Cover: шаг 1, изображение 1 из 3 Ninja Foodi DZ401 Power Cord Replacement, Top Cover: шаг 1, изображение 2 из 3 Ninja Foodi DZ401 Power Cord Replacement, Top Cover: шаг 1, изображение 3 из 3
    • Position the air fryer so that the front is facing you and the top is accessible.

    • Using opening picks and a metal spudger, pry open the silver ring on the front, right corner.

    • Place an opening pick on the left side of the corner to hold the ring away from the cover.

    • Slide the metal spudger underneath the silver ring. When you find a notch, place the metal spudger next to the notch and pry up to release it.

    • This process requires a significant amount of force to be applied to the silver ring and top cover of the air fryer. It may result in damage to both tools and the air fryer cover.

  2. Ninja Foodi DZ401 Power Cord Replacement: шаг 2, изображение 1 из 1
    • Using a metal spudger, pry open the plastic top cover by inserting into the slots and pushing up on the tabs.

    • There are three openings on the front, one on each side, and four on the back of the unit.

    • The metal spudger may scratch or damage the cover if care is not taken.

  3. Ninja Foodi DZ401 Power Cord Replacement, Outer Casing: шаг 3, изображение 1 из 1
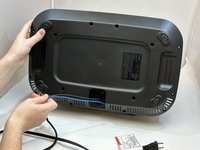
    • Rotate the air fryer so that the back of the air fryer is facing down and the base is facing you.

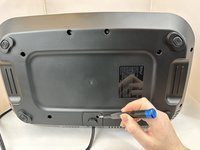
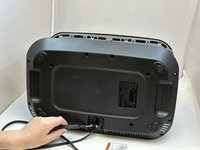
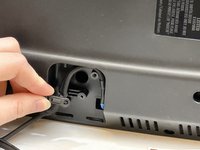
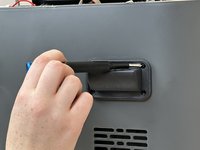
  4. Ninja Foodi DZ401 Power Cord Replacement: шаг 4, изображение 1 из 3 Ninja Foodi DZ401 Power Cord Replacement: шаг 4, изображение 2 из 3 Ninja Foodi DZ401 Power Cord Replacement: шаг 4, изображение 3 из 3
    • Remove the ten 15 mm screws from the bottom of the air fryer using a Phillips #3 screwdriver.

    • Remove the power cord cover.

    • Remove the two 16.7 mm power cord bracket screws using a Phillips #1 screwdriver.

  5. Ninja Foodi DZ401 Power Cord Replacement: шаг 5, изображение 1 из 1
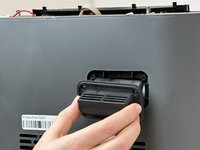
    • Rotate the air fryer so that the rear fan vents are accessible.

  6. Ninja Foodi DZ401 Power Cord Replacement: шаг 6, изображение 1 из 2 Ninja Foodi DZ401 Power Cord Replacement: шаг 6, изображение 2 из 2
    • Remove the four 11.1 mm screws from each vent using a Phillips #1 screwdriver.

    • Remove both vents.

  7. Ninja Foodi DZ401 Power Cord Replacement: шаг 7, изображение 1 из 3 Ninja Foodi DZ401 Power Cord Replacement: шаг 7, изображение 2 из 3 Ninja Foodi DZ401 Power Cord Replacement: шаг 7, изображение 3 из 3
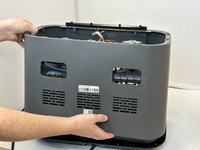
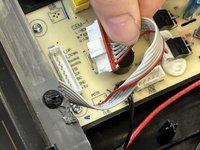
    • Carefully pull the outer casing up from the back.

    • Disconnect the front display cable from the motherboard.

    • Fully remove the outer casing.

  8. Ninja Foodi DZ401 Power Cord Replacement, Power Cord: шаг 8, изображение 1 из 2 Ninja Foodi DZ401 Power Cord Replacement, Power Cord: шаг 8, изображение 2 из 2
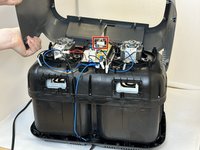
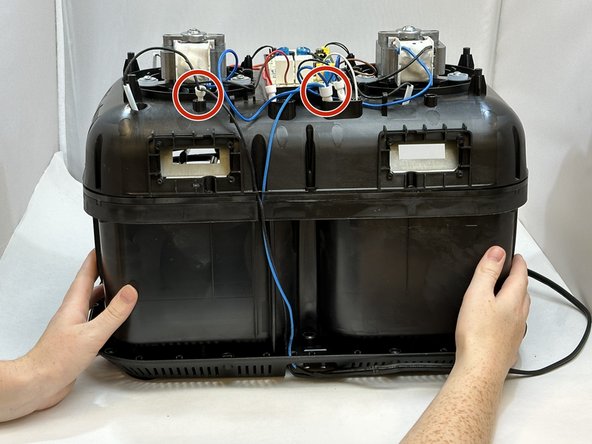
    • Rotate the unit so that you can access the top and rear.

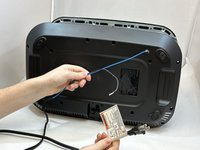
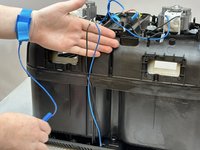
    • Locate and extract the black and blue wire bundles.

  9. Ninja Foodi DZ401 Power Cord Replacement: шаг 9, изображение 1 из 3 Ninja Foodi DZ401 Power Cord Replacement: шаг 9, изображение 2 из 3 Ninja Foodi DZ401 Power Cord Replacement: шаг 9, изображение 3 из 3
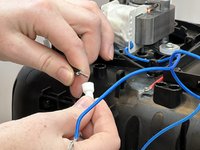
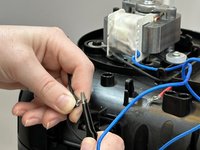
    • Using pliers, gently uncrimp and remove the plastic wire cap from the blue and black wires.

    • Carefully separate the wires.

    • The wires may be sharp. Use pliers to reduce the risk of harm.

  10. Ninja Foodi DZ401 Power Cord Replacement: шаг 10, изображение 1 из 3 Ninja Foodi DZ401 Power Cord Replacement: шаг 10, изображение 2 из 3 Ninja Foodi DZ401 Power Cord Replacement: шаг 10, изображение 3 из 3
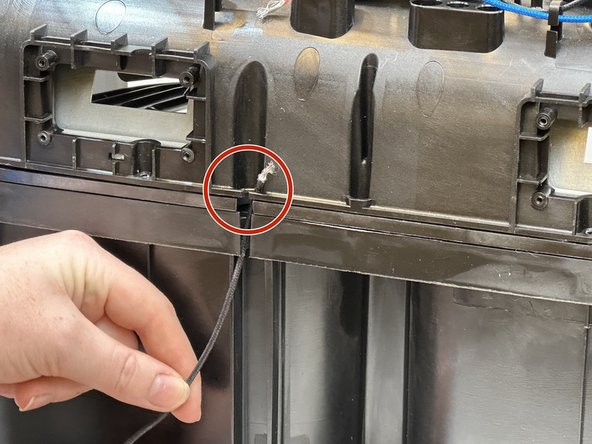
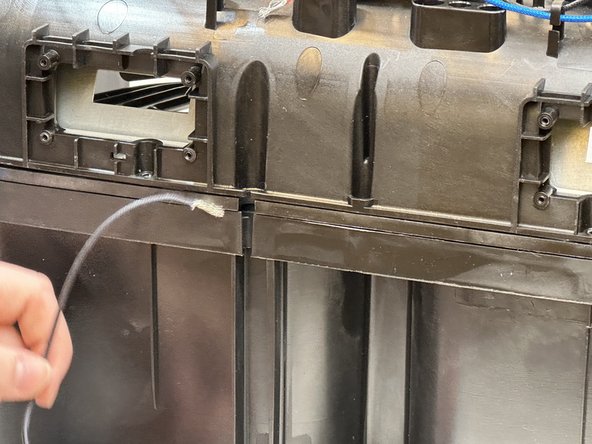
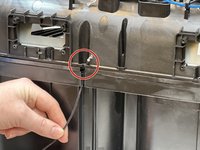
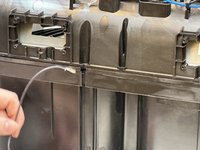
    • Locate the blue and black wires that connect to the bottom of the unit.

    • Gently pull both wires out from the back of the unit.

    • Both wires run through a small channel that may impede removal. Use caution when extracting the wires from this area.

  11. Ninja Foodi DZ401 Power Cord Replacement: шаг 11, изображение 1 из 2 Ninja Foodi DZ401 Power Cord Replacement: шаг 11, изображение 2 из 2
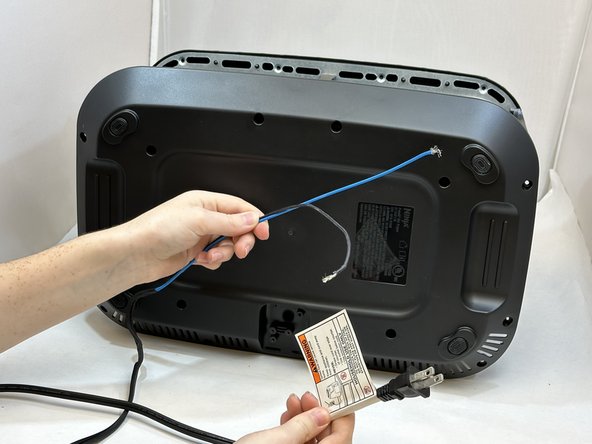
    • Slightly lift the unit to allow the wires to come out easily.

    • Gently pull the blue and black wires through the base.

Заключение

To reassemble your device, follow these instructions in reverse order.

A.J. Brain
Участник с: 10/02/24

579 Репутация

Автор 5 руководств

Команду

Eastern Washington University, Team 1-2, Carnegie Fall 2024 Участник Eastern Washington University, Team 1-2, Carnegie Fall 2024

EWU-CARNEGIE-F24S1G2

4 членов

Автор 7 руководств

Один комментарий

What kind of cord is needed?

Nichele - Ответить

Добавить комментарий

Статистика просмотров:

За последние 24 час(ов): 5

За последние 7 дней: 23

За последние 30 дней: 105

За всё время: 290