Введение
Remove your broken Nintendo 3DS lower case and replace it with a fresh one.
Выберете то, что вам нужно
-
Инструмент, используемый на этом этапе:Phillips #00 Screwdriver$5.49
-
Use a Phillips PH00 screwdriver to loosen the four screws along the top of the back cover.
-
-
-
Grab the top edge of the back cover with your opposite hand so that the cover does not fall back into place.
-
Pull the back cover up and away from the rest of the device to remove it.
-
-
-
-
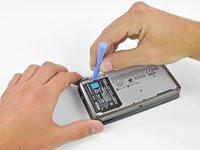
Insert a plastic opening tool into the notch in the lower case above the battery.
-
Pry the battery up with the plastic opening tool.
-
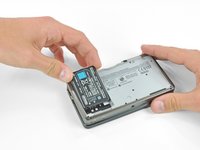
Grab the top edge of the battery and lift it out of the lower case.
-
-
-
Use a JIS #00 screwdriver to remove the nine 6.3 mm black screws from the lower case.
-
Use a JIS #00 screwdriver to remove the 2.4 mm silver screw above the game cartridge slot.
-
-
-
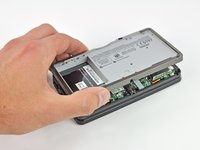
Lift the bottom edge of the lower case off the rest of the 3DS.
-
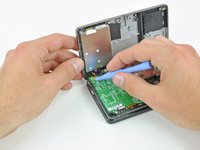
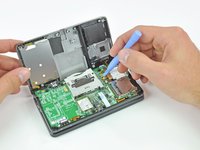
Use a plastic opening tool to pry the shoulder button ribbon cables off their sockets on the motherboard.
-
Remove the lower case from the device.
-


To reassemble your device, follow these instructions in reverse order.
Отменить: Я не выполнил это руководство.
8 человек успешно провели ремонт по этому руководству.

3 Комментарии к руководству
Is this guide for the original 3ds?
yessir it is
havent tried it (was thinking of shell swapping to see how hard it is) but it seems kinda easy for moderate rating you just remove 14 screws sorry if im wrong