Введение
This guide will show the basic steps to remove you old headliner, replace the loose material, and re-install the headliner into the vehicle. This type of headliner has been used since the early 1980s through today.
Выберете то, что вам нужно
-
-
Prep the car for work.
-
Disconnect the negative battery terminal.
-
Removal of the right passenger seat may be necessary to help remove the headliner from the car.
-
-
-
Remove the trim.
-
Unbolt the sun visors, dome lamp, grab handles and any other accessories that are attached to the ceiling.
-
Remove the upper seat belt mounting loops.
-
Remove and/or pull back just enough of the side interior trim panels to gain access to the edge of the headliner. Complete removal of these panels is usually not needed.
-
Lower one side of the headliner panel and slide it over to clear the trim panels.
-
Turn the panel and remove it from the vehicle.
-
-
-
-
Remove the old fabric from the board.
-
Place the headliner panel on a clean work table.
-
Carefully pull the old fabric material off the board. Usually the foam backing will remain stuck to the headliner board. Use a piece of the old material to rub the old foam loose from the board.
-
Vacuum the foam bits from the backing board.
-
-
-
Install new fabric:
-
If the board is damaged, repair it using aluminum tape. Any rough areas might show after the new fabric is applied.
-
Lay out the new fabric over the board. Pull 1/2 of it back over itself.
-
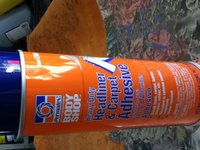
Spray headliner adhesive glue on 1/2 of the board and the back side of the fabric.
-
Carefully place the fabric onto the board starting from the center point and smooth it outward wit your hand as you lay it down.
-
Pull up the other 1/2of the fabric over the side you just glued down. Repeat the above steps to lay down this side of the fabric.
-
-
-
Trim up the fabric edges
-
Fold over the front & rear edges and glue them to the back side of the board about 1 inch from the edge.
-
Cut the side edges flush with the board. Also cut any access holes for the sun visors and other accessories that were previously removed.
-
-
-
Reinstall the headliner to the car:
-
Reverse the removal steps to re-install the headliner into the car.
-
Start one edge over the side trim panels and then raise the headliner into position over the other side trim panels.
-
Re-install the sun visors, dome lamp, seat belt upper loops and any other items that were previously removed
-
Lightly brush the headliner to remove marks & fingerprints.
-
If any of the trim clips break off of the interior trim panels, you can reattach them to the panel with 2-part epoxy glue.
-


To reassemble your device, follow these instructions in reverse order.
Отменить: Я не выполнил это руководство.
18 человек успешно провели ремонт по этому руководству.

4 Комментарии к руководству
Excellent directions. I'd like to see a well made video of the procedure! Thanks,
Dub
Thank you so much. I've never tried anything like this before, you've made it seem like even I can do it. I'm excited to save a cpl hundred by doing it myself!
I like the steps you laid out. Its a very easy job of you have patience. Its a virtue in itself. All headliners are made different and from different material. Thank you for sharing this,
Excellent instructions. Thank you so much !!!