Введение
Use this guide to replace the earpiece speaker in a Skullcandy Crusher Wireless headphones. Replacement speakers can be bought online.
Follow this replacement guide if the earpiece speaker has stopped working and you've ruled out other sources of the problem (or maybe you just want to see the internal components of your Skullcandy Crusher Wireless). See our Troubleshooting page for more information on what could be causing the sound issues.
Also, for more information about soldering and desoldering, please use this guide.
Выберете то, что вам нужно
-
-
Take your headphones and hold them upside down for better control with your hands.
-
-
-
Grab the ear cushion firmly between your thumb and forefinger with a tight grip.
-
Pull the ear cushion away from the plastic, covering the speaker, by sliding the ear cushion down to release it.
-
-
-
Continue pulling it away from the edges of the plastic covering until the cushion is fully removed.
-
-
-
Remove three 12 mm Phillips #1 screws located underneath the left ear cushion.
-
-
-
-
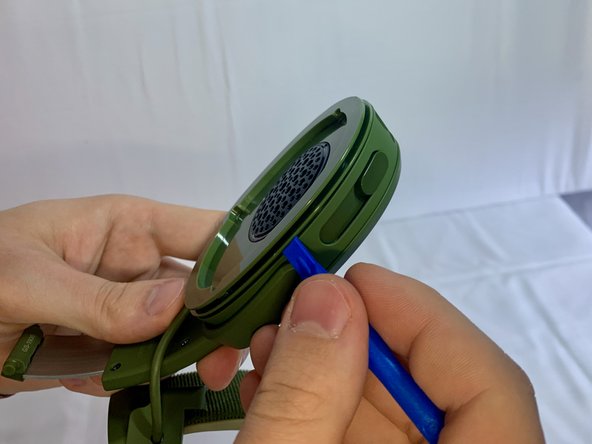
Slide a plastic opening tool between the plastic frame and speaker assembly of the headphones.
-
Gently pry the speaker away from the frame of the headphones.
-
-
-
Inspect the USB port and ensure that it is connected correctly. If necessary, desolder the USB port and replace it with the new port.
-
-
-
Remove four 4 mm Phillips #1 screws that connect the motherboard with the plastic frame.
-
-
-
Remove three 4 mm Phillips #1 screws that connect the bass speaker to the plastic frame.
-
-
-
Move the motherboard away from the plastic frame.
-
Desolder two cables to replace the speaker and bass component.
-


To reassemble your device, follow these instructions in reverse order.
To reassemble your device, follow these instructions in reverse order.
Отменить: Я не выполнил это руководство.
Еще один человек закончил это руководство.
Команда

UMass Dartmouth, Team 1-33, Gurgel Spring 2022 Участник UMass Dartmouth, Team 1-33, Gurgel Spring 2022
UMASSD-GURGEL-S22S1G33
1 член
Автор 12 руководств