Введение
Remove the old glass from the digitizer and replace it with new glass without replacing the assembly
Выберете то, что вам нужно
-
-
Use a plastic opening tool to pry the home button up from the display assembly.
-
-
-
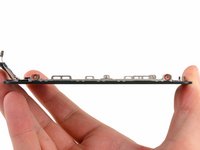
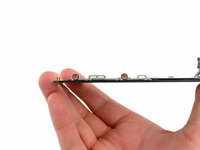
Remove the two screws securing the LCD shield plate to the display assembly:
-
One 1.4 mm Phillips screw
-
One 2.6 mm Phillips screw
-
-
-
-
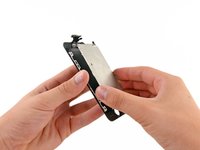
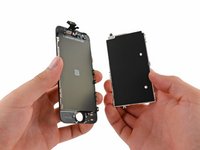
The bare display assembly remains.
-
Make sure to remove the protective cover from your new display assembly as well as the protective cover on the back of the LCD.
-
Note: When reassembled, the screen may not turn on. Try fixing this by plugging your phone in, and holding down the power and home buttons at the same time for 20 seconds.
-
-
-
I used some clear packing tape to help me remove the glass and get suction.
-
-
-
Using a hot plate (cooktop) and a temp gun heat up the LCD to about 150-160 degrees. I also soaked the display in Duck Brand adhesive remover. Working a few pieces of glass at a time soaking and heating. I used a small flat head, plastic pry and a high guitar string to remove all the glass from the LCD. Be careful not to twist the LCD assembly.
-
-
-
After all the glass is removed from the LCD, gently soak it down in adhesive remover and use your fingers to get rid of the rest of the goo
-
-
-
Clean the rest of the glass and goo off of the frame. I used the same heat and adhesive remover method, but a touch more heat here is okay.
-
-
-
Attach the new glass to the frame and LCD. I only attached the glass to the frame on mine for various reasons. Others recommend using an optically clear adhesive to attach the new glass to the LCD directly. Then reassemble the display and install.
-


To reassemble your device, follow these instructions in reverse order.
Отменить: Я не выполнил это руководство.
15 человек успешно провели ремонт по этому руководству.
1 Комментарий к руководству
i've buyed this yaxun LOCA adhesive remover, to remove the screens glue, the thing is that how you avoid damaging the display? i found that the display was divided in two parts when i started removing the glue, so the glue remover got between the two parts of the display and with what type of glue you secure the frame? again the one i've buyed is yaxun 7000 glue multipurpose glue and is not a tight cohesion between the frame and the digitizer