Перейти к основному содержанию

APEX AP-GS918 Power/Volume Button Replacement

Выберете то, что вам нужно

  1. APEX AP-GS918 Power/Volume Button Replacement, Power/Volume Button: шаг 1, изображение 1 из 3 APEX AP-GS918 Power/Volume Button Replacement, Power/Volume Button: шаг 1, изображение 2 из 3 APEX AP-GS918 Power/Volume Button Replacement, Power/Volume Button: шаг 1, изображение 3 из 3
    • To begin, locate the two 4.9mm Phillips #00 screws at the top corners of the case and remove them.

  2. APEX AP-GS918 Power/Volume Button Replacement: шаг 2, изображение 1 из 3 APEX AP-GS918 Power/Volume Button Replacement: шаг 2, изображение 2 из 3 APEX AP-GS918 Power/Volume Button Replacement: шаг 2, изображение 3 из 3
    • Squeeze the plastic opening tool in between the seam where the screen joins the plastic case.

    • Begin separating the bottom of the case from the screen by carefully going around the whole edge of the case and slowly prying it apart.

    • Be careful when separating the lids because the wires holding the speaker to the motherboard are very short.

  3. APEX AP-GS918 Power/Volume Button Replacement: шаг 3, изображение 1 из 2 APEX AP-GS918 Power/Volume Button Replacement: шаг 3, изображение 2 из 2
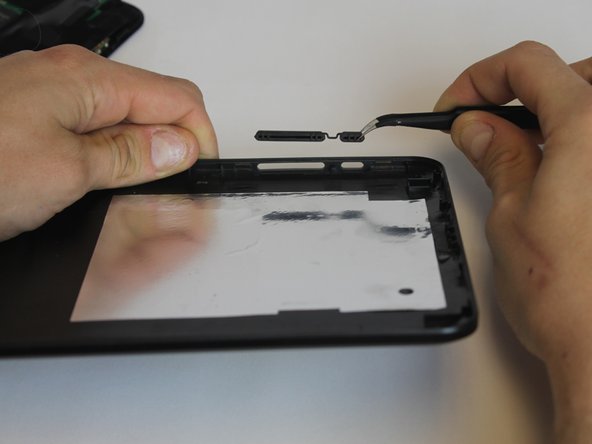
    • Carefully place the bottom lid next to the screen case. The power/speaker buttons should be visible at the corner of the lid. Remove the buttons with the tweezers.

Заключение

To reassemble your device, follow these instructions in reverse order.

Christopher Wright

Участник с: 02/19/15

127 Репутация

1 руководство автора

Команда

USF Tampa, Team 9-1, Leahy Winter 2015 Участник USF Tampa, Team 9-1, Leahy Winter 2015

USFT-LEAHY-W15S9G1

3 членов

Автор 9 руководств

0 Комментариев

Добавить комментарий

Просмотр статистики:

За последние 24часов: 0

За последние 7 дней: 1

За последние 30 дней: 1

За всё время: 203