Перейти к основному содержанию
Присоединяйся к сообществу ремонтников - Создай аккаунт

ASUS X44H-BBR4 Fan Replacement

Выберете то, что вам нужно

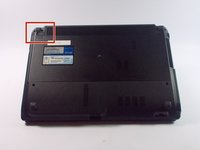
    1. ASUS X44H-BBR4 Fan Replacement, Battery: шаг 1, изображение 1 из 2 ASUS X44H-BBR4 Fan Replacement, Battery: шаг 1, изображение 2 из 2
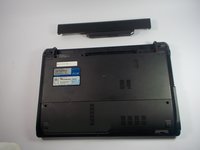
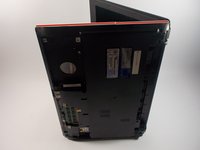
      • Flip the device over.

      Спросите у FixBot

      Добавить комментарий

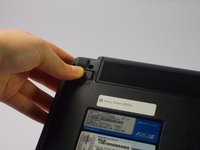
    2. ASUS X44H-BBR4 Fan Replacement: шаг 2, изображение 1 из 3 ASUS X44H-BBR4 Fan Replacement: шаг 2, изображение 2 из 3 ASUS X44H-BBR4 Fan Replacement: шаг 2, изображение 3 из 3
      • Slide the right lock button to the unlock position.

      • After it is unlocked, a red line will be visible.

      Спросите у FixBot

      Добавить комментарий

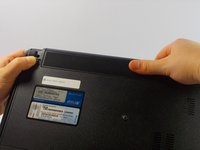
    3. ASUS X44H-BBR4 Fan Replacement: шаг 3, изображение 1 из 2 ASUS X44H-BBR4 Fan Replacement: шаг 3, изображение 2 из 2
      • Slide the left lock button into the unlock position and hold.

      Спросите у FixBot

      Добавить комментарий

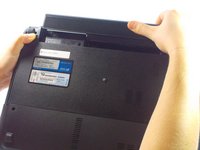
    4. ASUS X44H-BBR4 Fan Replacement: шаг 4, изображение 1 из 3 ASUS X44H-BBR4 Fan Replacement: шаг 4, изображение 2 из 3 ASUS X44H-BBR4 Fan Replacement: шаг 4, изображение 3 из 3
      • While holding the left lock button in the unlock position, push the battery from the center away from you.

      Спросите у FixBot
      Добавить комментарий

    1. ASUS X44H-BBR4 Fan Replacement, Keyboard: шаг 5, изображение 1 из 2 ASUS X44H-BBR4 Fan Replacement, Keyboard: шаг 5, изображение 2 из 2
      • Open the laptop to show the keyboard.

      Спросите у FixBot
      Добавить комментарий

    2. ASUS X44H-BBR4 Fan Replacement: шаг 6, изображение 1 из 1
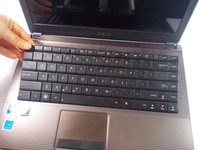
      • Look at the top row of the keyboard, you will see a space that has four latches holding the keyboard down.

      • The latches are located above the Esc key, the F5 key, between the F10 and F11 key and the Delete key.

      Спросите у FixBot
      Добавить комментарий

    3. ASUS X44H-BBR4 Fan Replacement: шаг 7, изображение 1 из 3 ASUS X44H-BBR4 Fan Replacement: шаг 7, изображение 2 из 3 ASUS X44H-BBR4 Fan Replacement: шаг 7, изображение 3 из 3
      • Don't pull too hard on the keys otherwise they may fall off.

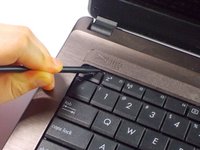
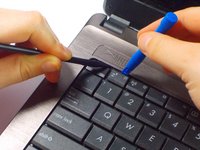
      • Push the latch away from the keyboard using the spudger point.

      • While pushing the latches use a plastic opening tool and pull up on a key near it.

      • Continue along the rest of the keyboard until it is released at all four latches.

      Спросите у FixBot

      Добавить комментарий

    4. ASUS X44H-BBR4 Fan Replacement: шаг 8, изображение 1 из 2 ASUS X44H-BBR4 Fan Replacement: шаг 8, изображение 2 из 2
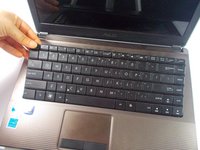
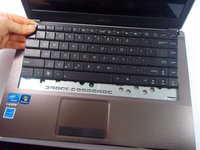
      • Push the keyboard away from the mouse track pad to unlock the bottom from the base.

      • Do not pull too hard because there is a ribbon connecting to keyboard to the motherboard.

      Спросите у FixBot

      Добавить комментарий

    5. ASUS X44H-BBR4 Fan Replacement: шаг 9, изображение 1 из 2 ASUS X44H-BBR4 Fan Replacement: шаг 9, изображение 2 из 2
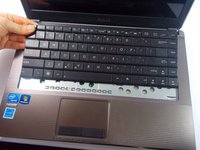
      • Flip the keyboard over to reveal the back of it and what is underneath.

      Спросите у FixBot
      Добавить комментарий

    6. ASUS X44H-BBR4 Fan Replacement: шаг 10, изображение 1 из 3 ASUS X44H-BBR4 Fan Replacement: шаг 10, изображение 2 из 3 ASUS X44H-BBR4 Fan Replacement: шаг 10, изображение 3 из 3
      • Pull each end of the black ribbon cable piece towards the mouse track pad to unlock the ribbon connector piece.

      • Gently pull out the ribbon cable from the connector piece.

      Спросите у FixBot
      Добавить комментарий

    7. ASUS X44H-BBR4 Fan Replacement: шаг 11, изображение 1 из 1
      • Remove the keyboard completely.

      Спросите у FixBot

      Добавить комментарий

    1. ASUS X44H-BBR4 Fan Replacement, Hard Drive: шаг 12, изображение 1 из 2 ASUS X44H-BBR4 Fan Replacement, Hard Drive: шаг 12, изображение 2 из 2
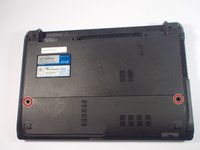
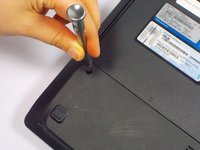
      • Remove the two 9 mm Phillips head screws with the PH0 bit indicated by the red circles in the picture.

      Спросите у FixBot

      Добавить комментарий

    2. ASUS X44H-BBR4 Fan Replacement: шаг 13, изображение 1 из 2 ASUS X44H-BBR4 Fan Replacement: шаг 13, изображение 2 из 2
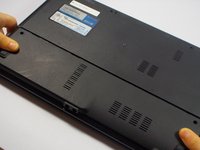
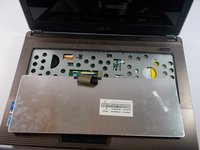
      • Once the screws are removed, slide the back panel away from the computer.

      Спросите у FixBot
      Добавить комментарий

    3. ASUS X44H-BBR4 Fan Replacement: шаг 14, изображение 1 из 1
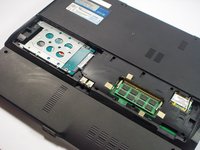
      • Remove the 9mm Phillips head screw in the left bottom corner of the hard drive with the PH0 bit.

      Спросите у FixBot
      Добавить комментарий

    4. ASUS X44H-BBR4 Fan Replacement: шаг 15, изображение 1 из 2 ASUS X44H-BBR4 Fan Replacement: шаг 15, изображение 2 из 2
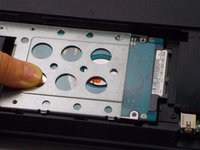
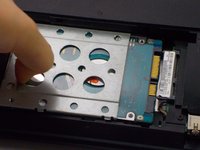
      • Slide the hard drive to the left, unlocking it from its default position.

      Спросите у FixBot

      Добавить комментарий

    5. ASUS X44H-BBR4 Fan Replacement: шаг 16, изображение 1 из 2 ASUS X44H-BBR4 Fan Replacement: шаг 16, изображение 2 из 2
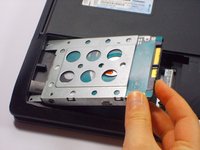
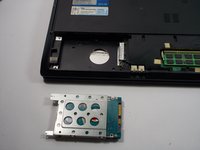
      • Pull the hard drive upwards and take it out of its position.

      Спросите у FixBot

      Добавить комментарий

    6. ASUS X44H-BBR4 Fan Replacement: шаг 17, изображение 1 из 3 ASUS X44H-BBR4 Fan Replacement: шаг 17, изображение 2 из 3 ASUS X44H-BBR4 Fan Replacement: шаг 17, изображение 3 из 3
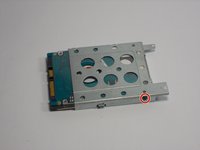
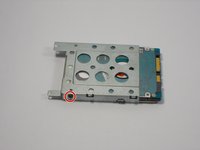
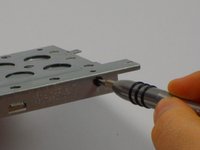
      • Remove two 3mm Phillips head screws, one located on each side of the metal casing holding the hard drive using the PH0 bit.

      Спросите у FixBot

      Добавить комментарий

    7. ASUS X44H-BBR4 Fan Replacement: шаг 18, изображение 1 из 1
      • Pull upwards on the metal casing and it will come off.
      Спросите у FixBot

      Добавить комментарий

    1. ASUS X44H-BBR4 Fan Replacement, Front Panel: шаг 19, изображение 1 из 3 ASUS X44H-BBR4 Fan Replacement, Front Panel: шаг 19, изображение 2 из 3 ASUS X44H-BBR4 Fan Replacement, Front Panel: шаг 19, изображение 3 из 3
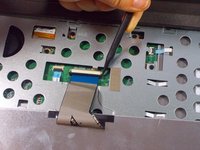
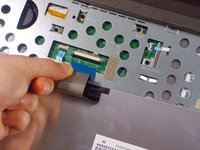
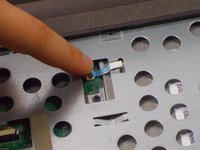
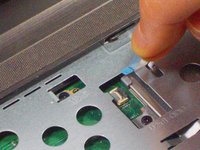
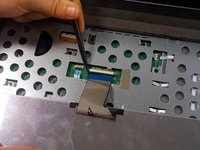
      • Lift up the black lock holding the ribbon.

      • Using the blue tab, pull out the ribbon.

      • Pull gently on the ribbon to remove the risk of damaging the ribbon.

      Спросите у FixBot

      Добавить комментарий

    2. ASUS X44H-BBR4 Fan Replacement: шаг 20, изображение 1 из 1
      • Lift up the black lock holding the ribbon.

      • Using the blue tab, pull out the ribbon.

      • Pull gently on the ribbon to remove the risk of damaging the ribbon.

      Спросите у FixBot
      Добавить комментарий

    3. ASUS X44H-BBR4 Fan Replacement: шаг 21, изображение 1 из 2 ASUS X44H-BBR4 Fan Replacement: шаг 21, изображение 2 из 2
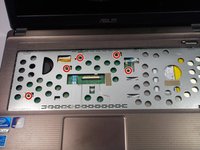
      • Remove the five 9 mm Phillips head screws with the PH0 bit.

      Спросите у FixBot
      Добавить комментарий

    4. ASUS X44H-BBR4 Fan Replacement: шаг 22, изображение 1 из 2 ASUS X44H-BBR4 Fan Replacement: шаг 22, изображение 2 из 2
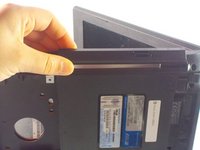
      • Flip the laptop on its side so that the red line indicated in the pictures is facing upwards.

      Спросите у FixBot

      Добавить комментарий

    5. ASUS X44H-BBR4 Fan Replacement: шаг 23, изображение 1 из 2 ASUS X44H-BBR4 Fan Replacement: шаг 23, изображение 2 из 2
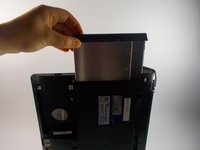
      • Pull up on the disk drive and remove.

      Спросите у FixBot

      Добавить комментарий

    6. ASUS X44H-BBR4 Fan Replacement: шаг 24, изображение 1 из 2 ASUS X44H-BBR4 Fan Replacement: шаг 24, изображение 2 из 2
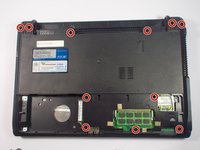
      • Close the laptop and flip it over.

      • Remove the six 12.5 mm screws Phillips head and the five 9 mm screws remaining with the PH0 bit.

      Спросите у FixBot
      Добавить комментарий

    7. ASUS X44H-BBR4 Fan Replacement: шаг 25, изображение 1 из 3 ASUS X44H-BBR4 Fan Replacement: шаг 25, изображение 2 из 3 ASUS X44H-BBR4 Fan Replacement: шаг 25, изображение 3 из 3
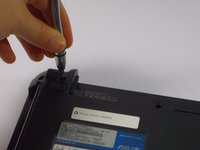
      • Flip the device back over and open the laptop.

      • Using the nylon or metal spudger, gently pry off the panel by moving the spudger along the seam.

      • You should hear clicking sounds as the front panel is being removed from the base.

      Спросите у FixBot
      Добавить комментарий

    8. ASUS X44H-BBR4 Fan Replacement: шаг 26, изображение 1 из 1
      • Remove the panel.

      • The laptop will now become heavier to the front so it will tend to fall on the back side of the screen.

      Спросите у FixBot

      Добавить комментарий

    1. ASUS X44H-BBR4 Fan Replacement, MotherBoard: шаг 27, изображение 1 из 2 ASUS X44H-BBR4 Fan Replacement, MotherBoard: шаг 27, изображение 2 из 2
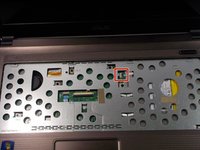
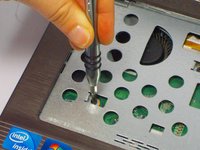
      • Remove the 5mm Phillips head screw using the PH0 bit.

      Спросите у FixBot

      Добавить комментарий

    2. ASUS X44H-BBR4 Fan Replacement: шаг 28, изображение 1 из 3 ASUS X44H-BBR4 Fan Replacement: шаг 28, изображение 2 из 3 ASUS X44H-BBR4 Fan Replacement: шаг 28, изображение 3 из 3
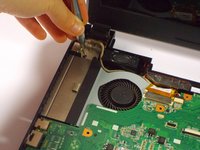
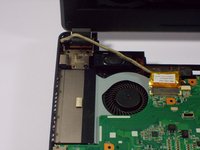
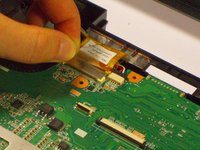
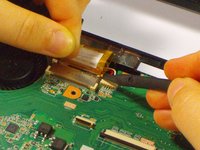
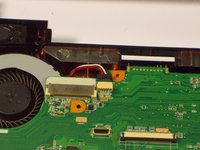
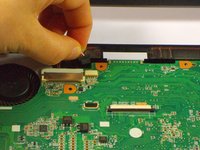
      • Pull up on the tape holding the tan cable in place.

      • While holding the tape push up on each side of the cable connector to disconnect it.

      Спросите у FixBot

      Добавить комментарий

    3. ASUS X44H-BBR4 Fan Replacement: шаг 29, изображение 1 из 1
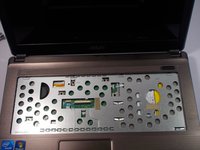
      • Gently pull out the cable connector.

      Спросите у FixBot
      Добавить комментарий

    4. ASUS X44H-BBR4 Fan Replacement: шаг 30, изображение 1 из 3 ASUS X44H-BBR4 Fan Replacement: шаг 30, изображение 2 из 3 ASUS X44H-BBR4 Fan Replacement: шаг 30, изображение 3 из 3
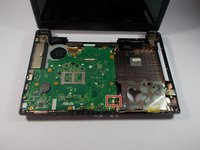
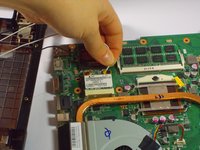
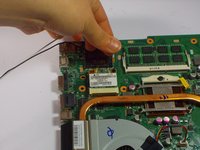
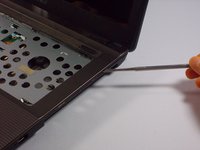
      • Gently pull out the USB connector attached to the motherboard.

      Спросите у FixBot
      Добавить комментарий

    5. ASUS X44H-BBR4 Fan Replacement: шаг 31, изображение 1 из 2 ASUS X44H-BBR4 Fan Replacement: шаг 31, изображение 2 из 2
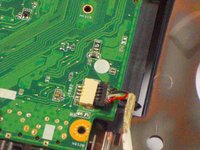
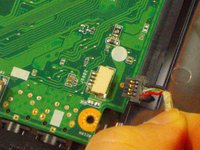
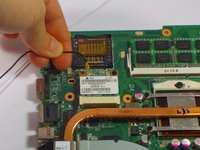
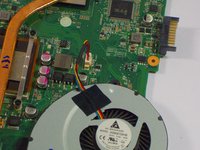
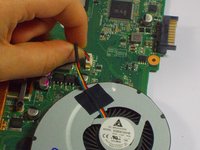
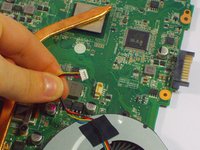
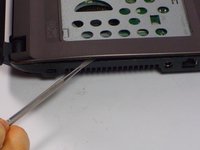
      • Remove the red and white wire connector next to the fan.

      Спросите у FixBot
      Добавить комментарий

    6. ASUS X44H-BBR4 Fan Replacement: шаг 32, изображение 1 из 1
      • Take out the motherboard

      • There are still two wires connected to the bottom of the motherboard so remove carefully.

      Спросите у FixBot

      Добавить комментарий

    7. ASUS X44H-BBR4 Fan Replacement: шаг 33, изображение 1 из 1
      • Flip the motherboard over next to the laptop base.

      Спросите у FixBot

      Добавить комментарий

    8. ASUS X44H-BBR4 Fan Replacement: шаг 34, изображение 1 из 3 ASUS X44H-BBR4 Fan Replacement: шаг 34, изображение 2 из 3 ASUS X44H-BBR4 Fan Replacement: шаг 34, изображение 3 из 3
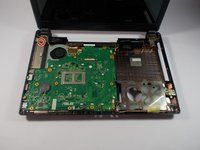
      • Remove the white and black wire.

      • The motherboard is not completely separated from the base of the computer.

      Спросите у FixBot
      Добавить комментарий

    1. ASUS X44H-BBR4 Fan Replacement, Fan: шаг 35, изображение 1 из 3 ASUS X44H-BBR4 Fan Replacement, Fan: шаг 35, изображение 2 из 3 ASUS X44H-BBR4 Fan Replacement, Fan: шаг 35, изображение 3 из 3
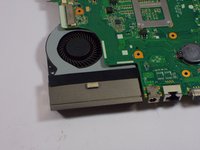
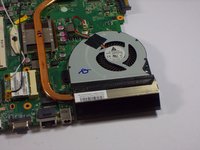
      • Remove the black piece of tape located on each side of the fan and vent, connecting the two components.

      Спросите у FixBot

      Добавить комментарий

    2. ASUS X44H-BBR4 Fan Replacement: шаг 36, изображение 1 из 3 ASUS X44H-BBR4 Fan Replacement: шаг 36, изображение 2 из 3 ASUS X44H-BBR4 Fan Replacement: шаг 36, изображение 3 из 3
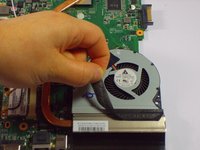
      • Pull up on the four wires (red, yellow, blue and black) connecting the fan to the motherboard.

      • Remove fan by pulling it upwards.

      Спросите у FixBot

      Добавить комментарий

Заключение

To reassemble your device, follow these instructions in reverse order.

Отменить: Я не выполнил это руководство.

Еще один человек закончил это руководство.

Devaj Ramsamooj

Участник с: 10/21/15

824 Репутация

Автор 5 руководств

Команда

UMass Dartmouth, Team 4-3, Catania Fall 2015 Участник UMass Dartmouth, Team 4-3, Catania Fall 2015

UMASSD-CATANIA-F15S4G3

4 членов

Автор 49 руководств

0 Комментарии к руководству

Добавить комментарий

Статистика просмотров:

За последние 24 часов: 0

За последние 7 дней: 8

За последние 30 дней: 26

За всё время: 954