Введение
If your battery is not holding a charge, you can use this guide to replace it. Before beginning to replace the battery in this device, there are a few precautions to consider. One of those precautions would be to ground yourself to prevent frying the internal components. Another precaution would be to label and organize your small parts and screws to avoid misplacing important components. Happy fixing!
Выберете то, что вам нужно
-
-
-
Use the plastic tool to pry between the silver bezel and the back case
-
Work the tool around the device to free the back case
 Спросите у FixBot
-
-
-
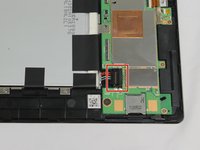
Remove the ribbon cables by lifting up the white retaining flap on the ZIF connectors, then pulling the ribbon cable away.
-
-
-
-
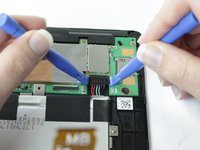
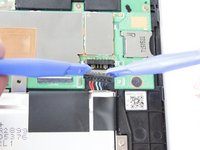
Remove the battery connector by prying it up away from the device using 2 plastic pry tools
-
-
-
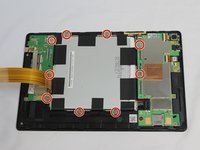
Remove all 9 of the 1.5mm #00 Philips screws
-
Gently lift the battery out of the device
-
Use an opening pick or similar tool to separate the adhesive on the bottom and top of the battery.
-
-




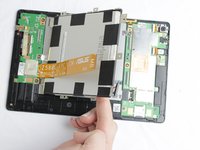
To reassemble your device, follow these instructions in reverse order. Ensure that the MicroSD card slot cover is in its closed position before re-attaching the rear cover.
Отменить: Я не выполнил это руководство.
29 человек успешно провели ремонт по этому руководству.

Команда

USF Tampa, Team 2-2, Cagle Fall 2016 Участник USF Tampa, Team 2-2, Cagle Fall 2016
USFT-CAGLE-F16S2G2
4 членов
Автор 5 руководств
20 Комментарии к руководству
Thanks for this tutorial. Any chance anybody knows the part number for the battery and a good source?
Yes, A good tutorial but part number for the battery would be useful
Doh! its in the pictures its a C11Pn9H should have spotted that.
The original battery says” Rating 3.8v 15.2 Wh” and “Capacity 4000mAh(TYP) 3984mAh(MIN)”
Clone batteries may be lower. Wish I’d bought a “factory battery”
Tutorial was perfect, much easier than I thought. Unfortunately swapping the battery did not fix my tablet, but I feel a lot more confident now to try fixing things like this first instead of just automatically throwing them away. Thanks!
