Перейти к основному содержанию
Присоединяйся к сообществу ремонтников - Создай аккаунт

Acer Aspire 3000 Hard Drive Replacement

Выберете то, что вам нужно

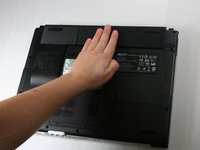
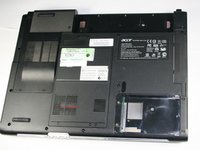
    1. Acer Aspire 3000 Hard Drive Replacement, Battery: шаг 1, изображение 1 из 1
      • Begin with the device face down.

      • Orient the laptop so that the battery is on the side opposite of you and the headphone ports are facing towards you.

      Спросите у FixBot

      Добавить комментарий

    2. Acer Aspire 3000 Hard Drive Replacement: шаг 2, изображение 1 из 2 Acer Aspire 3000 Hard Drive Replacement: шаг 2, изображение 2 из 2
      • Slide the button found below the battery to the left into the unlocked position.

      • You will know the battery is unlocked if the tab is pushed to the side where the symbol is unlocked.

      Спросите у FixBot

      Добавить комментарий

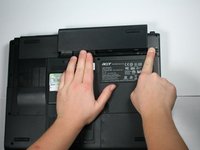
    3. Acer Aspire 3000 Hard Drive Replacement: шаг 3, изображение 1 из 2 Acer Aspire 3000 Hard Drive Replacement: шаг 3, изображение 2 из 2
      • Locate the battery and the tab to the right of it.

      • Pull the tab to the right while simultaneously pushing the battery away from you.

      • Make sure you push the battery only when tab is held in the right position in order to avoid damage to the device.

      Спросите у FixBot

      Добавить комментарий

    1. Acer Aspire 3000 Hard Drive Replacement, Hard Drive: шаг 4, изображение 1 из 1
      • Unscrew the two 4.6 mm Phillips #1 screws on the left side of the hard drive panel in the lower right corner on the back of the laptop using the phillips head j1 bit.

      Спросите у FixBot

      Добавить комментарий

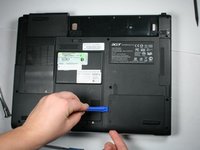
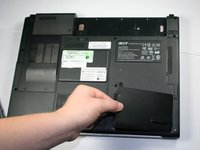
    2. Acer Aspire 3000 Hard Drive Replacement: шаг 5, изображение 1 из 3 Acer Aspire 3000 Hard Drive Replacement: шаг 5, изображение 2 из 3 Acer Aspire 3000 Hard Drive Replacement: шаг 5, изображение 3 из 3
      • Insert the plastic opening tool under left side of the hard drive cover and gently pry the cover open.

      • Pull the cover up and out to release the tabs on the right side of the cover and remove from the device.

      Спросите у FixBot

      Добавить комментарий

Заключение

To reassemble your device, follow these instructions in reverse order.

Отменить: Я не выполнил это руководство.

4 человек успешно провели ремонт по этому руководству.

Courtney Lyons

Участник с: 10/30/16

199 Репутация

1 руководство автора

Команда

Baylor, Team 4-2, Williams Fall 2016 Участник Baylor, Team 4-2, Williams Fall 2016

BU-WILLIAMS-F16S4G2

4 членов

Автор 60 руководств

0 Комментарии к руководству

Добавить комментарий

Статистика просмотров:

За последние 24 часов: 0

За последние 7 дней: 8

За последние 30 дней: 31

За всё время: 2,692