Введение
This RAM replacement guide will prove to be very useful for devices that contain a faulty RAM. Often times the RAM slows performance of the device or stops it entirely. In order to optimize the computers performance a careful RAM replacement must be executed. However, it is important to follow the steps with care because the RAM ports are fragile and vital to the device. If the ports do become damaged the device will not likely work.
Выберете то, что вам нужно
-
-
-
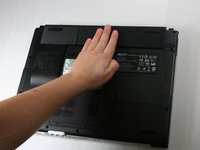
Begin with the device face down.
-
Orient the laptop so that the battery is on the side opposite of you and the headphone ports are facing towards you.
 Спросите у FixBot
-
-
-
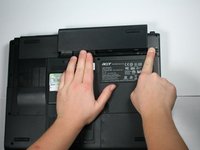
Slide the button found below the battery to the left into the unlocked position.
-
-
-
Locate the battery and the tab to the right of it.
-
Pull the tab to the right while simultaneously pushing the battery away from you.
-
-
-
-
-
Unscrew the two 4.6 mm Phillips #1 screws found at the bottom of the RAM cover using the phillips head j1 bit.
-
-
-
-
Open the RAM cover by wedging the opening tool and the metal spudger in the opening between the two screws.
-
-
-
Slide the opening tool around the sides of the cover to release the 3 tabs that hold the cover down.
-
-
-
Lift and pull the cover back towards you to detach it from the device.
-
-
-
Push the white tabs on either side away from the from the chip.
-
-




To reassemble your device, follow these instructions in reverse order.
Отменить: Я не выполнил это руководство.
2 человек успешно провели ремонт по этому руководству.

Команда

Baylor, Team 4-2, Williams Fall 2016 Участник Baylor, Team 4-2, Williams Fall 2016
BU-WILLIAMS-F16S4G2
4 членов
Автор 54 руководств
