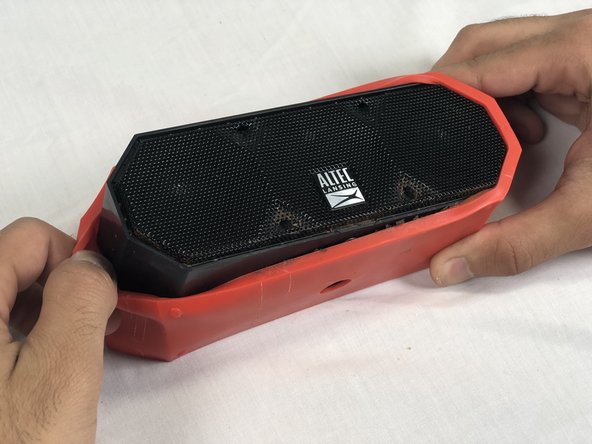
Перейти к основному содержанию

Altec Lansing Mini Lifejacket 2 Motherboard Replacement

Выберете то, что вам нужно

  1. Altec Lansing Mini Lifejacket 2 Motherboard Replacement, Back Panel: шаг 1, изображение 1 из 3 Altec Lansing Mini Lifejacket 2 Motherboard Replacement, Back Panel: шаг 1, изображение 2 из 3 Altec Lansing Mini Lifejacket 2 Motherboard Replacement, Back Panel: шаг 1, изображение 3 из 3
    • Use the spudger to remove the eight black pins from the front and back of the wire screens.

  2. Altec Lansing Mini Lifejacket 2 Motherboard Replacement: шаг 2, изображение 1 из 3 Altec Lansing Mini Lifejacket 2 Motherboard Replacement: шаг 2, изображение 2 из 3 Altec Lansing Mini Lifejacket 2 Motherboard Replacement: шаг 2, изображение 3 из 3
    • Detach the eight secondary pins from the front and back of the wire mesh plates with a spudger.

    • Removing the secondary pins from the rubber casing is optional.

  3. Altec Lansing Mini Lifejacket 2 Motherboard Replacement: шаг 3, изображение 1 из 2 Altec Lansing Mini Lifejacket 2 Motherboard Replacement: шаг 3, изображение 2 из 2
    • Remove both black and orange layers from the speaker body.

  4. Altec Lansing Mini Lifejacket 2 Motherboard Replacement: шаг 4, изображение 1 из 3 Altec Lansing Mini Lifejacket 2 Motherboard Replacement: шаг 4, изображение 2 из 3 Altec Lansing Mini Lifejacket 2 Motherboard Replacement: шаг 4, изображение 3 из 3
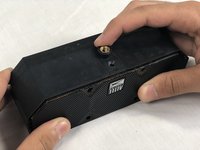
    • Remove the single 7.8mm Phillips #2 screw from the mounting plate located under the device.

    • Slide the mounting plate out to remove it.

  5. Altec Lansing Mini Lifejacket 2 Motherboard Replacement: шаг 5, изображение 1 из 2 Altec Lansing Mini Lifejacket 2 Motherboard Replacement: шаг 5, изображение 2 из 2
    • Pry off the wire mesh on both sides using a metal spudger.

    • Be gentle to avoid bending the mesh.

  6. Altec Lansing Mini Lifejacket 2 Motherboard Replacement: шаг 6, изображение 1 из 2 Altec Lansing Mini Lifejacket 2 Motherboard Replacement: шаг 6, изображение 2 из 2
    • Using tweezers, remove the four rubber stoppers in each corner of the rear panel.

  7. Altec Lansing Mini Lifejacket 2 Motherboard Replacement: шаг 7, изображение 1 из 1
    • Remove the four 13.7mm Phillips #1 screws located underneath the rubber stoppers.

  8. Altec Lansing Mini Lifejacket 2 Motherboard Replacement: шаг 8, изображение 1 из 1
    • Pull the case apart to access the interior components.

  9. Altec Lansing Mini Lifejacket 2 Motherboard Replacement: шаг 9, изображение 1 из 3 Altec Lansing Mini Lifejacket 2 Motherboard Replacement: шаг 9, изображение 2 из 3 Altec Lansing Mini Lifejacket 2 Motherboard Replacement: шаг 9, изображение 3 из 3
    • To remove the back panel, gently pull out its wire harness.

  10. Altec Lansing Mini Lifejacket 2 Motherboard Replacement, Battery: шаг 10, изображение 1 из 3 Altec Lansing Mini Lifejacket 2 Motherboard Replacement, Battery: шаг 10, изображение 2 из 3 Altec Lansing Mini Lifejacket 2 Motherboard Replacement, Battery: шаг 10, изображение 3 из 3
    • Disconnect the battery from the motherboard.

    • The battery is not secured within the case and can be removed after detaching its wiring from the circuit board.

  11. Altec Lansing Mini Lifejacket 2 Motherboard Replacement, Motherboard: шаг 11, изображение 1 из 3 Altec Lansing Mini Lifejacket 2 Motherboard Replacement, Motherboard: шаг 11, изображение 2 из 3 Altec Lansing Mini Lifejacket 2 Motherboard Replacement, Motherboard: шаг 11, изображение 3 из 3
    • Unplug the remaining four wire harnesses attached to the circuit board

  12. Altec Lansing Mini Lifejacket 2 Motherboard Replacement: шаг 12, изображение 1 из 2 Altec Lansing Mini Lifejacket 2 Motherboard Replacement: шаг 12, изображение 2 из 2
    • Remove the three 9.1mm Phillips #1 screws located on the circuit board.

  13. Altec Lansing Mini Lifejacket 2 Motherboard Replacement: шаг 13, изображение 1 из 3 Altec Lansing Mini Lifejacket 2 Motherboard Replacement: шаг 13, изображение 2 из 3 Altec Lansing Mini Lifejacket 2 Motherboard Replacement: шаг 13, изображение 3 из 3
    • Remove the motherboard.

Заключение

To reassemble your device, follow these instructions in reverse order.

2 участников успешно повторили данное руководство.

Stephen Albrecht

Участник с: 02/14/18

1 029 Репутация

Автор 4 руководств

Команда

USF Tampa, Team S3-G2, Nance Spring 2018 Участник USF Tampa, Team S3-G2, Nance Spring 2018

USFT-NANCE-S18S3G2

4 членов

Автор 4 руководств

6 Комментариев

I own the IMW778-BLU-TA model. Where can I find a replacement motherboard for it??

Nick Cote - Ответить

same for me, anyone knows where can I find a replacement of the motherboard? thx

Travis - Ответить

need back panel replacement

rahul pande - Ответить

Same here! Loved the product. Can not afford to buy something else.

Mr Shopper - Ответить

I need 2 the board for charging,usb,aux cord that plugs into motherboard.

John Proffit - Ответить

Добавить комментарий

Просмотр статистики:

За последние 24часов: 3

За последние 7 дней: 10

За последние 30 дней: 24

За всё время: 5,371