Введение
The drive motor is what powers the shredding teeth via the drive gears. The motor may burn out due to age or extended use. It is found attached to the main shredder housing holding the shredding teeth and the drive gears.
Выберете то, что вам нужно
-
-
-
Remove the shredder assembly from the paper scrap bin.
 Спросите у FixBot
-
-
-
Remove the two 10mm PH1 screws holding the small black panel in place.
-
-
-
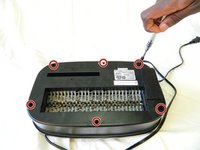
Remove the six 14mm PH1 screws holding the bottom cover in place.
-
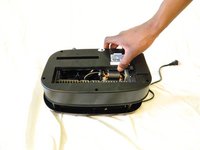
Remove the cover by lifting straight upwards.
-
-
-
-
Remove the blade/motor assembly from the top cover by lifting straight upwards. Do not disconnect any wiring just yet.
-
-
-
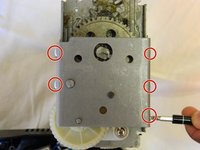
Remove the five 8mm PH2 screws from the bracket holding the gears in place.
-
-
-
Use a metal spudger to pry the bracket from the main shredder assembly.
-
-
-
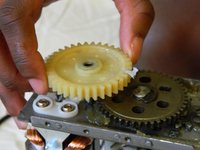
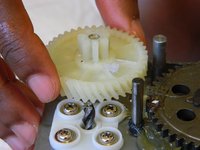
Remove the two plastic drive gears from the shredder assembly by lifting straight upwards.
-
-
-
-
-
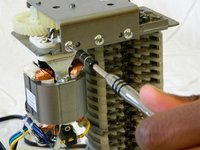
Remove the four 18mm PH2 screws holding the motor to the main shredder assembly.
-
-
-
Disconnect the motor from the motherboard by either clipping the wires, or using a soldering iron to disconnect the wires directly at the board.
-
-


To reassemble your device, follow these instructions in reverse order.
Отменить: Я не выполнил это руководство.
Еще один человек закончил это руководство.
Команда

UMass Dartmouth, Team 1-3, Miles Spring 2016 Участник UMass Dartmouth, Team 1-3, Miles Spring 2016
UMASSD-MILES-S16S1G3
2 членов
Автор 4 руководств