Перейти к основному содержанию
Присоединяйся к сообществу ремонтников - Создай аккаунт

Apple IIc IC Chips Replacement

Выберете то, что вам нужно

  1. Apple IIc IC Chips Replacement, Disassembling Apple IIc Cover: шаг 1, изображение 1 из 2 Apple IIc IC Chips Replacement, Disassembling Apple IIc Cover: шаг 1, изображение 2 из 2
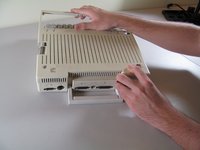
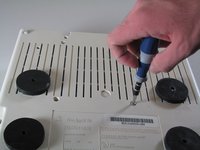
    • Remove the six 19 mm long screws with a #2 Phillips head screwdriver.

    Спросите у FixBot
  2. Apple IIc IC Chips Replacement: шаг 2, изображение 1 из 2 Apple IIc IC Chips Replacement: шаг 2, изображение 2 из 2
    • Release the catch by pushing it in using a plastic opening tool.

    • The catch is off-center, but in line with the middle of the speaker underneath.

    Спросите у FixBot
  3. Apple IIc IC Chips Replacement: шаг 3, изображение 1 из 2 Apple IIc IC Chips Replacement: шаг 3, изображение 2 из 2
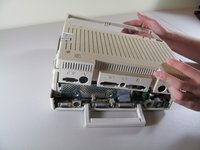
    • Slide the case toward the ports on the back, then grip under the catch and pull up while moving toward the ports to remove.

    Спросите у FixBot
  4. Apple IIc IC Chips Replacement: шаг 4, изображение 1 из 2 Apple IIc IC Chips Replacement: шаг 4, изображение 2 из 2
    • Lift the handle straight up to remove.

    Спросите у FixBot
  5. Apple IIc IC Chips Replacement, Keyboard: шаг 5, изображение 1 из 2 Apple IIc IC Chips Replacement, Keyboard: шаг 5, изображение 2 из 2
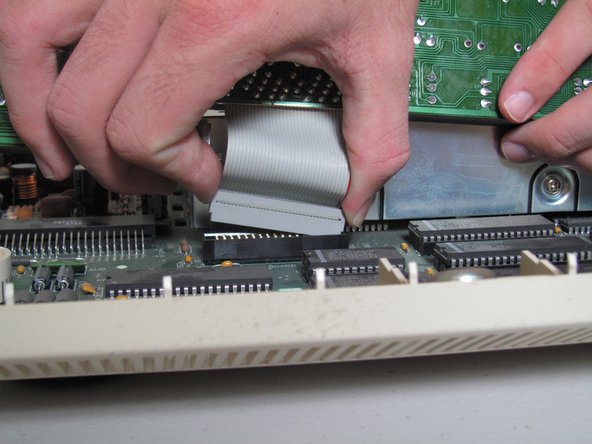
    • Tilt the keyboard up while detaching the ribbon connection by pulling it straight up. You may have to wiggle the connector sideways to loosen it.

    • Be careful not to force the ribbon while pulling it out to avoid tearing. Do not try to pull the ribbon out by pulling the keyboard as it may cause tearing.

    Спросите у FixBot
  6. Apple IIc IC Chips Replacement, Floppy Drive: шаг 6, изображение 1 из 2 Apple IIc IC Chips Replacement, Floppy Drive: шаг 6, изображение 2 из 2
    • Carefully place device upside down to remove the four centered 21.1 mm screws that secure the floppy drive.

    Спросите у FixBot
  7. Apple IIc IC Chips Replacement: шаг 7, изображение 1 из 3 Apple IIc IC Chips Replacement: шаг 7, изображение 2 из 3 Apple IIc IC Chips Replacement: шаг 7, изображение 3 из 3
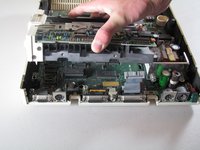
    • Carefully detach ribbon connector from floppy disk drive by pulling it out horizontally.

    Спросите у FixBot
  8. Apple IIc IC Chips Replacement: шаг 8, изображение 1 из 2 Apple IIc IC Chips Replacement: шаг 8, изображение 2 из 2
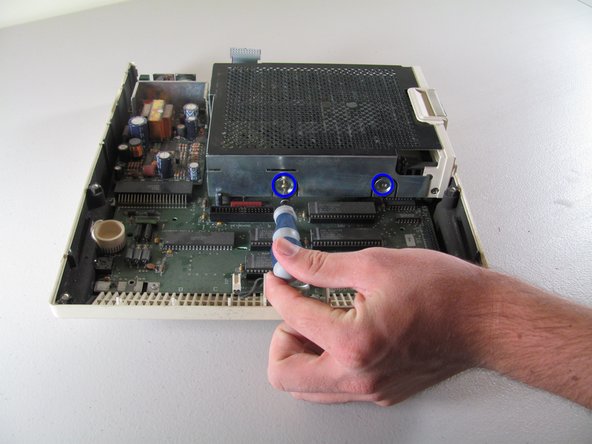
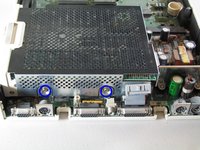
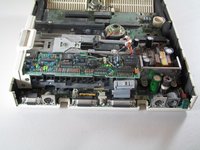
    • Unscrew the four 8.5 mm screws that attach the floppy drive cage. Two screws are located on the front and back of the cage.

    Спросите у FixBot
  9. Apple IIc IC Chips Replacement: шаг 9, изображение 1 из 2 Apple IIc IC Chips Replacement: шаг 9, изображение 2 из 2
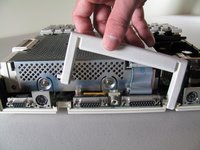
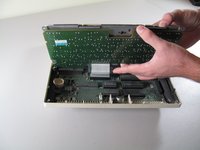
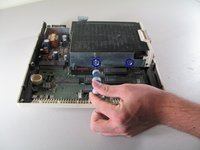
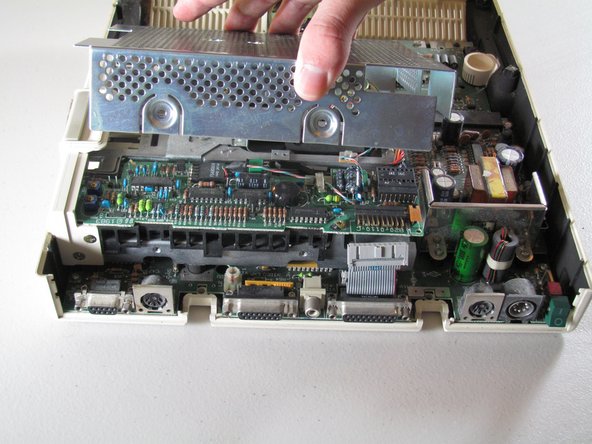
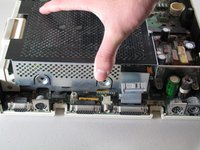
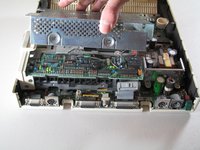
    • Carefully lift the floppy drive cage straight up to remove it.

    Спросите у FixBot
  10. Apple IIc IC Chips Replacement: шаг 10, изображение 1 из 2 Apple IIc IC Chips Replacement: шаг 10, изображение 2 из 2
    • Lift the floppy drive straight up to remove.

    Спросите у FixBot
  11. Apple IIc IC Chips Replacement, IC Chips: шаг 11, изображение 1 из 3 Apple IIc IC Chips Replacement, IC Chips: шаг 11, изображение 2 из 3 Apple IIc IC Chips Replacement, IC Chips: шаг 11, изображение 3 из 3
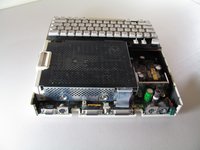
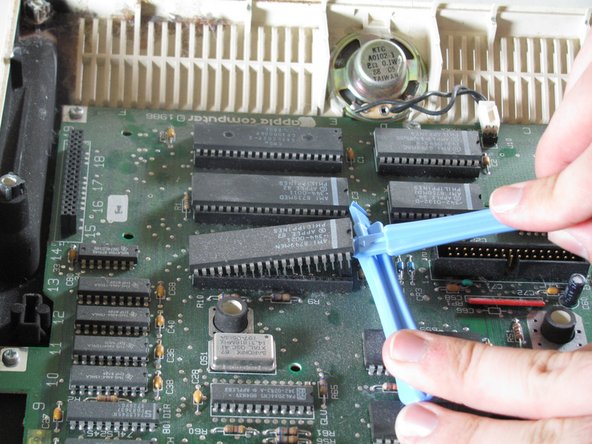
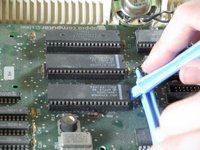
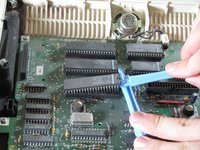
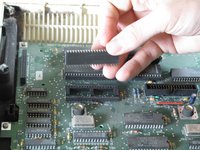
    • Use the plastic opening tools to carefully lever the IC chips out of the holder. Gently lever one end and then the other to lift it out of the chip holder.

    • Do not force IC chips out! Pins are very fragile and can easily bend or break.

    Спросите у FixBot
Заключение

To reassemble your device, follow these instructions in reverse order.

9 человек успешно провели ремонт по этому руководству.

Josiah

Участник с: 10/06/11

658 Репутация

Автор 3 руководств

Команда

Cal Poly, Team 21-23, Maness Fall 2011 Участник Cal Poly, Team 21-23, Maness Fall 2011

CPSU-MANESS-F11S21G23

4 членов

Автор 14 руководств

1 Комментарий к руководству

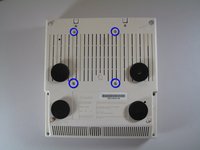
What are the 4 round black things shown in the photos in Step 1 and Step 6? (No explanation is given.)

James Wages - Ответить Поделиться

Добавить комментарий

Статистика просмотров:

За последние 24 часов: 0

За последние 7 дней: 16

За последние 30 дней: 72

За всё время: 7,488