Введение
This guide will show you how to properly get into your Apple TV 4K's remote and get access to the logic board for replacement.
Выберете то, что вам нужно
-
-
-
Heat iOpener according to manufacturer's instructions.
-
Place over the face of the remote to soften the adhesive under the glass.
 Спросите у FixBot
-
-
-
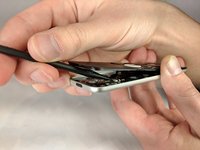
Using a spudger, gently lift the face of the remote. Starting from the bottom and working your way to the top.
-
-
-
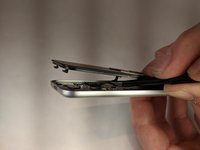
Push front face forward to disengage plastic clips at the top of the remote.
-
-
-
Инструмент, используемый на этом этапе:Tweezers$4.99
-
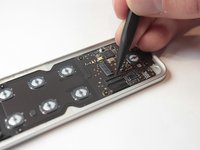
Unlatch the connector that binds the touch screen and logic board.
-
Afterwards, use tweezers to detach the connector that binds the touch screen to the logic board.
-
-
-
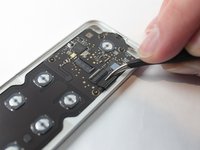
Lift the latch holding back the connector to the battery.
-
Use tweezers to disconnect the battery connector.
-
-
-
Remove the following screws using a T3 Torx screwdriver:
-
Eight 2mm screws
-
-
-
Using a plastic spudger, gently remove the logic board from the case of the remote.
-
-






To reassemble your device, follow these instructions in reverse order.
Отменить: Я не выполнил это руководство.
4 человек успешно провели ремонт по этому руководству.

Команда

UW Stout, Team S6-G3, Ogden Fall 2018 Участник UW Stout, Team S6-G3, Ogden Fall 2018
UWSTOUT-OGDEN-F18S6G3
4 членов
Автор 20 руководств
2 Комментарии к руководству
Have you ever successfully reconnected the ribbon cable after disassembly? It seems nearly impossible to do by hand…
I can’t find replacement adhesive that fits. How are people getting this thing to stick back together when you’re done??
