Перейти к основному содержанию

Apple Watch Ultra 2 Battery Replacement

Выберете то, что вам нужно

  1. Apple Watch Ultra 2 Battery Replacement, Power down your watch: шаг 1, изображение 1 из 2 Apple Watch Ultra 2 Battery Replacement, Power down your watch: шаг 1, изображение 2 из 2
    • Drain your watch battery below 25% before starting this repair. A charged battery may catch fire if damaged.

    • Take your watch off the charger and power it down.

    • If your touchscreen is broken and you can't power off the watch, use this alternate method to power it down.

  2. Apple Watch Ultra 2 Battery Replacement, Safety details: шаг 2, изображение 1 из 3 Apple Watch Ultra 2 Battery Replacement, Safety details: шаг 2, изображение 2 из 3 Apple Watch Ultra 2 Battery Replacement, Safety details: шаг 2, изображение 3 из 3
    Инструмент, используемый на этом этапе:
    Safety Glasses
    $3.19
    Купить
    • Because the gap between the screen assembly and frame is so small, a thin metal tool is needed to pry the screen up. Read the following warnings before you start disassembly:

    • Protect your fingers by keeping them completely clear of the front end of your tool. You can protect your free hand with a heavy glove, such as a leather shop glove or gardening glove.

    • Be careful not to apply too much pressure, as this might cause the iFlex to slip and cut you, or damage the watch.

    • Wear eye protection. The glass may break, sending pieces flying.

    • Attach or remove the watch bands as needed to provide more control as you make repairs.

  3. Apple Watch Ultra 2 Battery Replacement, Soften the screen adhesive: шаг 3, изображение 1 из 1
    • Heat an iOpener and apply it to the screen for two minutes to loosen the adhesive underneath.

    • You can also use a hair dryer, heat gun, or hot plate, but be careful not to overheat the watch—the screen and internal battery are both susceptible to heat damage.

  4. Apple Watch Ultra 2 Battery Replacement, Insert the iFlex: шаг 4, изображение 1 из 3 Apple Watch Ultra 2 Battery Replacement, Insert the iFlex: шаг 4, изображение 2 из 3 Apple Watch Ultra 2 Battery Replacement, Insert the iFlex: шаг 4, изображение 3 из 3
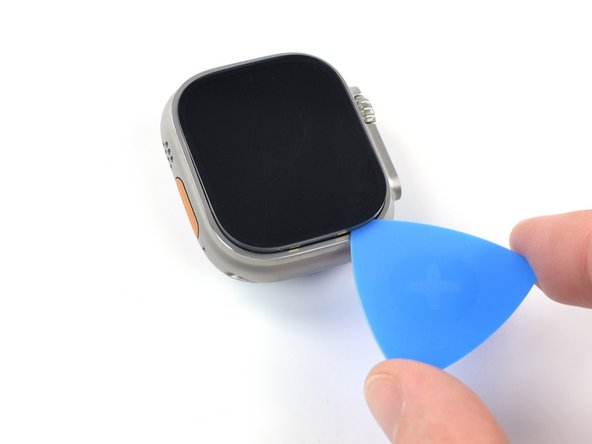
    • Place the tip of an iFlex along the edge opposite the Digital Crown and position it in the seam between the screen and the frame.

    • Press the iFlex firmly straight down into the gap.

    • The gap between the screen and the frame is very small, and it makes inserting the iFlex difficult. Don't force the iFlex in, or you risk damaging the screen. If you're having trouble, apply more heat and try again.

  5. Apple Watch Ultra 2 Battery Replacement, Pry up the screen: шаг 5, изображение 1 из 2 Apple Watch Ultra 2 Battery Replacement, Pry up the screen: шаг 5, изображение 2 из 2
    • Use the iFlex to pry up the screen.

    • The adhesive requires time and constant force to loosen—it probably won't loosen from the initial pry. Reheat the screen and keep applying constant force until the adhesive loosens.

  6. Apple Watch Ultra 2 Battery Replacement, Insert an opening pick: шаг 6, изображение 1 из 3 Apple Watch Ultra 2 Battery Replacement, Insert an opening pick: шаг 6, изображение 2 из 3 Apple Watch Ultra 2 Battery Replacement, Insert an opening pick: шаг 6, изображение 3 из 3
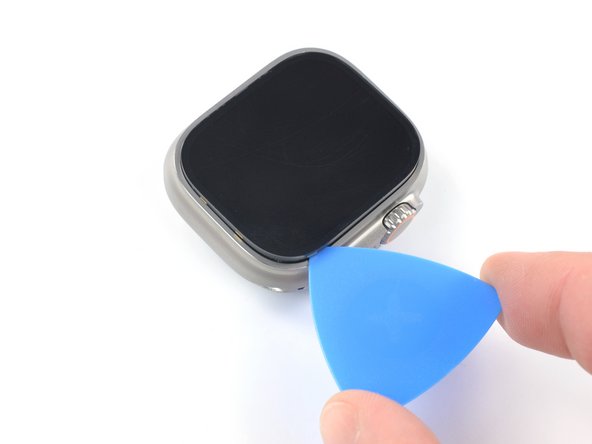
    • Insert an opening pick in the gap you created between the screen and the frame.

    • Remove the iFlex.

  7. Apple Watch Ultra 2 Battery Replacement, Slice the adhesive: шаг 7, изображение 1 из 3 Apple Watch Ultra 2 Battery Replacement, Slice the adhesive: шаг 7, изображение 2 из 3 Apple Watch Ultra 2 Battery Replacement, Slice the adhesive: шаг 7, изображение 3 из 3
    • Insert the tip of the opening pick less than 2 mm to prevent damaging the antenna pin.

    • Slide the opening pick around the top left corner and along the top edge of the watch to slice the screen adhesive.

  8. Apple Watch Ultra 2 Battery Replacement: шаг 8, изображение 1 из 2 Apple Watch Ultra 2 Battery Replacement: шаг 8, изображение 2 из 2
    • Insert the tip of the opening pick less than 2 mm to prevent damaging the antenna pin.

    • Slide the opening pick around the top right corner and stop just before the Digital Crown.

  9. Apple Watch Ultra 2 Battery Replacement: шаг 9, изображение 1 из 2 Apple Watch Ultra 2 Battery Replacement: шаг 9, изображение 2 из 2
    • Insert an opening pick into the seam at the top left corner of the watch.

    • Slide the pick along the Action button edge to slice the adhesive.

  10. Apple Watch Ultra 2 Battery Replacement: шаг 10, изображение 1 из 2 Apple Watch Ultra 2 Battery Replacement: шаг 10, изображение 2 из 2
    • Slide the opening pick around the bottom left corner and along the bottom edge of the watch to slice the screen adhesive.

  11. Apple Watch Ultra 2 Battery Replacement: шаг 11, изображение 1 из 2 Apple Watch Ultra 2 Battery Replacement: шаг 11, изображение 2 из 2
    • Slide the opening pick around the bottom right corner and stop before you reach the side button.

  12. Apple Watch Ultra 2 Battery Replacement, Lift the screen: шаг 12, изображение 1 из 2 Apple Watch Ultra 2 Battery Replacement, Lift the screen: шаг 12, изображение 2 из 2
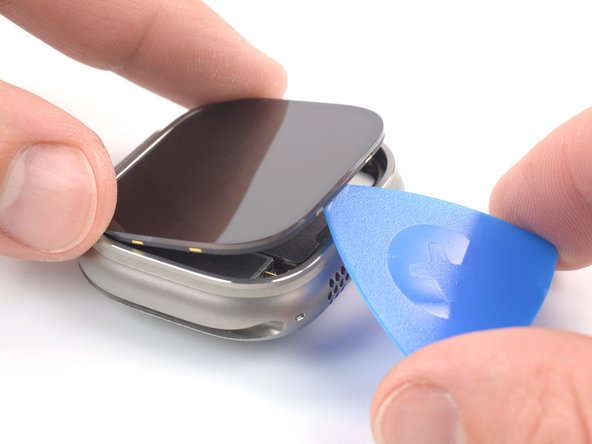
    • Insert the opening pick between the screen and frame at the opposite edge of the Digital Crown.

    • Pry up the screen until you can get a good grip with your fingers.

    • Don't try to remove the screen all the way yet. It's still connected to the watch body.

  13. Apple Watch Ultra 2 Battery Replacement, Swing open the screen: шаг 13, изображение 1 из 3 Apple Watch Ultra 2 Battery Replacement, Swing open the screen: шаг 13, изображение 2 из 3 Apple Watch Ultra 2 Battery Replacement, Swing open the screen: шаг 13, изображение 3 из 3
    • Be careful not to strain the screen cable when you swing open the screen.

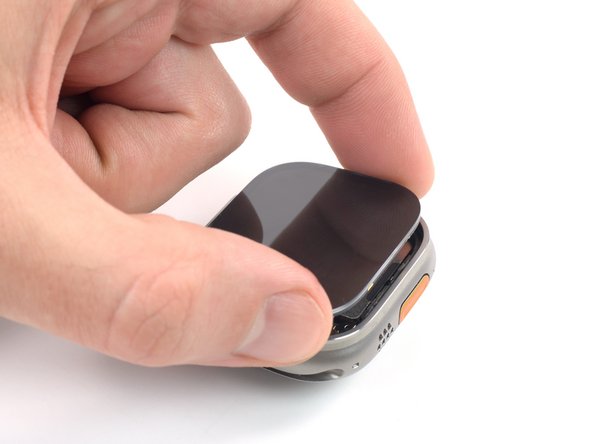
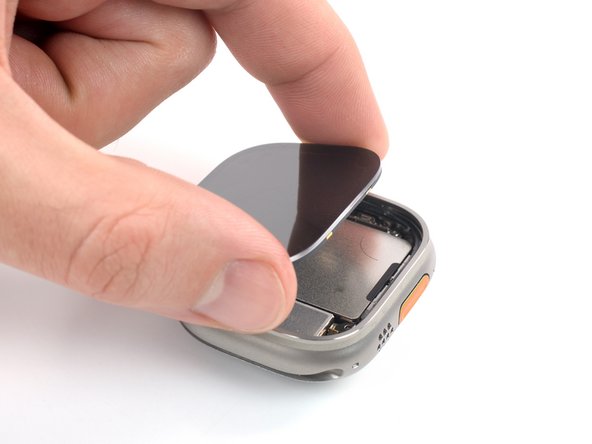
    • Lift the screen up and carefully pull it towards the Digital Crown.

    • Swing the screen open to an upward position.

  14. Apple Watch Ultra 2 Battery Replacement, Remove the two connector bracket screws: шаг 14, изображение 1 из 1
    • Use a Y000 driver to remove the two 2.3 mm‑long screws securing the metal connector bracket at the bottom edge of the watch.

  15. Apple Watch Ultra 2 Battery Replacement, Remove the bottom connector bracket: шаг 15, изображение 1 из 2 Apple Watch Ultra 2 Battery Replacement, Remove the bottom connector bracket: шаг 15, изображение 2 из 2
    Инструмент, используемый на этом этапе:
    Tweezers
    $4.99
    Купить
    • Use a pair of tweezers to remove the bottom connector bracket.

  16. Apple Watch Ultra 2 Battery Replacement, Disconnect the battery: шаг 16, изображение 1 из 2 Apple Watch Ultra 2 Battery Replacement, Disconnect the battery: шаг 16, изображение 2 из 2
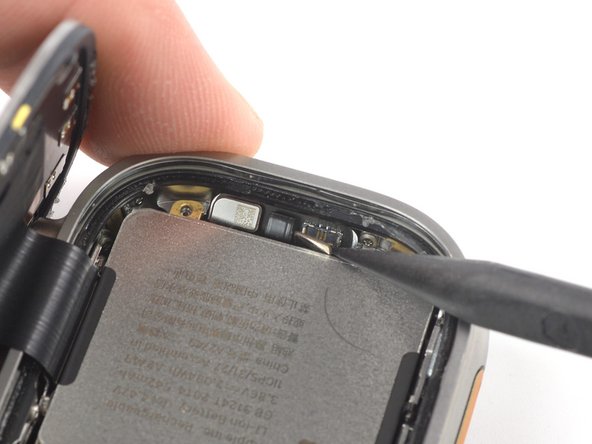
    • Use the point of a spudger to pry up the battery connector towards the battery.

    • During reassembly, this is a good point to power on your device and test all functions before sealing it up. Be sure to power your watch back down completely before you continue working.

  17. Apple Watch Ultra 2 Battery Replacement, Remove the upper battery screws: шаг 17, изображение 1 из 2 Apple Watch Ultra 2 Battery Replacement, Remove the upper battery screws: шаг 17, изображение 2 из 2
    • Use a Y000 driver to remove the 2.9 mm‑long screw securing the battery.

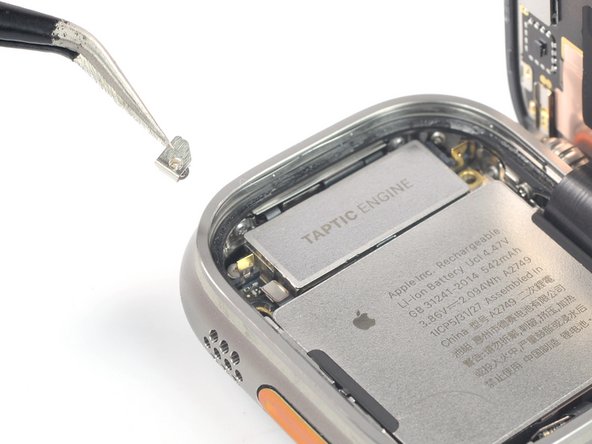
    • Use a Y000 driver to unscrew the 2.1 mm‑long screw that's sandwiched between the metal bracket.

  18. Apple Watch Ultra 2 Battery Replacement, Remove the metal bracket including the screw: шаг 18, изображение 1 из 2 Apple Watch Ultra 2 Battery Replacement, Remove the metal bracket including the screw: шаг 18, изображение 2 из 2
    • Use a pair of tweezers to remove the bracket with the screw sandwiched between it.

    • Although the screw sits nicely in the bracket, it’s not captive and can fall out.

  19. Apple Watch Ultra 2 Battery Replacement, Remove the battery: шаг 19, изображение 1 из 3 Apple Watch Ultra 2 Battery Replacement, Remove the battery: шаг 19, изображение 2 из 3 Apple Watch Ultra 2 Battery Replacement, Remove the battery: шаг 19, изображение 3 из 3
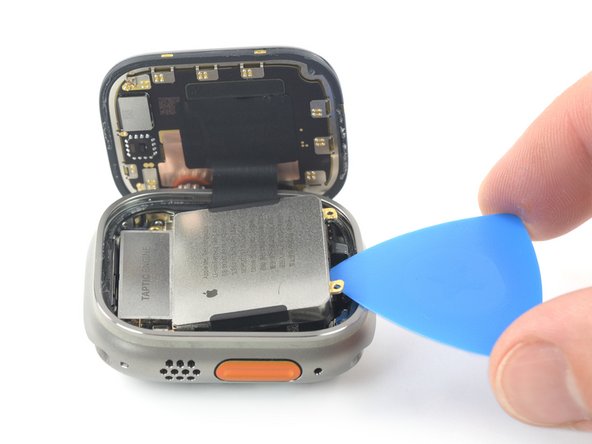
    • Use an opening pick to lift up the battery.

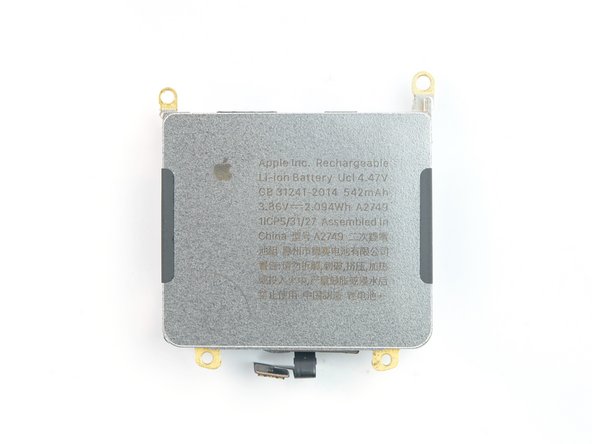
    • Remove the battery from the case.

    • Don't reinstall a damaged or deformed battery, as doing so is a potential safety hazard.

Заключение

To reassemble your device, follow these instructions in reverse order.

For optimal performance, after completing this guide, calibrate your newly installed battery.

Take your e-waste to an R2 or e-Stewards certified recycler.

Repair didn’t go as planned? Try some basic troubleshooting, or ask our Answers community for help.

Arthur Shi

Участник с: 01/03/18

254 082 Репутация

Автор 529 руководств

Команда

iFixit Участник iFixit

Staff

136 членов

Автор 17 291 руководств

0 Комментариев

Добавить комментарий

Просмотр статистики:

За последние 24часов: 11

За последние 7 дней: 53

За последние 30 дней: 298

За всё время: 1,563