Введение
A broken or malfunctioning keyboard can render your computer unusable. Luckily, replacing the keyboard of the A53U-ES21 is rather simple and can save you the expense of having to replace the entire computer.
Выберете то, что вам нужно
-
-
Flip the laptop upside down so that the battery is facing you.
 Спросите у FixBot
-
-
-
Move the two sliders towards the outer edge of the laptop.
-
Pull the battery out with your left hand while holding the right slider.
-
-
-
-
Remove the RAM cover from the bottom of the keyboard.
-
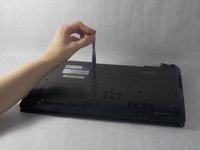
Remove the 5mm screw keeping the panel in place using a Phillips #1 screwdriver.
-
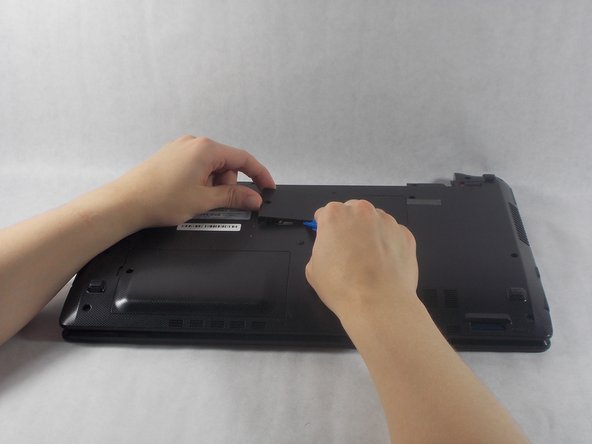
Work the pry tool along the edge to finish removal.
-
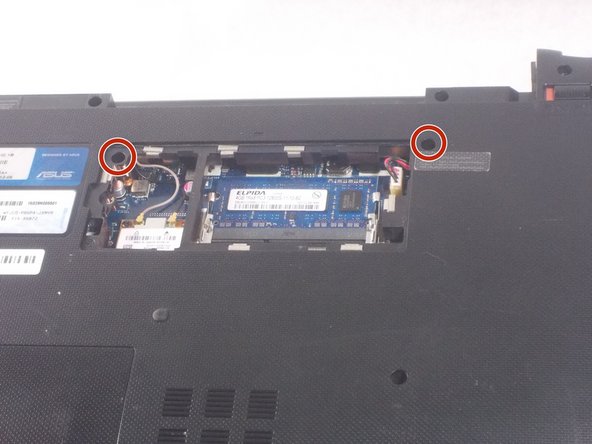
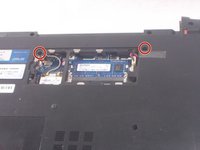
Unscrew the two 7mm screws marked with an engraved "K" using a #1 Phillips screwdriver.
-
-
-
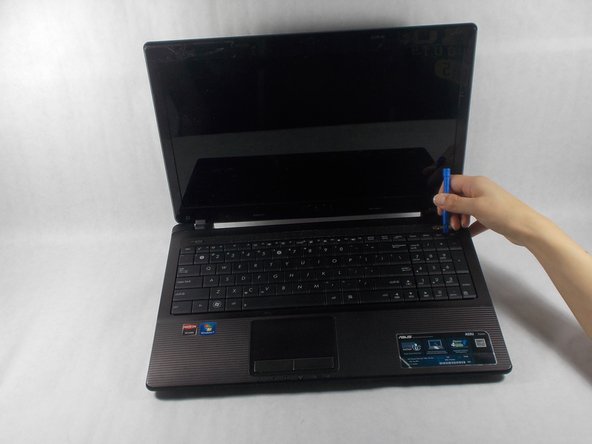
Orient the computer so the keyboard is facing toward you with the screen at the top.
-
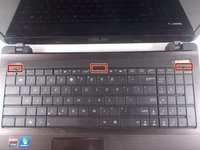
Find the three buttons to depress at top of the keyboard, set in the crack between the casing and the keyboard, highlighted here in red.
-
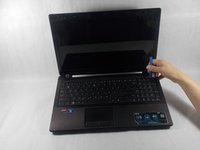
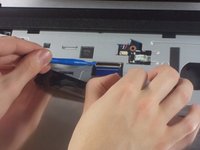
Use the pry tool to depress the buttons. The keyboard should pop out.
-
-
-
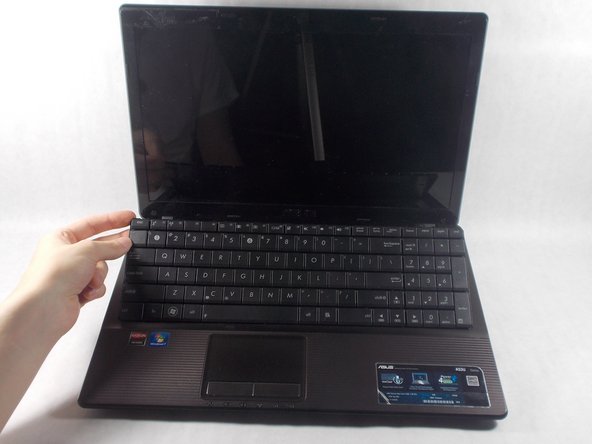
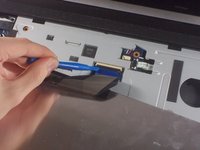
Fold the keyboard out towards you. It should still be connected by a ribbon to the rest of the computer.
-
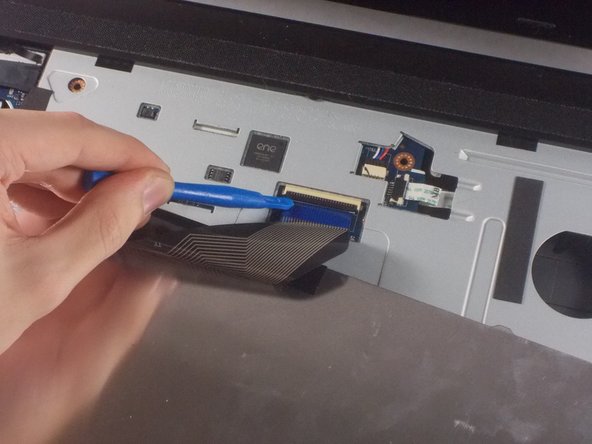
Gently use the opening tool to lift the black piece holding the ribbon down and remove the ribbon.
-


To reassemble your device, follow these instructions in reverse order.
Отменить: Я не выполнил это руководство.
2 человек успешно провели ремонт по этому руководству.
Команда

UMass Dartmouth, Team S1-G3, Simcock Fall 2018 Участник UMass Dartmouth, Team S1-G3, Simcock Fall 2018
UMASSD-SIMCOCK-F18S1G3
3 членов
Автор 7 руководств