Перейти к основному содержанию
Присоединяйся к сообществу ремонтников - Создай аккаунт

Asus K53E-BBR7 Optical Drive Replacement

Выберете то, что вам нужно

    1. Asus K53E-BBR7 Optical Drive Replacement, Optical Drive: шаг 1, изображение 1 из 3 Asus K53E-BBR7 Optical Drive Replacement, Optical Drive: шаг 1, изображение 2 из 3 Asus K53E-BBR7 Optical Drive Replacement, Optical Drive: шаг 1, изображение 3 из 3
      • Push the two locking mechanisms at the top of your laptop away from each other.

      • Pull the battery away from your laptop using your hands.

      • The battery of this laptop is missing.

      Спросите у FixBot

      Добавить комментарий

    2. Asus K53E-BBR7 Optical Drive Replacement: шаг 2, изображение 1 из 1
      • Remove the two black 7.0 mm Phillips #0 screws from the back cover of your laptop.

      Спросите у FixBot

      Добавить комментарий

    3. Asus K53E-BBR7 Optical Drive Replacement: шаг 3, изображение 1 из 1
      • Remove the back panel by sliding the panel downwards with your hands.

      Спросите у FixBot

      Добавить комментарий

    4. Asus K53E-BBR7 Optical Drive Replacement: шаг 4, изображение 1 из 1
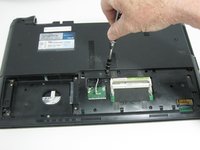
      • Use your Phillips #0 screwdriver to remove the four 7.0 mm Phillips #0 screws surrounding the hard drive.

      • Use your hands to slowly pull the hard drive out of your laptop.

      • The hard drive of this laptop is missing.

      Спросите у FixBot

      Добавить комментарий

    5. Asus K53E-BBR7 Optical Drive Replacement: шаг 5, изображение 1 из 2 Asus K53E-BBR7 Optical Drive Replacement: шаг 5, изображение 2 из 2
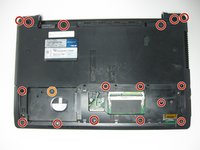
      • Using your Phillips #0 screwdriver, remove the following seventeen screws from your laptop:

      • Sixteen black 7.0 mm Phillips #0 screws

      • One silver 4.0 mm Phillips #0 screw

      Спросите у FixBot

      Добавить комментарий

    6. Asus K53E-BBR7 Optical Drive Replacement: шаг 6, изображение 1 из 3 Asus K53E-BBR7 Optical Drive Replacement: шаг 6, изображение 2 из 3 Asus K53E-BBR7 Optical Drive Replacement: шаг 6, изображение 3 из 3
      • Flip the laptop over and open the lid to reveal the keyboard.

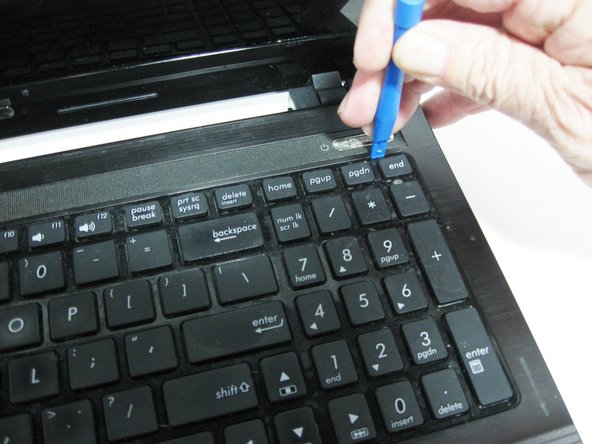
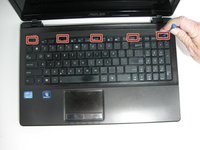
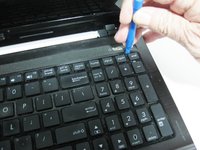
      • Insert the blue prying tool into each of the five tabs located at the top of the keyboard, pulling upwards on the keyboard to separate it from the palm rest.

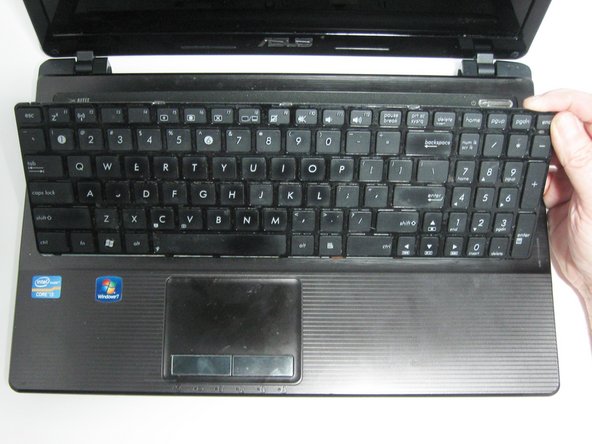
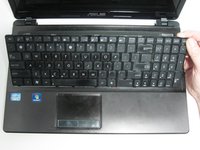
      • Once the top of the keyboard has been separated from the device, slowly begin pulling the keyboard away from the laptop using your hands.

      • A silver ribbon cable is connected to the keyboard and the palm rest of the laptop. Removing the keyboard quickly may tear the silver ribbon cable, causing harm to your device.

      Спросите у FixBot

      Добавить комментарий

    7. Asus K53E-BBR7 Optical Drive Replacement: шаг 7, изображение 1 из 1
      • Using your fingers, gently disconnect the silver ribbon cable from the laptop by pulling the cable out of the slot and to the right.

      • When separating the ribbon cable from the laptop, be gentle. Improperly removing the ribbon cable from the device can damage the laptop.

      Спросите у FixBot

      Добавить комментарий

    8. Asus K53E-BBR7 Optical Drive Replacement: шаг 8, изображение 1 из 2 Asus K53E-BBR7 Optical Drive Replacement: шаг 8, изображение 2 из 2
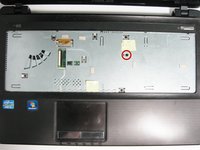
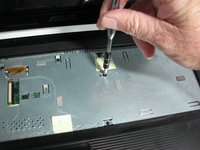
      • Remove the single silver 6.0 mm Phillips #0 screw that connects the optical drive to the palm rest.

      Спросите у FixBot

      Добавить комментарий

    9. Asus K53E-BBR7 Optical Drive Replacement: шаг 9, изображение 1 из 2 Asus K53E-BBR7 Optical Drive Replacement: шаг 9, изображение 2 из 2
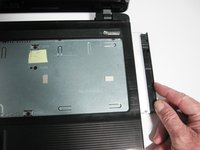
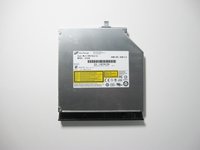
      • Remove the optical drive from the laptop by pulling it to the right with your hands.

      Спросите у FixBot

      Добавить комментарий

Заключение

To reassemble your device, follow these instructions in reverse order.

Отменить: Я не выполнил это руководство.

2 человек успешно провели ремонт по этому руководству.

Christina Nelson

Участник с: 10/18/16

289 Репутация

1 руководство автора

Команда

UW Tacoma, Team 1-3, Rose Fall 2016 Участник UW Tacoma, Team 1-3, Rose Fall 2016

UWT-ROSE-F16S1G3

4 членов

Автор 34 руководств

1 Комментарий к руководству

Most of these steps are unnecessary to get to the dvd-drive. The keyboard clicks loose without removing these screws too, so only steps 7, 8 and 9 are needed.

Nick - Ответить Поделиться

Добавить комментарий

Статистика просмотров:

За последние 24 часов: 0

За последние 7 дней: 8

За последние 30 дней: 47

За всё время: 3,167