Введение
The battery is located inside the tablet part of the device. The plastic backing must be removed before the battery can be accessed.
Выберете то, что вам нужно
-
-
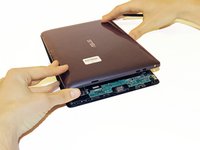
Separate the tablet from the base by pressing the large silver button below the tablet. The silver button is located at the base of the tablet.
-
Remove the tablet by lifting up.
 Спросите у FixBot
-
-
-
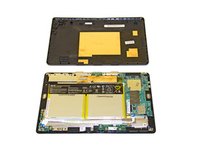
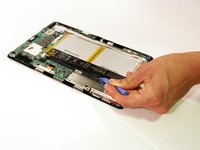
Insert the opening tool into the seam of the tablet casing and gently pry upwards.
-
With a little force, you will feel the clips release.
-
-
-
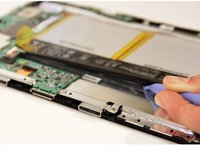
Slide the tool along all four edges of the tablet, making sure that all the clips are released.
-
-
-
-
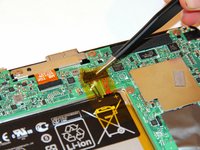
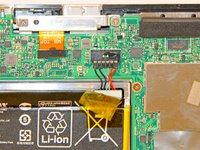
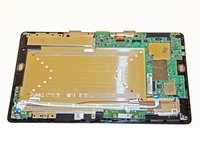
Gently pull back the yellow transparent plastic covering on top of the battery connection port.
-
-
-
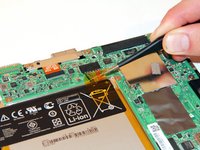
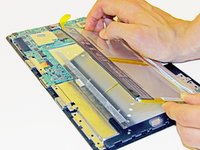
Rotate the device so the top of the screen is facing you. Place the plastic opening tool underneath the battery and gently pry upwards to lift the battery out.
-
-
-
Remove the battery by slowly peeling the battery away from the connected side.
-
The adhesive on the back will pull away from the battery.
-


To reassemble your device, follow these instructions in reverse order.
Отменить: Я не выполнил это руководство.
70 человек успешно провели ремонт по этому руководству.
Команда

Cal Poly, Team 13-31, Maness Spring 2014 Участник Cal Poly, Team 13-31, Maness Spring 2014
CPSU-MANESS-S14S13G31
3 членов
Автор 8 руководств
22 Комментарии к руководству
So I switched out my screen for it and its not turning on and I checked it everything was correctly place, but my Asus transformer was dead before hand so I tried charging it, and it wasn't charging, so I checked it and it seems the battery wire harness is loose enough to come off, is it possible to fix that?
Hi christian! How did you solve this problem? That happened to me too...
what is the battery part # for t100 and can you purchase it?
thank you
Part number is C12N1320. They are available from a variety of sources.
Thanks for detailed guide.
I could not get the transformer tablet to power up no matter which buttons I held for how long or in what sequence. Unplugging the battery internally and replugging fixed a hung device.