Перейти к основному содержанию
Присоединяйся к сообществу ремонтников - Создай аккаунт

Asus X751L Battery Replacement

Выберете то, что вам нужно

    1. Asus X751L Battery Replacement, Keyboard: шаг 1, изображение 1 из 1
      • With the screen closed, place your laptop upside-down with the front facing you.

      • Remove the six 14.6mm Phillips #00 screws.

      • Remove the four 6.6mm Phillips #00 screws.

      Спросите у FixBot

      Добавить комментарий

    2. Asus X751L Battery Replacement: шаг 2, изображение 1 из 1
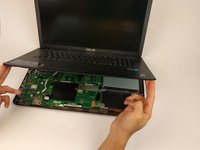
      • Flip the laptop over and open the lid.

      • Pry around the edges of the laptop base using the plastic opening tool.

      • Prying too hard can break the plastic clips.

      Спросите у FixBot

      Добавить комментарий

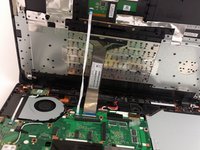
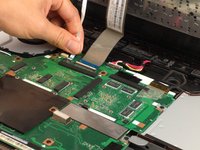
    3. Asus X751L Battery Replacement: шаг 3, изображение 1 из 3 Asus X751L Battery Replacement: шаг 3, изображение 2 из 3 Asus X751L Battery Replacement: шаг 3, изображение 3 из 3
      • Carefully lift the keyboard up.

      • Be very careful when lifting the keyboard up. Two zero insertion force (ZIF) cables are between the keyboard assembly and the motherboard. Do not lift the assembly too high.

      • Disconnect the two ZIF connectors from the motherboard using your fingernail to lift the cream-colored tab.

      Спросите у FixBot

      Добавить комментарий

    1. Asus X751L Battery Replacement, Battery: шаг 4, изображение 1 из 1
      • Remove the two 6.6mm Phillips #00 screws holding the battery in place.

      Спросите у FixBot

      Добавить комментарий

    2. Asus X751L Battery Replacement: шаг 5, изображение 1 из 2 Asus X751L Battery Replacement: шаг 5, изображение 2 из 2
      • Lift the battery from the cable-side to maneuver it around the plastic clips.

      Спросите у FixBot

      Добавить комментарий

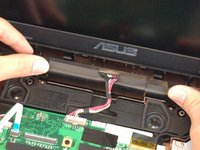
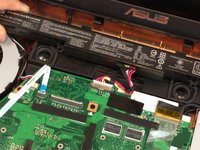
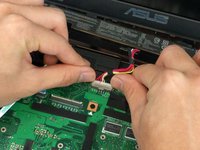
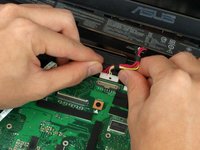
    3. Asus X751L Battery Replacement: шаг 6, изображение 1 из 3 Asus X751L Battery Replacement: шаг 6, изображение 2 из 3 Asus X751L Battery Replacement: шаг 6, изображение 3 из 3
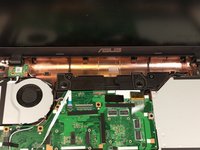
      • Using your finger nails, gently push the battery cable out of the connector on the motherboard.

      • Once the cable is disconnected, you can remove the battery.

      Спросите у FixBot

      Добавить комментарий

Заключение

To reassemble your device, follow these instructions in reverse order.

Отменить: Я не выполнил это руководство.

5 человек успешно провели ремонт по этому руководству.

John Enderton

Участник с: 02/02/17

612 Репутация

Автор 2 руководств

Команда

USF Tampa, Team 17-2, Blackwell Spring 2017 Участник USF Tampa, Team 17-2, Blackwell Spring 2017

USFT-BLACKWELL-S17S17G2

4 членов

Автор 35 руководств

6 Комментарии к руководству

Very nice, thank you !

anh

barzamjavel - Ответить Поделиться

very nice, thank you !

Anh

barzamjavel - Ответить Поделиться

Took me awhile to figure out how to get the cables back. Other than that, good insturctions.

Jacqueline Foxall - Ответить Поделиться

Your instructions were easy to follow. Thank you!!!

theresa collet - Ответить Поделиться

very helpful

khan - Ответить Поделиться

Добавить комментарий

Статистика просмотров:

За последние 24 часов: 2

За последние 7 дней: 10

За последние 30 дней: 107

За всё время: 14,497