Перейти к основному содержанию

Battery Blocking

Абсолютно необходимое руководство
Это руководство предназначено только для использования в качестве обязательного условия для других руководств. Оно не полностью само по себе.

Выберете то, что вам нужно

  1. Battery Blocking, Unfasten the bottom cable shield: шаг 1, изображение 1 из 2 Battery Blocking, Unfasten the bottom cable shield: шаг 1, изображение 2 из 2
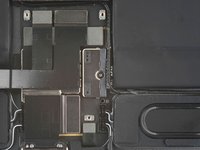
    • Use a Phillips screwdriver to remove the three 1.2 mm screws securing the bottom cable shield to the logic board.

  2. Battery Blocking, Remove the bottom cable shield: шаг 2, изображение 1 из 3 Battery Blocking, Remove the bottom cable shield: шаг 2, изображение 2 из 3 Battery Blocking, Remove the bottom cable shield: шаг 2, изображение 3 из 3
    • Use tweezers or your fingers to remove the bottom cable shield.

  3. Battery Blocking, Disconnect the battery: шаг 3, изображение 1 из 2 Battery Blocking, Disconnect the battery: шаг 3, изображение 2 из 2
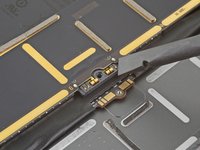
    • Use a Phillips screwdriver to remove the 1.8 mm screw securing the battery connector to the logic board.

  4. Battery Blocking, Battery connector information: шаг 4, изображение 1 из 3 Battery Blocking, Battery connector information: шаг 4, изображение 2 из 3 Battery Blocking, Battery connector information: шаг 4, изображение 3 из 3
    • These photos show what the battery connector looks like underneath the logic board. Use these photos as a reference while you safely disconnect the battery.

    • Notice that the battery connector has cantilever springs on the logic board that press against the battery contact pads. Since both the logic board and battery are glued down, you'll need to slide something thin and flexible between the contact points to disconnect the battery.

  5. Battery Blocking, Create a battery blocker: шаг 5, изображение 1 из 3 Battery Blocking, Create a battery blocker: шаг 5, изображение 2 из 3 Battery Blocking, Create a battery blocker: шаг 5, изображение 3 из 3
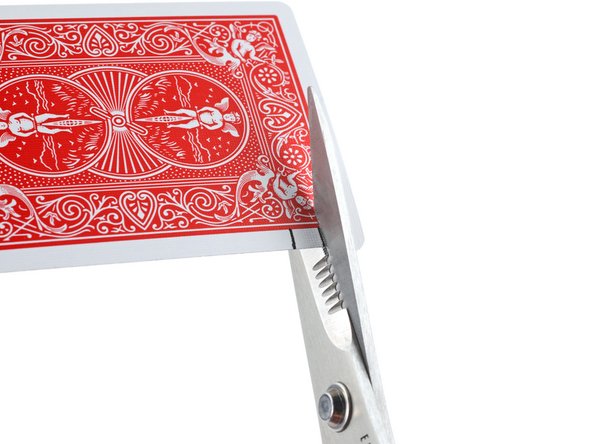
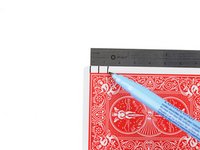
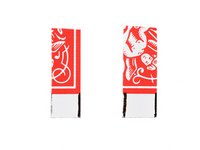
    • Cut two 6 mm wide strips from a playing card or cardstock to use as a battery blocker.

    • The strips should be about 4 cm long so you can easily grip them.

  6. Battery Blocking, Insert the card strips: шаг 6, изображение 1 из 3 Battery Blocking, Insert the card strips: шаг 6, изображение 2 из 3 Battery Blocking, Insert the card strips: шаг 6, изображение 3 из 3
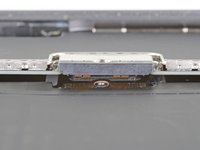
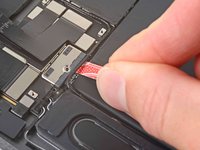
    • Insert the card strips on each side of the battery connector until they stop.

Заключение

To reassemble your device, follow these instructions in reverse order.

Chayton Ritter

Участник с: 08/21/20

17 891 Репутация

Автор 99 руководств

Команда

Guide Team Участник Guide Team

Staff

6 членов

Автор 7 200 руководств

0 Комментариев

Добавить комментарий

Просмотр статистики:

За последние 24часов: 0

За последние 7 дней: 2

За последние 30 дней: 2

За всё время: 73