Введение
This guide has been created using a Toyota powered Series 2 Lotus Elise. so some details may differ if you have an S1 Elise / Exige or S2 Exige, or have Honda running drivetrain.
In this guide we will run through the removal of a standard OEM Lotus shifter, and give details in how to then install your replacement AliTech Shifter.
-
-
On both sides of your car, remove the plastic caps from the upper seatbelt mounting points to expose the bolts. Then remove these bolts.
-
Using a hex tool, remove the four bolts holding each seat to the chassis floor.
 Спросите у FixBot
-
-
-
Undo the two screws in the base of the rear bulkhead pocket.
-
You'll now have access to two further screws which will also need removing. Once done you will be able to lift the cowling away from the bulkhead to aid in removal of the OEM shifter assembly.
-
-
-
Loosen the hex grub screws on the lower side of the handbrake trim.
-
The handbrake trim should now come away from the handbrake mechanism.
-
-
-
Undo the two remaining screws located either side of the shifter trim.
-
With the shifter gaiter/boot still attached, lift the plastic trim high enough to reach the underside. This will give you access to remove the clips holing the gaiter/boot the the plastic shifter trim.
-
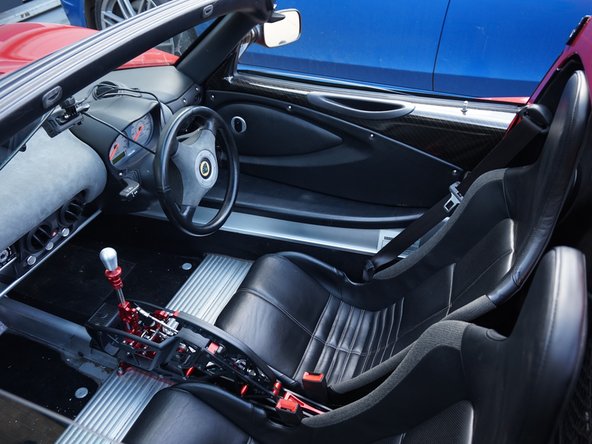
With the handbrake in its upmost possition, and with a little shuffling, you will be able to remove the shifter trim - exposing the OEM shifter mechanism beneath.
-
-
-
Detach the cable from the bottom of the handbrake.
-
You will need to remove the handbrake microswitch from the shifter. This will be fitted in a similar position on the AliTech shifter in Step 10.
-
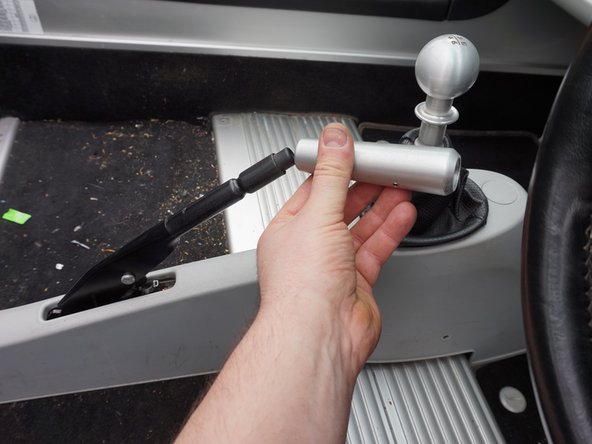
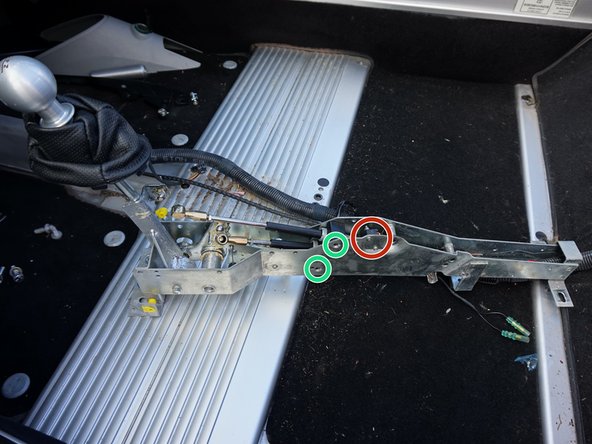
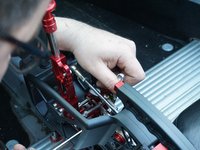
Remove the remaining bolts securing the front of the shifter to the car chassis
-
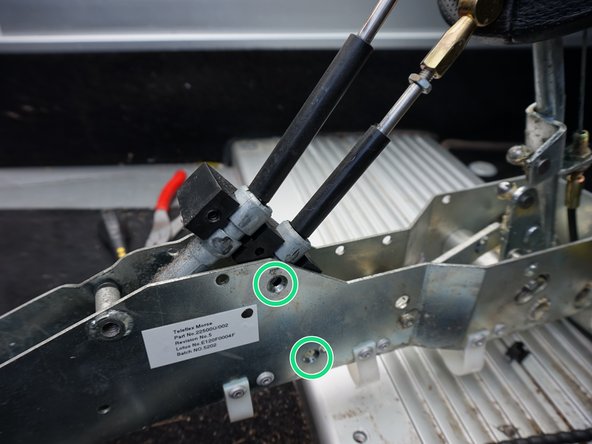
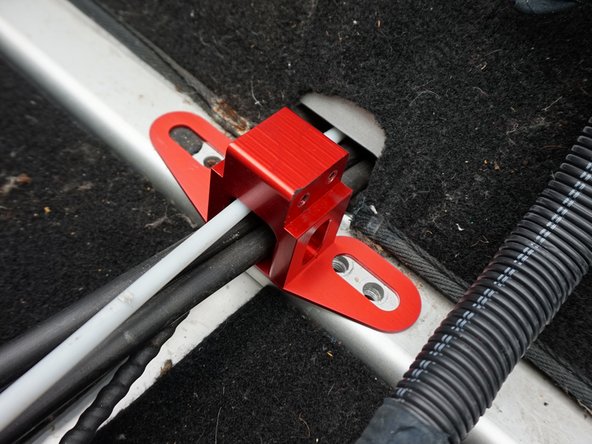
Undo the block holding the shifter cables in place. This is held with 4 screws - two either side.
-
Unfasten the two rod ends from the shifter mechanism.
-
-
-
-
Before you start with the installation of the AliTech Shifter, it is advised that you first slacken the handbrake cabel.
-
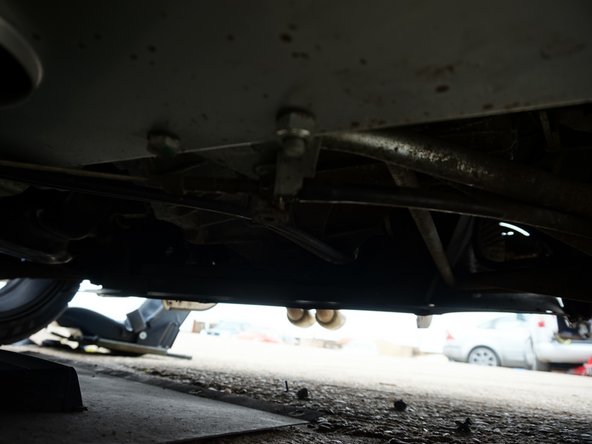
To do this, you will first need to remove the rearmost floorpan to gain access to the handbrake adjuster.
-
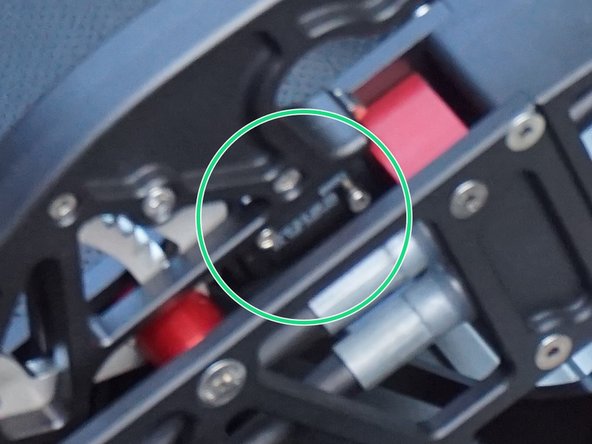
Unfortunately our pictures here aren't very clear, but they show the floorpan undone and removed with a number of fixings around the circumference.
-
-
-
Using the same mounting holes used by the OEM shifter, trial fit the front shifter bracket to your car.
-
To add the additional mounting point you will need to mark it out so it can be drilled to accept the required M8 rivnut - not supplied.
-
In Step 9 final fitting of the front bracket will require shimming under some of the bolt holes using the supplied washers. These are required to ensure the front bracket is horizontally aligned with the rear bracket. and to ensure that every bolt has positive engagement with the floorpan.
-
-
-
Build the rear bracket upside down using the 4x M4 countersunk bolts supplied making sure that he gear selector and handbrake cable pass through the assembly as shown.
-
Rotate the assembly to its correct orientation and place into its final resting position so the slots align with the bolts holes your seat rails use (Different hole locations are used on LHD and RHD cars.)
-
-
-
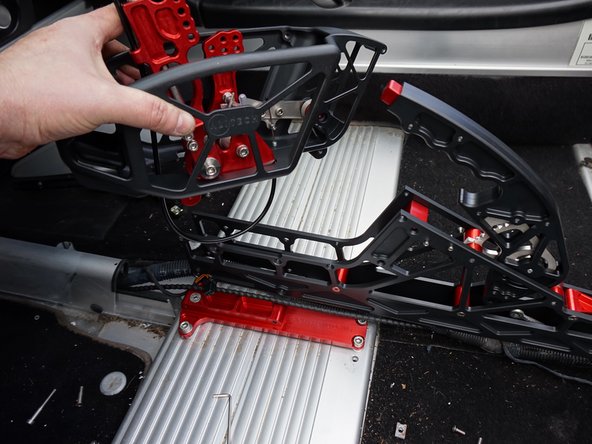
Trial fit the shifter chassis to the front and rear mounts. Whilest doing this, be sure to feed the shifter and handbrake cable through the shifter chassis assembley.
-
Once in situ, check that the front of the shifter sits flush over the front mounting bracket. If misaligned, as described in Step 7, insert washers beneath the mounting bracket so that the shifter chassis fits flush (no gaps)
-
Remove the cable block from the shifter chassis. Feed the shifter cables through the shifter block, securing them in place using the dowel pins supplied. Longer cable - top, shorter cable - bottom.
-
With the cables attached, install the shifter chassis to the front mounting bracket. The wiring loom should also be fed inside the shifter chassis at this stage.
-
-
-
To attach the handbrake cable to the handbrake you will need to lift the rear 'dogbone' out of the way (as shown) and remove the handbrake assembly from the shifter chassis.
-
Attach the cable using the supplied clevis and E-Clip, then refit the handbrake assembly into the shifter chassis. Be sure that the wider spacers are to the right hand side of the assembly - this is to give clearance for the shifter cables.
-
Adjust the handbrake cable beneath the car to remove any slack. When happy, refit the rear floorpan.
-
Reassemble the handbrake being sure that the wider spacers are to the right hand side of the assembly - this is to give clearance for the shifter cables.
-
Fit the handbrake switch to the Shifter Chassis using the supplies M3 bolts.
-
-
-
Attach the supplied rod ends to the shifter cables. These will be tightened shortly.
-
Refit the shifter mechanism to the shifter chassis whilst being sure to use the longer M5 countersunk bolts on the left side, and the shorter ones on the right side.
-
With the shifter in its 'neutral' position, adjust the rod ends until they align with the desired holes on the lever arms.
-
-
-
Loosen the two bolts on the reverse lockout plates - just enough so that the sliding section only just slides. Push it fully forwards.
-
Carefully locate 1st gear, then second. This should push the sliding section back to the point where it will prevent reverse being selected.
-
Retighten the two bolts and check you can select all gears. Also check you can select reverse with the reverse lockout disengaged (Lift reverse collar on gearstick).
-
This setting may require minor tweaking, so adjust as necessary.
-
-
-
Reinstall the rear pocket back on to the rear bulkhead by following Step 2 in reverse order.
-
Refit both seats and seatbelts using the holes noted from Step 1
-
Once everything is installed it is suggested that you adjust the shifter height (by loosening the two grub screws behind the reverse cable on the front of the lever arm) to a height you're comfortable with.
-
-
-
You're done! Go enjoy your new toy, and send us a photo of your installation for us to share on our Facebook page.
-


To reassemble your device, follow these instructions in reverse order.
Отменить: Я не выполнил это руководство.
4 человек успешно провели ремонт по этому руководству.