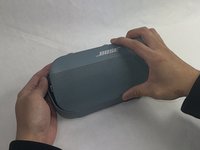
Перейти к основному содержанию
Присоединяйся к сообществу ремонтников - Создай аккаунт

Bose Soundlink Flex Battery Replacement

Выберете то, что вам нужно

  1. Bose Soundlink Flex Battery Replacement, Grille: шаг 1, изображение 1 из 1
    • Use a heat gun to warm up the device.

    • This will allow for an easier removal of the grille and prevent damage to the device during the replacement. If you do not have access to a heat gun, a hair dryer works as well.

  2. Bose Soundlink Flex Battery Replacement: шаг 2, изображение 1 из 1
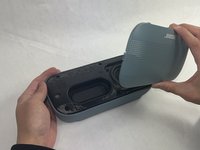
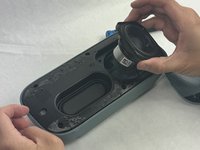
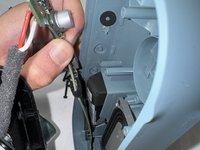
    • Use an iFixit opening tool to pop off the eight clips on the grille.

    • Be patient and do not rush this process as you may otherwise damage the device.

  3. Bose Soundlink Flex Battery Replacement: шаг 3, изображение 1 из 2 Bose Soundlink Flex Battery Replacement: шаг 3, изображение 2 из 2
    • Once the clips have been released, the only thing holding the grille on is glue.

    • Apply minimal force and the grille should pop right off the device.

    • Reheat the device to warm up the glue if there is difficulty in removing.

  4. Bose Soundlink Flex Battery Replacement, Battery: шаг 4, изображение 1 из 3 Bose Soundlink Flex Battery Replacement, Battery: шаг 4, изображение 2 из 3 Bose Soundlink Flex Battery Replacement, Battery: шаг 4, изображение 3 из 3
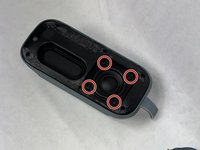
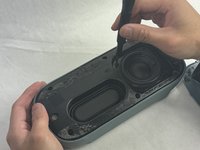
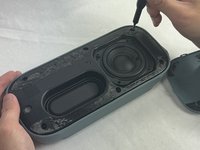
    • Remove the four 2.3 mm screws holding the driver in place using a TR8 Torx screwdriver.

    • Lift the driver out, being cautious of the wires still connected to the device.

  5. Bose Soundlink Flex Battery Replacement: шаг 5, изображение 1 из 3 Bose Soundlink Flex Battery Replacement: шаг 5, изображение 2 из 3 Bose Soundlink Flex Battery Replacement: шаг 5, изображение 3 из 3
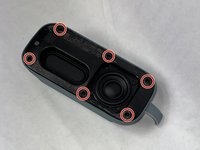
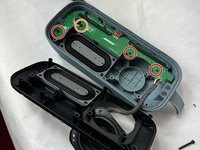
    • Remove the six 2.3 mm screws around the edge with a TR8 Torx screwdriver.

    • Pull the back panel off exposing the motherboard.

  6. Bose Soundlink Flex Battery Replacement: шаг 6, изображение 1 из 2 Bose Soundlink Flex Battery Replacement: шаг 6, изображение 2 из 2
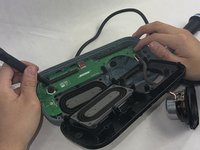
    • Remove the three 1.7 mm screws from the motherboard using a TR6 Torx screwdriver.

    • Remove the single 1.4 mm screw from the motherboard using a TR5 Torx screwdriver.

  7. Bose Soundlink Flex Battery Replacement: шаг 7, изображение 1 из 3 Bose Soundlink Flex Battery Replacement: шаг 7, изображение 2 из 3 Bose Soundlink Flex Battery Replacement: шаг 7, изображение 3 из 3
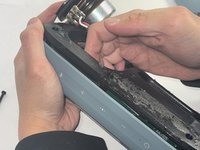
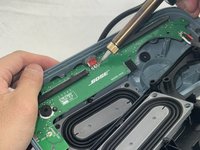
    • Take the motherboard out and take note of the battery attached.

    • Remove the insulation and the solder from the wiring.

    • Be careful not to damage the motherboard. Doing so will create a slew of problems for the speaker.

    • Solder the wires of the new battery onto the motherboard.

    • Be cautious when adding the solder to not damage the motherboard or burn yourself.

Заключение

To reassemble your device, follow these instructions in reverse order.

5 человек успешно провели ремонт по этому руководству.

Kalvin Lee

Участник с: 03/19/24

579 Репутация

Автор 3 руководств

Команда

UMass Dartmouth, Team 4-1, Shaddix Spring 2024 Участник UMass Dartmouth, Team 4-1, Shaddix Spring 2024

UMASSD-SHADDIX-S24S4G1

3 членов

Автор 10 руководств

1 Комментарий к руководству

How do I know which one is the positive and which one is the negative side of my battery connector in soundlink flex ? As I have already removed the old battery only.

SOM SATPATHY - Ответить

Добавить комментарий

Статистика просмотров:

За последние 24 часов: 8

За последние 7 дней: 86

За последние 30 дней: 374

За всё время: 6,044