Перейти к основному содержанию
Присоединяйся к сообществу ремонтников - Создай аккаунт

Bra Underwire Replacement

Выберете то, что вам нужно

    1. Bra Underwire Replacement, Underwire: шаг 1, изображение 1 из 2 Bra Underwire Replacement, Underwire: шаг 1, изображение 2 из 2
      • Remove broken bra wire.

      Спросите у FixBot

      Добавить комментарий

    2. Bra Underwire Replacement: шаг 2, изображение 1 из 3 Bra Underwire Replacement: шаг 2, изображение 2 из 3 Bra Underwire Replacement: шаг 2, изображение 3 из 3
      • Insert the new wire into the bra.

      • Adjust the wire until it fits perfectly.

      Спросите у FixBot

      Добавить комментарий

    3. Bra Underwire Replacement: шаг 3, изображение 1 из 3 Bra Underwire Replacement: шаг 3, изображение 2 из 3 Bra Underwire Replacement: шаг 3, изображение 3 из 3
      • Choose a thread that is a similar color to the bra.

      • Insert the thread into the eye of the needle.

      • Tie a double-knot.

      Спросите у FixBot

      Добавить комментарий

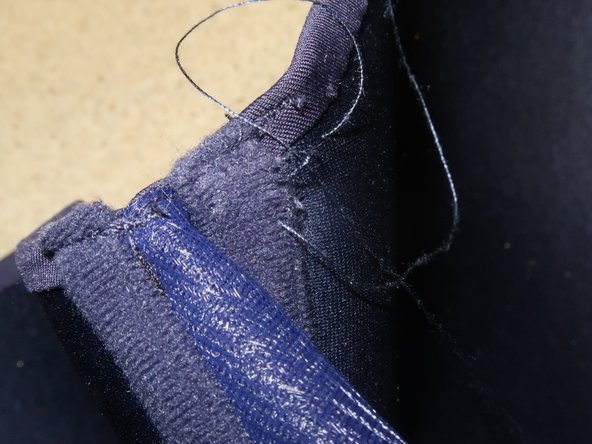
    4. Bra Underwire Replacement: шаг 4, изображение 1 из 3 Bra Underwire Replacement: шаг 4, изображение 2 из 3 Bra Underwire Replacement: шаг 4, изображение 3 из 3
      • Poke the needle through the bottom of the hole in the fabric.

      • Loop the needle through the top of the hole.

      • Pull the thread tight so the hole closes up.

      • Guide the needle back through the bottom of the hole.

      • Repeat steps until the hole is closed.

      • Watch your fingers to prevent injury from the needle.

      Спросите у FixBot

      Добавить комментарий

    5. Bra Underwire Replacement: шаг 5, изображение 1 из 3 Bra Underwire Replacement: шаг 5, изображение 2 из 3 Bra Underwire Replacement: шаг 5, изображение 3 из 3
      • Slide the needle under your last stitch.

      • Pull it through the stitch.

      • Tie a double-knot.

      • Cut the excess thread off.

      Спросите у FixBot

      Добавить комментарий

    6. Bra Underwire Replacement: шаг 6, изображение 1 из 1
      • Protect the stitches by placing a few drops of fabric glue onto the casing.

      Спросите у FixBot

      Добавить комментарий

Финишная прямая

Отменить: Я не выполнил это руководство.

2 человек успешно провели ремонт по этому руководству.

True Sloan

Участник с: 09/28/21

175 Репутация

1 руководство автора

Команда

University of North Texas, Team 2-6, Raign Fall 2021 Участник University of North Texas, Team 2-6, Raign Fall 2021

UNT-RAIGN-F21S2G6

2 членов

Автор 1 руководств

0 Комментарии к руководству

Добавить комментарий

Статистика просмотров:

За последние 24 часов: 2

За последние 7 дней: 26

За последние 30 дней: 98

За всё время: 3,571