Перейти к основному содержанию
Присоединяйся к сообществу ремонтников - Создай аккаунт

Canon EOS Rebel G Back Panel Replacement

Выберете то, что вам нужно

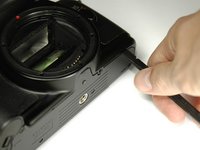
    1. Canon EOS Rebel G Back Panel Replacement, Front Panel: шаг 1, изображение 1 из 1
      • Using a #00 Phillips screw driver, remove three 4.4 mm Phillips screws as indicated by the red circles.

      Спросите у FixBot

      Добавить комментарий

    2. Canon EOS Rebel G Back Panel Replacement: шаг 2, изображение 1 из 2 Canon EOS Rebel G Back Panel Replacement: шаг 2, изображение 2 из 2
      • Using your finger, peel back the textured grip so the components are separated.

      Спросите у FixBot

      Добавить комментарий

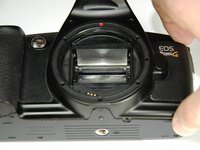
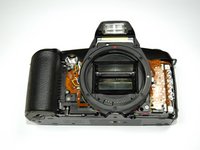
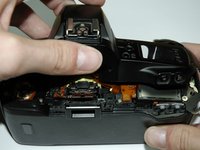
    3. Canon EOS Rebel G Back Panel Replacement: шаг 3, изображение 1 из 3 Canon EOS Rebel G Back Panel Replacement: шаг 3, изображение 2 из 3 Canon EOS Rebel G Back Panel Replacement: шаг 3, изображение 3 из 3
      • Using the flat end of a spudger, loosen the connection between the front panel and the device.

      • Remove the front panel using your hands.

      Спросите у FixBot

      Добавить комментарий

    1. Canon EOS Rebel G Back Panel Replacement, Top Panel: шаг 4, изображение 1 из 1
      • Turn Camera over.

      • Using a #00 Phillips screw driver, unscrew the two 4.9 mm Phillips screws located on either side of the viewfinder.

      Спросите у FixBot

      Добавить комментарий

    2. Canon EOS Rebel G Back Panel Replacement: шаг 5, изображение 1 из 1
      • Using a #00 Phillips screw driver, unscrew the one 5.7 mm Phillips screw located next to the LCD screen.

      Спросите у FixBot

      Добавить комментарий

    3. Canon EOS Rebel G Back Panel Replacement: шаг 6, изображение 1 из 1
      • Lay the camera on its back.

      • Unsolder the flash connection from the motherboard as noted by the blue circle.

      Спросите у FixBot

      Добавить комментарий

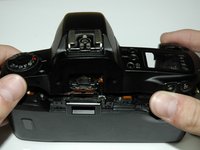
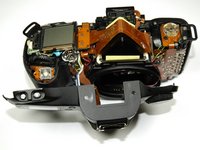
    4. Canon EOS Rebel G Back Panel Replacement: шаг 7, изображение 1 из 3 Canon EOS Rebel G Back Panel Replacement: шаг 7, изображение 2 из 3 Canon EOS Rebel G Back Panel Replacement: шаг 7, изображение 3 из 3
      • Remove the top panel by lifting it from the back, pushing it forward over the camera and letting it rotate down in front of the camera.

      Спросите у FixBot

      Добавить комментарий

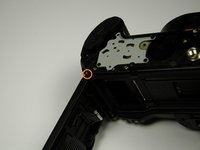
    1. Canon EOS Rebel G Back Panel Replacement, Back Panel: шаг 8, изображение 1 из 1
      • Using a #00 Philllips screw driver, unscrew the 6.8 mm Phillips screw that holds the strap anchor noted by the red circle.

      • Remove the strap anchor.

      Спросите у FixBot

      Добавить комментарий

    2. Canon EOS Rebel G Back Panel Replacement: шаг 9, изображение 1 из 1
      • Unlatch the back panel.

      • Using a #00 Phillips screw driver, unscrew the six screws on the bottom of the camera.

      • One 7.4 mm Phillips screw

      • Two 6.0 mm Phillips screws

      • Two 4.4 mm Phillips screws

      • One 3.9 mm Phillips screw

      Спросите у FixBot

      Добавить комментарий

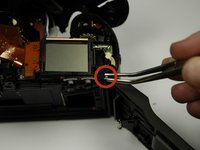
    3. Canon EOS Rebel G Back Panel Replacement: шаг 10, изображение 1 из 3 Canon EOS Rebel G Back Panel Replacement: шаг 10, изображение 2 из 3 Canon EOS Rebel G Back Panel Replacement: шаг 10, изображение 3 из 3
      Инструмент, используемый на этом этапе:
      Tweezers
      $4.99
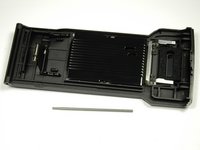
      • From the bottom of the camera push the hinge rod in with your finger.

      • Return the camera to its upright position.

      • Use pliers (or tweezers) to pull the rod out from the top.

      Спросите у FixBot

      Добавить комментарий

Заключение

To reassemble your device, follow these instructions in reverse order.

Отменить: Я не выполнил это руководство.

Zach

Участник с: 04/04/12

46 Репутация

Автор 8 руководств

Команда

Cal Poly, Team 14-9, Forte Spring 2012 Участник Cal Poly, Team 14-9, Forte Spring 2012

CPSU-FORTE-S12S14G9

5 членов

Автор 36 руководств

0 Комментарии к руководству

Добавить комментарий

Статистика просмотров:

За последние 24 часов: 2

За последние 7 дней: 3

За последние 30 дней: 23

За всё время: 2,432