Введение
The flash component is critical to proper operation of the Canon PowerShot A2500. Using the flash feature it will assist in achieving proper lighting for dark photos. This will increase the ease of which photos can be taken.
Выберете то, что вам нужно
-
-
-
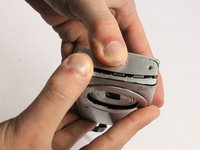
Remove the knot holding the wrist lanyard onto the camera
 Спросите у FixBot
-
-
-
Open the latch at the bottom corner of the device to reveal the battery and SD card housing.
-
There is an orange latch holding the battery in place which must be pushed back in order to free the battery.
-
Once the battery is removed push the SD card and this will activate a spring ejecting the card from the camera.
-
-
-
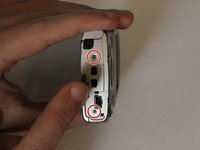
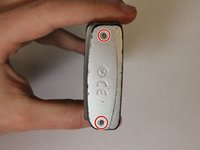
Remove the 6 Phillips #00 exterior screws from the camera. Two are located on the bottom and two are located on either side as shown. Notice that one of the screws is under the AV Out Digital flap on the side. All exterior screws should be 2.4mm in length
-
-
-
-
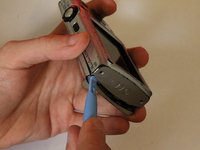
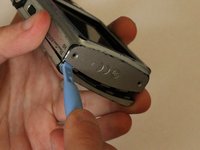
Pry apart the camera casing using the plastic opening tool tool provided. Once the casing has begun to separate pull the two sides apart with your hands.
-
-
-
-
-
Lift LCD Display using the plastic opening tool to access the screws.
-
-
-
Remove top left phillips #00 screw under LCD display
-
The screw should be 3.6mm long and the face of the screw should have a 2.4mm diameter
-
-
-
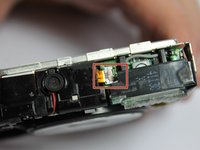
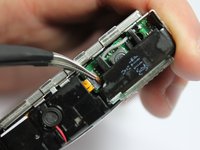
Once the screw is removed lift small brown tab and carefully remove the ribbon tape connecting the flash component to the camera
-
Now the flash component is completely separated from the computer and ready to be replaced or repaired
-
-


To reassemble your device, follow these instructions in reverse order.
Отменить: Я не выполнил это руководство.
Еще один человек закончил это руководство.
Команда

UMass Dartmouth, Team 3-4, Duarte Spring 2015 Участник UMass Dartmouth, Team 3-4, Duarte Spring 2015
UMASSD-DUARTE-S15S3G4
4 членов
Автор 12 руководств
1 Комментарий к руководству
Great tutorial, but I am left with one problem - where can I buy a flash component? Just can’t seem to find any on the internet.
Jonathan, UK