Перейти к основному содержанию
Присоединяйся к сообществу ремонтников - Создай аккаунт

Canon PowerShot A620 Camera Housing Replacement

Выберете то, что вам нужно

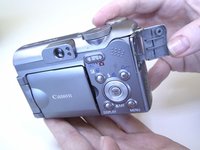
    1. Canon PowerShot A620 Camera Housing Replacement, Open Battery Door: шаг 1, изображение 1 из 3 Canon PowerShot A620 Camera Housing Replacement, Open Battery Door: шаг 1, изображение 2 из 3 Canon PowerShot A620 Camera Housing Replacement, Open Battery Door: шаг 1, изображение 3 из 3
      • Slide the tab on the battery door while pushing the battery door away from you. The battery door should pop open.

      Спросите у FixBot

      Добавить комментарий

    2. Canon PowerShot A620 Camera Housing Replacement, Insert Batteries: шаг 2, изображение 1 из 2 Canon PowerShot A620 Camera Housing Replacement, Insert Batteries: шаг 2, изображение 2 из 2
      • Insert AA batteries according to the diagram printed on the camera.

      • Close the battery door.

      Спросите у FixBot

      Добавить комментарий

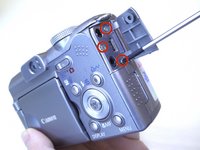
    1. Canon PowerShot A620 Camera Housing Replacement, Side Panel: шаг 3, изображение 1 из 3 Canon PowerShot A620 Camera Housing Replacement, Side Panel: шаг 3, изображение 2 из 3 Canon PowerShot A620 Camera Housing Replacement, Side Panel: шаг 3, изображение 3 из 3
      • Unscrew the three Phillips #00 1.6x3mm screws on the side.

      • Lift loose panel from the case.

      • Unscrew the two Phillips #00 1.6x3mm screws that were previously hidden beneath the panel.

      Спросите у FixBot

      Добавить комментарий

    2. Canon PowerShot A620 Camera Housing Replacement, Bottom Panel: шаг 4, изображение 1 из 1
      • Unscrew the two Phillips #00 1.6x3mm screws on the bottom panel.

      Спросите у FixBot

      Добавить комментарий

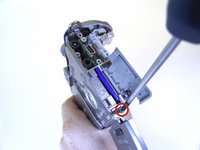
    3. Canon PowerShot A620 Camera Housing Replacement, Battery Compartment: шаг 5, изображение 1 из 1
      • Open the battery door.

      • Unscrew the four Phillips #00 1.6x3mm screws in the battery compartment.

      Спросите у FixBot

      Добавить комментарий

    4. Canon PowerShot A620 Camera Housing Replacement, Terminal Cover: шаг 6, изображение 1 из 2 Canon PowerShot A620 Camera Housing Replacement, Terminal Cover: шаг 6, изображение 2 из 2
      • Lift the terminal cover on the side of the camera.

      • Unscrew the three Phillips #00 1.6x3mm screws beneath the terminal cover.

      Спросите у FixBot

      Добавить комментарий

    5. Canon PowerShot A620 Camera Housing Replacement, Top Panel: шаг 7, изображение 1 из 1
      • Gently pull the top panel to separate it from the case.

      • Although the top panel will now be free from the rest of the case, it will still be attached to the camera by a ribbon cable.

      Спросите у FixBot

      Добавить комментарий

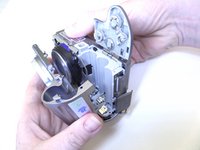
    6. Canon PowerShot A620 Camera Housing Replacement, Front Panel: шаг 8, изображение 1 из 2 Canon PowerShot A620 Camera Housing Replacement, Front Panel: шаг 8, изображение 2 из 2
      • Gently pull the front panel to separate it from the camera.

      • The battery terminals are easy to access from this step.

      Спросите у FixBot

      Добавить комментарий

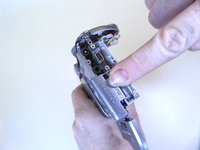
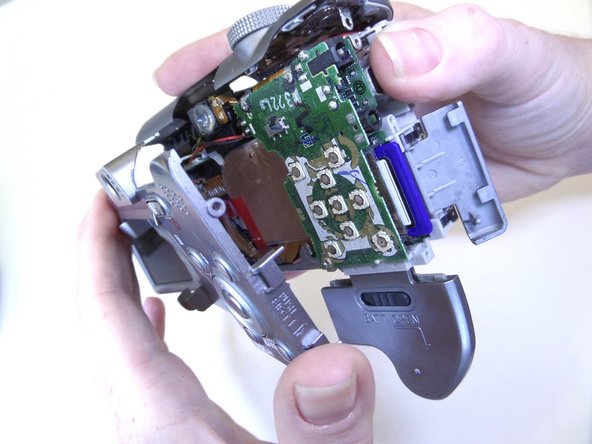
    7. Canon PowerShot A620 Camera Housing Replacement, Terminal Cover: шаг 9, изображение 1 из 2 Canon PowerShot A620 Camera Housing Replacement, Terminal Cover: шаг 9, изображение 2 из 2
      • Gently pull the terminal cover to separate it from the camera.

      Спросите у FixBot

      Добавить комментарий

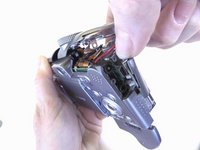
    8. Canon PowerShot A620 Camera Housing Replacement, Memory Card Cover: шаг 10, изображение 1 из 2 Canon PowerShot A620 Camera Housing Replacement, Memory Card Cover: шаг 10, изображение 2 из 2
      • Slide the memory card cover down.

      • Unscrew the Phillips #00 1.6x3mm screw beneath the memory card cover.

      Спросите у FixBot

      Добавить комментарий

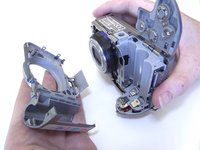
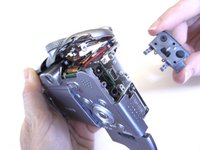
    9. Canon PowerShot A620 Camera Housing Replacement, Back Panel: шаг 11, изображение 1 из 2 Canon PowerShot A620 Camera Housing Replacement, Back Panel: шаг 11, изображение 2 из 2
      • Gently pull the back panel to separate it from the camera.

      Спросите у FixBot

      Добавить комментарий

Заключение

To reassemble your device, follow these instructions in reverse order.

Отменить: Я не выполнил это руководство.

2 человек успешно провели ремонт по этому руководству.

Jaime Abraham

Участник с: 09/08/14

350 Репутация

Автор 3 руководств

Команда

CSU Fullerton, Team 1-1, Bruce Fall 2014 Участник CSU Fullerton, Team 1-1, Bruce Fall 2014

CSUF-BRUCE-F14S1G1

3 членов

Автор 6 руководств

1 Комментарий к руководству

Ottima spiegazione: é tutto facile quando la spiegazione é semplice ed univoca. Ma redigere istruzioni semplici é un'arte che non tutti possiedono.

Paolo Ravera - Ответить Поделиться
Добавить комментарий

Статистика просмотров:

За последние 24 часов: 1

За последние 7 дней: 7

За последние 30 дней: 22

За всё время: 2,366