Перейти к основному содержанию
Присоединяйся к сообществу ремонтников - Создай аккаунт

Canon PowerShot A630 LCD Screen Replacement

Выберете то, что вам нужно

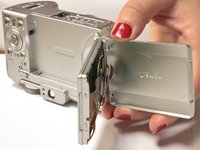
    1. Canon PowerShot A630 LCD Screen Replacement, LCD Screen: шаг 1, изображение 1 из 1
      • Open the LCD screen of the camera

      Спросите у FixBot

      Добавить комментарий

    2. Canon PowerShot A630 LCD Screen Replacement: шаг 2, изображение 1 из 2 Canon PowerShot A630 LCD Screen Replacement: шаг 2, изображение 2 из 2
      • Rotate the screen so that it is perpendicular to the body of the camera

      • Remove the .2mm screw using a Phillips #00 screwdriver

      • Rotate screen 180 degrees and remove second .2mm screw

      Спросите у FixBot

      Добавить комментарий

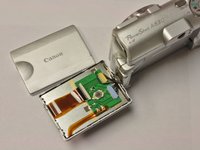
    3. Canon PowerShot A630 LCD Screen Replacement: шаг 3, изображение 1 из 2 Canon PowerShot A630 LCD Screen Replacement: шаг 3, изображение 2 из 2
      • Gently remove the back panel of the LCD screen

      Спросите у FixBot

      Добавить комментарий

    4. Canon PowerShot A630 LCD Screen Replacement: шаг 4, изображение 1 из 1
      • Once the back panel is removed another .2mm screw will be revealed, remove this screw to remove the front panel of the LCD screen

      Спросите у FixBot

      Добавить комментарий

    5. Canon PowerShot A630 LCD Screen Replacement: шаг 5, изображение 1 из 1
      • Gently remove front panel of the LCD screen

      Спросите у FixBot

      Добавить комментарий

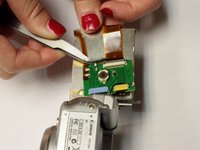
    6. Canon PowerShot A630 LCD Screen Replacement: шаг 6, изображение 1 из 2 Canon PowerShot A630 LCD Screen Replacement: шаг 6, изображение 2 из 2
      Инструмент, используемый на этом этапе:
      Tweezers
      $4.99
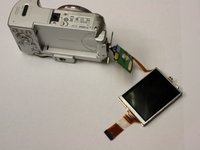
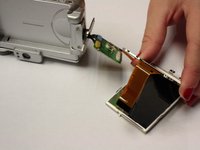
      • Locate the ribbon (orange) and using tweezers gently pull back the retaining clip and pull the ribbon out

      Спросите у FixBot
      Добавить комментарий

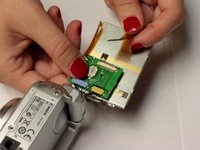
    7. Canon PowerShot A630 LCD Screen Replacement: шаг 7, изображение 1 из 3 Canon PowerShot A630 LCD Screen Replacement: шаг 7, изображение 2 из 3 Canon PowerShot A630 LCD Screen Replacement: шаг 7, изображение 3 из 3
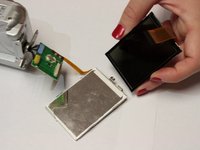
      • Use a spudger to gently remove the LCD screen from the metal backing plate

      Спросите у FixBot

      Добавить комментарий

Заключение

To reassemble your device, follow these instructions in reverse order.

Отменить: Я не выполнил это руководство.

3 человек успешно провели ремонт по этому руководству.

Kady Rose

Участник с: 10/13/14

219 Репутация

1 руководство автора

Команда

Clemson, Team 2-5, Benson Fall 2014 Участник Clemson, Team 2-5, Benson Fall 2014

CLEM-BENSON-F14S2G5

4 членов

Автор 18 руководств

2 Комментарии к руководству

Where can I purchase a replacement LCD screen?

steigw - Ответить Поделиться

I have the same question!

Regina Villarreal - Ответить Поделиться

Добавить комментарий

Статистика просмотров:

За последние 24 часов: 0

За последние 7 дней: 13

За последние 30 дней: 57

За всё время: 3,335