Перейти к основному содержанию
Присоединяйся к сообществу ремонтников - Создай аккаунт

Canon PowerShot S230 Motherboard Replacement

Выберете то, что вам нужно

  1. Canon PowerShot S230 Motherboard Replacement, Battery: шаг 1, изображение 1 из 1
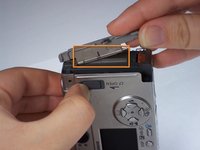
    • On the bottom of the camera, use your thumb to press the rubber battery cover towards the side of the camera with the strap base. The cover will shift to extend beyond the rest of the camera.

    Спросите у FixBot
  2. Canon PowerShot S230 Motherboard Replacement: шаг 2, изображение 1 из 1
    • Hold the end of the battery cover that extends beyond the camera and lift it up.

    Спросите у FixBot
  3. Canon PowerShot S230 Motherboard Replacement: шаг 3, изображение 1 из 1
    • Locate the orange tab next to the battery. Next roll the tab back in order for the battery to come out.

    Спросите у FixBot
  4. Canon PowerShot S230 Motherboard Replacement: шаг 4, изображение 1 из 1
    • Pull the battery out.

    Спросите у FixBot
  5. Canon PowerShot S230 Motherboard Replacement, Memory Card: шаг 5, изображение 1 из 3 Canon PowerShot S230 Motherboard Replacement, Memory Card: шаг 5, изображение 2 из 3 Canon PowerShot S230 Motherboard Replacement, Memory Card: шаг 5, изображение 3 из 3
    • Locate the sliding button labeled "CF open" on the back of the camera.

    • Press and slide down the button labeled "CF open". The memory card cover will pop open.

    Спросите у FixBot
  6. Canon PowerShot S230 Motherboard Replacement: шаг 6, изображение 1 из 3 Canon PowerShot S230 Motherboard Replacement: шаг 6, изображение 2 из 3 Canon PowerShot S230 Motherboard Replacement: шаг 6, изображение 3 из 3
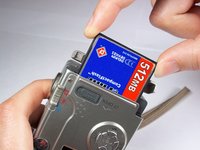
    • Push down on the black square button next to the memory card slot. This will release the memory card from the slot.

    Спросите у FixBot
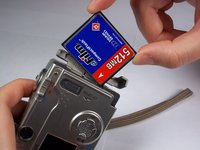
  7. Canon PowerShot S230 Motherboard Replacement: шаг 7, изображение 1 из 2 Canon PowerShot S230 Motherboard Replacement: шаг 7, изображение 2 из 2
    • Pull the memory card out of the memory card slot.

    Спросите у FixBot
  8. Canon PowerShot S230 Motherboard Replacement, Camera Casing: шаг 8, изображение 1 из 1
    • Remove two 2.4mm Phillips screws from the right side of the camera.

    Спросите у FixBot
  9. Canon PowerShot S230 Motherboard Replacement: шаг 9, изображение 1 из 1
    • Remove two 2.4mm Phillips screws above the label on the bottom of the camera.

    • Remove two 2.8mm Phillips screws next to the tripod hole.

    Спросите у FixBot
  10. Canon PowerShot S230 Motherboard Replacement: шаг 10, изображение 1 из 1
    • Remove the two 3.2mm Phillips screws that are closer to the top and bottom edges of the camera.

    • Remove the two 3.8mm Phillips screws on either side of the strap base.

    Спросите у FixBot
  11. Canon PowerShot S230 Motherboard Replacement: шаг 11, изображение 1 из 1
    • Remove one 1.6mm Phillips screw from the above the CF open button on back of the camera.

    Спросите у FixBot
  12. Canon PowerShot S230 Motherboard Replacement: шаг 12, изображение 1 из 3 Canon PowerShot S230 Motherboard Replacement: шаг 12, изображение 2 из 3 Canon PowerShot S230 Motherboard Replacement: шаг 12, изображение 3 из 3
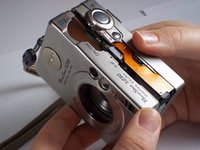
    • Gently pull the front casing from the camera.

    • The following items will either fall off or will be loose: the strap base, the gray rubber cover labeled "Digital A/V Out", and the black rubber piece over the view finder.

    • Remove the memory card cover by sliding down the CF open button and moving the pin.

    Спросите у FixBot
  13. Canon PowerShot S230 Motherboard Replacement: шаг 13, изображение 1 из 2 Canon PowerShot S230 Motherboard Replacement: шаг 13, изображение 2 из 2
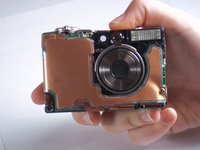
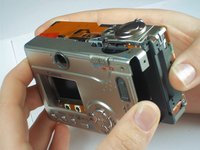
    • Gently pull the back casing from the camera.

    Спросите у FixBot
  14. Canon PowerShot S230 Motherboard Replacement, Buttons: шаг 14, изображение 1 из 2 Canon PowerShot S230 Motherboard Replacement, Buttons: шаг 14, изображение 2 из 2
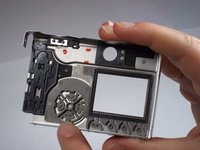
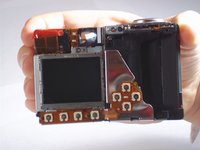
    • Locate the reverse side of the buttons by looking at the inside of the back camera casing.

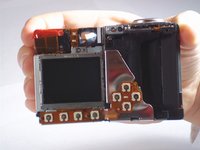
    • Locate the button sensors, which connect to the logic board by a connecting ribbon, by looking at the back of the camera once the back casing has been removed.

    • The button sensors on the back of the camera should appear to match up with the reverse side of the buttons on the inside of the back camera casing. Imagine one as being the reverse image, or mirror image, of the other. This will help you locate where a problem is occuring if a button or a button sensor has been damaged.

    Спросите у FixBot
  15. Canon PowerShot S230 Motherboard Replacement: шаг 15, изображение 1 из 1
    • Remove one 4.3mm screw directly below the power button on the top of the camera.

    • This screw attaches the entire panel for the power and picture-taking buttons. Be sure you are removing the screw from the top of the camera, as it is close to another screw on the back side of the camera.

    Спросите у FixBot
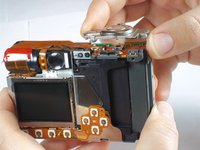
  16. Canon PowerShot S230 Motherboard Replacement: шаг 16, изображение 1 из 2 Canon PowerShot S230 Motherboard Replacement: шаг 16, изображение 2 из 2
    • Gently lift the button panel from the top of the camera.

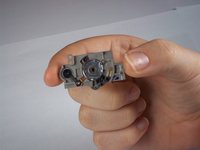
    • This is what the reverse side of the button panel looks like after removal.

    Спросите у FixBot
  17. Canon PowerShot S230 Motherboard Replacement, Motherboard: шаг 17, изображение 1 из 1
    • Remove the two 3.9mm screws holding down the copper flap that insulates the motherboard.

    Спросите у FixBot
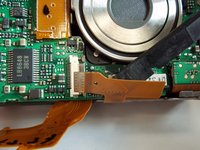
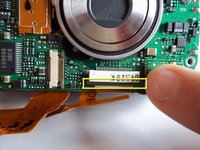
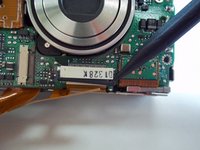
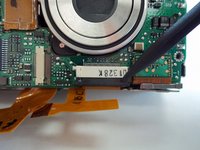
  18. Canon PowerShot S230 Motherboard Replacement: шаг 18, изображение 1 из 3 Canon PowerShot S230 Motherboard Replacement: шаг 18, изображение 2 из 3 Canon PowerShot S230 Motherboard Replacement: шаг 18, изображение 3 из 3
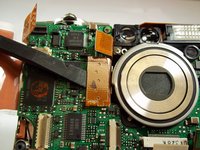
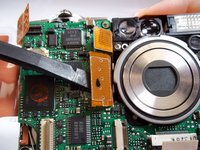
    • The motherboard can be damaged easily and must be treated with care. Try to avoid removing ribbon cables with your fingers, since motherboards are extremely sensitive to static discharge. Use a spudger or plastic opening tool to lift any flaps or tabs or to pry connectors straight off their sockets on the motherboard.

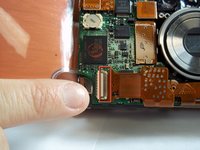
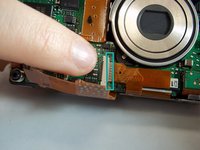
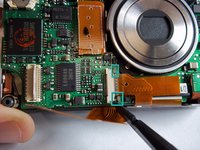
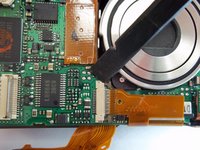
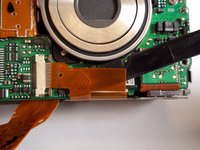
    • Before the motherboard can be removed, several ribbon cables must be disconnected from their respective ports. A few of the ribbon cables are held in place by locking ZIF connectors, which you must release before removing the cables. Removing each ribbon cable may require a gentle tug.

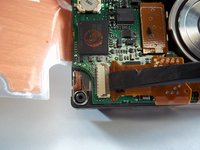
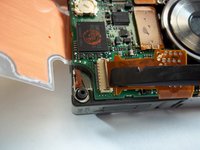
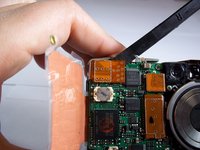
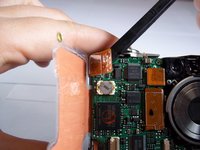
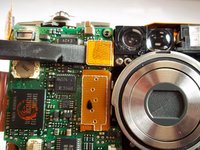
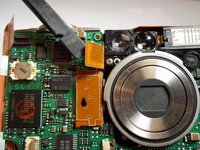
    • First, release the ZIF connector securing the ribbon cable in the bottom left corner of the motherboard. To do this, insert the flat end of a spudger under the connector's dark brown flap and gently wedge the flap open.

    Спросите у FixBot
  19. Canon PowerShot S230 Motherboard Replacement: шаг 19, изображение 1 из 2 Canon PowerShot S230 Motherboard Replacement: шаг 19, изображение 2 из 2
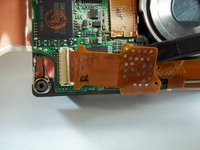
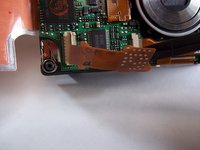
    • Now, insert the spudger under the ribbon cable and gently pull the cable out of its port.

    Спросите у FixBot
  20. Canon PowerShot S230 Motherboard Replacement: шаг 20, изображение 1 из 3 Canon PowerShot S230 Motherboard Replacement: шаг 20, изображение 2 из 3 Canon PowerShot S230 Motherboard Replacement: шаг 20, изображение 3 из 3
    • Release the ZIF connector securing the next ribbon cable. To do this, insert the flat end of a spudger between the dark brown piece and the white piece of the connector. Since the dark brown piece is under the ribbon cable, move this piece to the right by wedging one end at a time.

    Спросите у FixBot
  21. Canon PowerShot S230 Motherboard Replacement: шаг 21, изображение 1 из 2 Canon PowerShot S230 Motherboard Replacement: шаг 21, изображение 2 из 2
    • Insert the spudger under the ribbon cable and gently pull the cable out of its port.

    Спросите у FixBot
  22. Canon PowerShot S230 Motherboard Replacement: шаг 22, изображение 1 из 3 Canon PowerShot S230 Motherboard Replacement: шаг 22, изображение 2 из 3 Canon PowerShot S230 Motherboard Replacement: шаг 22, изображение 3 из 3
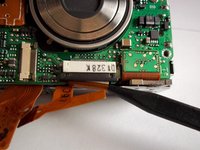
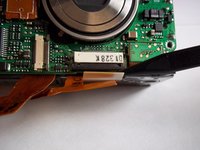
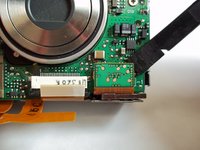
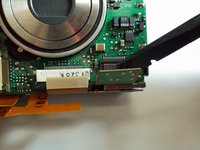
    • Release the ZIF connector securing the ribbon directly below the lens. To do this, insert the pointed end of the spudger between the black piece of the connector and the white piece. Wedge the black piece down.

    Спросите у FixBot
  23. Canon PowerShot S230 Motherboard Replacement: шаг 23, изображение 1 из 2 Canon PowerShot S230 Motherboard Replacement: шаг 23, изображение 2 из 2
    • Insert the pointed end of the spudger under the ribbon cable and gently pull the cable out of its port.

    Спросите у FixBot
  24. Canon PowerShot S230 Motherboard Replacement: шаг 24, изображение 1 из 2 Canon PowerShot S230 Motherboard Replacement: шаг 24, изображение 2 из 2
    • The rest of the ribbon cables are not secured with ZIF connectors. Remove the ribbon cable on the bottom right corner of the motherboard by using the flat end of the spudger to pry the cable from the board.

    Спросите у FixBot
  25. Canon PowerShot S230 Motherboard Replacement: шаг 25, изображение 1 из 2 Canon PowerShot S230 Motherboard Replacement: шаг 25, изображение 2 из 2
    • Remove the ribbon cable on the top left corner of the motherboard by using the flat end of the spudger to pry the cable from the board.

    Спросите у FixBot
  26. Canon PowerShot S230 Motherboard Replacement: шаг 26, изображение 1 из 2 Canon PowerShot S230 Motherboard Replacement: шаг 26, изображение 2 из 2
    • Remove the next ribbon cable by using the flat end of the spudger to pry the cable from the board.

    Спросите у FixBot
  27. Canon PowerShot S230 Motherboard Replacement: шаг 27, изображение 1 из 2 Canon PowerShot S230 Motherboard Replacement: шаг 27, изображение 2 из 2
    • Remove the last ribbon cable by using the flat end of the spudger to pry the cable from the board.

    • When replacing the ribbon cables, keep in mind that these last four cables simply snap back onto the motherboard.

    Спросите у FixBot
  28. Canon PowerShot S230 Motherboard Replacement: шаг 28, изображение 1 из 3 Canon PowerShot S230 Motherboard Replacement: шаг 28, изображение 2 из 3 Canon PowerShot S230 Motherboard Replacement: шаг 28, изображение 3 из 3
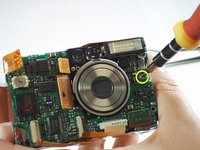
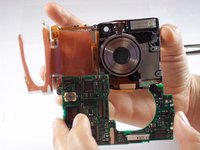
    • Remove one 3.9mm screw from the right side of the motherboard and under the flash.

    • The ends of the connecting ribbons may get caught on the motherboard as you remove it from the camera.

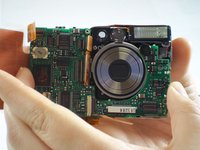
    • Gently pull the motherboard away from the front of the camera.

    Спросите у FixBot
Заключение

To reassemble your device, follow these instructions in reverse order.

Еще один человек закончил это руководство.

Tanya Malalang

Участник с: 01/12/11

340 Репутация

Автор 3 руководств

Команда

Cal Poly, Team 13-1, Forte Winter 2011 Участник Cal Poly, Team 13-1, Forte Winter 2011

CPSU-FORTE-W11S13G1

4 членов

Автор 5 руководств

0 Комментарии к руководству

Добавить комментарий

Статистика просмотров:

За последние 24 часов: 4

За последние 7 дней: 20

За последние 30 дней: 107

За всё время: 2,420