Этот перевод был сделан машиной и пока не проверен человеком. Говорите на этом языке? Просмотрите его.
Введение
Повреждение объектива камеры может стать фатальным. Но не бойтесь: если у вас есть старая совместимая камера Canon, которую можно использовать в качестве донора, или вы нашли подходящую запчасть в другом месте, восстановление работоспособности камеры будет относительно несложным.
Выберете то, что вам нужно
-
-
-
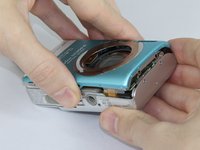
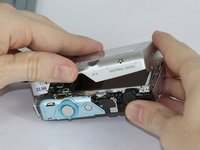
Открутите два винта с той стороны корпуса камеры, где находится ремешок (Phillips 00, 4 мм).
-
Открутите два винта в нижней части камеры (Phillips 00, 4 мм).
-
Открутите два винта с правой стороны камеры, противоположной ремешку (Phillips 00, 2 мм).
-
-
-
Инструмент, используемый на этом этапе:Tweezers$4.99
-
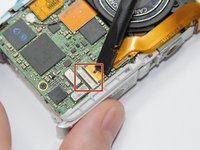
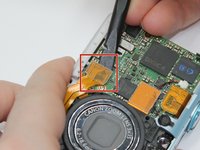
Используйте лопатку (spudger), чтобы поднять удерживающий клапан на разъеме ZIF (Zero Insertion Force), фиксирующем широкий шлейф.
-
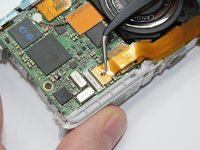
Вытяните шлейф, используя пальцы или пинцет.
-
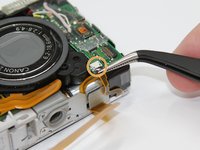
С помощью пинцета отсоедините небольшой шлейф под модулем вспышки от разъема No Fuss Connector, просто потянув его прямо на себя.
-
-
-
-
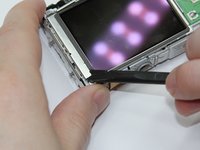
С помощью лопатки (spudger) снимите L-образные кронштейны с левой и правой стороны ЖК-экрана.
-
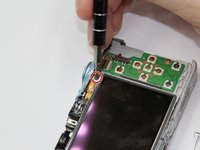
Выкрутите винт под кнопкой спуска затвора. (Phillips 00, 2,5 мм)
-
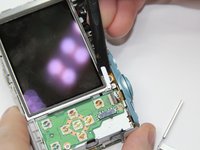
Удерживая ЖК-экран за края, приподнимите его и отведите в сторону, чтобы извлечь.
-
-
-
-
-
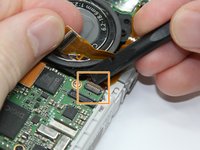
Используйте лопатку (spudger), чтобы поддеть каждую сторону плоского разъема узла объектива в нижней части материнской платы.
-
Придерживая шлейф узла объектива, используйте лопатку, чтобы поднять фиксатор разъема ZIF (с нулевым усилием вставки). Извлеките шлейф.
-
Используйте лопатку, чтобы поднять фиксатор разъема ZIF (с нулевым усилием вставки), расположенный на модуле вспышки. Извлеките шлейф.
-
-
-
Открутите два винта (Phillips 00, 2 мм) вдоль заднего края рамки камеры, расположенные прямо за узлом вспышки.
-
-
-
-
-
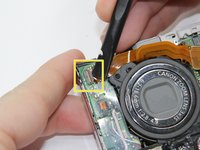
Аккуратно подденьте лопаткой (spudger) обе стороны плоского разъема, а затем вытяните шлейф прямо вверх из гнезда.
-
-
-
Открутите 4 угловых винта (Phillips 00, 2,5 мм) на задней панели камеры, расположенных в серебристой металлической рамке вокруг блока объектива.
-
-
-
Аккуратно подденьте светодиод в верхней части узла объектива с помощью пластиковой лопатки.
-
-

 Спросите у FixBot










Для сборки устройства выполните эти инструкции в обратном порядке.
Отменить: Я не выполнил это руководство.
5 человек успешно провели ремонт по этому руководству.

Команда

USF Tampa, Team 17-5, Blackwell Fall 2016 Участник USF Tampa, Team 17-5, Blackwell Fall 2016
USFT-BLACKWELL-F16S17G5
3 членов
Автор 70 руководств
2 Комментарии к руководству
i have this same camera, and for me all the sudden it stopped focasing completely. everything else works, and it isnt in any weird modes. when i try to focas especially on auto focas with the half button push, i hear some abnormal clicking like it is trying to auto focas but cant. im not sure what to do!
I have the same problem after my camera sat unused for a year. Everything functions fine except the camera will not focus.
