Введение
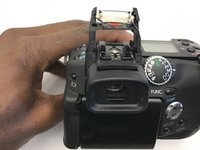
Follow this guide to replace the flash of your Canon Powershot Pro1. Nearly every camera on today’s market is equipped with a flash. The flash allows the user to take high quality pictures in poorly lit conditions and capture quickly moving objects. This guide will detail the steps necessary to replace the flash bulb and capacitor. The flash capacitor is capable of storing large amounts of energy. Therefore, it is important to remove the battery prior to disassembly. The capacitor can be discharged by pressing the flash Also, be sure to use ESD safe tools.
Выберете то, что вам нужно
-
-
-
Locate the battery compartment cover on the right hand side of the camera. The cover features the text: “CF/BATT.OPEN”.
 Спросите у FixBot
-
-
-
There is an arrow beside the text. Using your hands, slide the cover in the direction of this arrow.
-
-
-
Pull the cover toward you. After doing so you will see the battery sitting inside the compartment.
-
-
-
-
Press the orange battery lock inside the compartment.
-
Remove the battery.
-
-
-
-
-
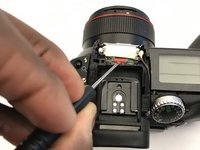
Remove the 25.4 mm Phillips #0 flash screw. The screw is near the flash.
-
Be careful not to damage the screw.
-
-
-
Locate the small points on both sides of the lens.
-
Pry the lens housing using the black nylon spudger so that it is lifted out of these points.
-
-
-
Use the plastic spudger to remove the upper portion of the flash housing.
-
-
-
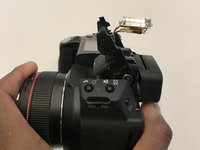
Use the nylon spudger to dislodge the flash bulb and capacitor from the housing.
-
-







To reassemble your device, follow these instructions in reverse order.

Команда

University of Alabama, Team S1-G1, Bedsole Fall 2019 Участник University of Alabama, Team S1-G1, Bedsole Fall 2019
UA-BEDSOLE-F19S1G1
3 членов
Автор 10 руководств
