Перейти к основному содержанию
Присоединяйся к сообществу ремонтников - Создай аккаунт

Comfort Zone CZ6C Motor Replacement

Выберете то, что вам нужно

    1. Comfort Zone CZ6C Motor Replacement, Motor: шаг 1, изображение 1 из 3 Comfort Zone CZ6C Motor Replacement, Motor: шаг 1, изображение 2 из 3 Comfort Zone CZ6C Motor Replacement, Motor: шаг 1, изображение 3 из 3
      • Make sure to unplug the Comfort Zone CZ6C before replacing the motor. This will prevent the risk of electrocution.

      • Unscrew the main housing screw located right above the main switch using a Phillips screwdriver.

      • Then use gentle force to remove the main housing door.

      • Remember to keep track of your screws!

      Спросите у FixBot

      Добавить комментарий

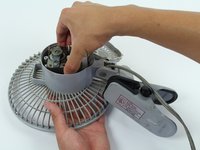
    2. Comfort Zone CZ6C Motor Replacement: шаг 2, изображение 1 из 3 Comfort Zone CZ6C Motor Replacement: шаг 2, изображение 2 из 3 Comfort Zone CZ6C Motor Replacement: шаг 2, изображение 3 из 3
      • Unscrew the two adjacent housing screws to free the motor cage from the housing.

      Спросите у FixBot

      Добавить комментарий

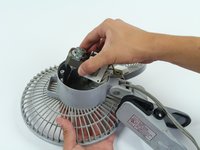
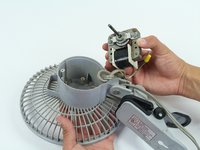
    3. Comfort Zone CZ6C Motor Replacement: шаг 3, изображение 1 из 3 Comfort Zone CZ6C Motor Replacement: шаг 3, изображение 2 из 3 Comfort Zone CZ6C Motor Replacement: шаг 3, изображение 3 из 3
      • Remove the motor cage from the fan housing.

      Спросите у FixBot

      Добавить комментарий

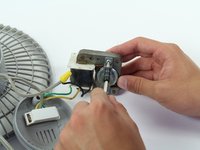
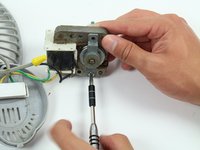
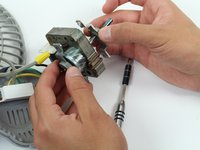
    4. Comfort Zone CZ6C Motor Replacement: шаг 4, изображение 1 из 2 Comfort Zone CZ6C Motor Replacement: шаг 4, изображение 2 из 2
      • Unscrew the two adjacent motor cage screws to free the motor

      Спросите у FixBot

      Добавить комментарий

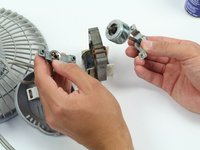
    5. Comfort Zone CZ6C Motor Replacement: шаг 5, изображение 1 из 3 Comfort Zone CZ6C Motor Replacement: шаг 5, изображение 2 из 3 Comfort Zone CZ6C Motor Replacement: шаг 5, изображение 3 из 3
      • The motor is now free to be replaced.

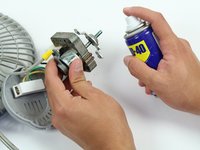
      • If the motor will not move out of its now freed state you can use WD-40 to loosen it

      Спросите у FixBot

      Добавить комментарий

Заключение

To reassemble your device, follow these instructions in reverse order.

Отменить: Я не выполнил это руководство.

5 человек успешно провели ремонт по этому руководству.

Gage Wilson

Участник с: 04/08/15

217 Репутация

1 руководство автора

Команда

Cal Poly, Team 17-5, Forte Spring 2015 Участник Cal Poly, Team 17-5, Forte Spring 2015

CPSU-FORTE-S15S17G5

4 членов

Автор 7 руководств

0 Комментарии к руководству

Добавить комментарий

Статистика просмотров:

За последние 24 часов: 1

За последние 7 дней: 12

За последние 30 дней: 50

За всё время: 6,530