Перейти к основному содержанию

Core Assembly Removal

Выберете то, что вам нужно

  1. Core Assembly Removal, Unfasten the back cover screws: шаг 1, изображение 1 из 1
    • Before starting repairs, take your watch off the charger and power it down.

    • Use a Tri-point Y00 driver to unfasten the four screws on the back of the watch.

    • Don’t worry about removing the screws, they will stay in place in the back cover.

  2. Core Assembly Removal, Wedge open the back cover: шаг 2, изображение 1 из 2 Core Assembly Removal, Wedge open the back cover: шаг 2, изображение 2 из 2
    • Insert an opening tool between the back cover and the metal housing.

    • Twist the opening tool to create a wider gap.

    • Don't fully remove the back cover just yet. The sensor flex cable is still connected to the motherboard.

  3. Core Assembly Removal, Disconnect the sensor flex cable: шаг 3, изображение 1 из 3 Core Assembly Removal, Disconnect the sensor flex cable: шаг 3, изображение 2 из 3 Core Assembly Removal, Disconnect the sensor flex cable: шаг 3, изображение 3 из 3
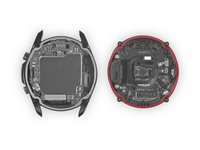
    • Lay the watch face down.

    • Carefully lift the back cover up from the edge with the buttons to access the sensor connector.

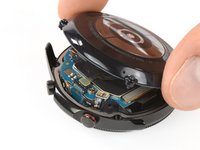
    • Use the flat end of a spudger to pry up and disconnect the sensor flex cable from the motherboard.

  4. Core Assembly Removal, Remove the back cover: шаг 4, изображение 1 из 2 Core Assembly Removal, Remove the back cover: шаг 4, изображение 2 из 2
    • Remove the back cover.

    • Make sure the rubber gasket (marked red) is undamaged. If damaged replace it with a new one during reassembly to maintain proper water resistance.

  5. Core Assembly Removal, Unplug the display connector: шаг 5, изображение 1 из 2 Core Assembly Removal, Unplug the display connector: шаг 5, изображение 2 из 2
    • Use the flat end of a spudger to pry up and disconnect the display flex cable from the motherboard.

  6. Core Assembly Removal, Loosen the core assembly: шаг 6, изображение 1 из 2 Core Assembly Removal, Loosen the core assembly: шаг 6, изображение 2 из 2
    • The core's plastic frame fits tightly within the watch's metal housing.

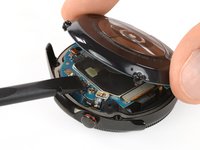
    • Place the corner of the flat end of a spudger in the small opening of the barometric sensor, on the opposite side of the display connector.

    • Twist and tilt the spudger to lever the core assembly out of the metal housing.

  7. Core Assembly Removal, Remove the core assembly: шаг 7, изображение 1 из 3 Core Assembly Removal, Remove the core assembly: шаг 7, изображение 2 из 3 Core Assembly Removal, Remove the core assembly: шаг 7, изображение 3 из 3
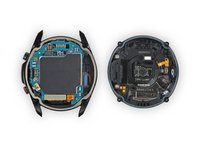
    • Carefully thread the display flex cable through the gap on the core's plastic frame.

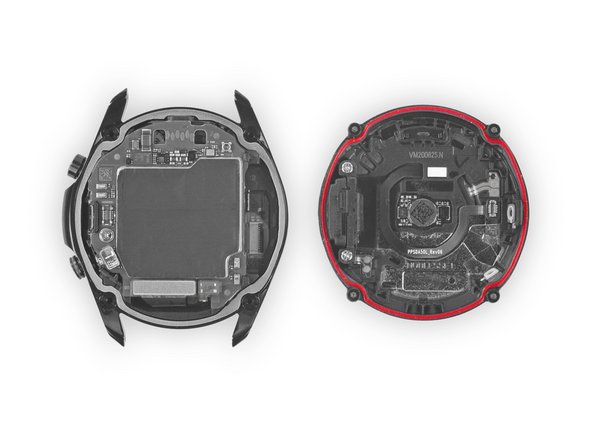
    • Remove the core assembly.

Заключение

To reassemble your device, follow these instructions in reverse order.

Tobias Isakeit

Участник с: 03/31/14

117 851 Репутация

Автор 188 руководств

Команда

Tobias Isakeit - Repairability Engineer Участник Tobias Isakeit - Repairability Engineer

Business

1 член

Автор 1 083 руководств

0 Комментариев

Добавить комментарий

Просмотр статистики:

За последние 24часов: 0

За последние 7 дней: 2

За последние 30 дней: 18

За всё время: 958