Перейти к основному содержанию
Присоединяйся к сообществу ремонтников - Создай аккаунт

Daisy Model 10 Carbine Firing Mechanism Spring Replacement

Выберете то, что вам нужно

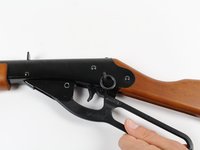
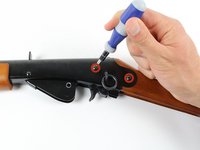
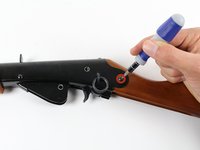
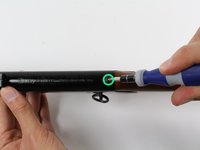
  1. Daisy Model 10 Carbine Firing Mechanism Spring Replacement, Removing Screws: шаг 1, изображение 1 из 3 Daisy Model 10 Carbine Firing Mechanism Spring Replacement, Removing Screws: шаг 1, изображение 2 из 3 Daisy Model 10 Carbine Firing Mechanism Spring Replacement, Removing Screws: шаг 1, изображение 3 из 3
    • Make sure the safety is on!

    • Place the carbine with the saddle ring and leather thong facing upwards.

    • Locate the screw head on the cocking lever.

    • There should be one on either side of the saddle ring and one on the cocking lever assembly.

    • Place a #2 Phillips Screwdriver in the 11/16ths of an inch, matte black screw on the cocking lever assembly. Twist with a counter-clockwise motion.

    • Completely remove the screws.

    • Be wary of the black washers on the other side of the Carbine. Be sure to keep track of them once they fall out after the screws are removed

    Спросите у FixBot
  2. Daisy Model 10 Carbine Firing Mechanism Spring Replacement, Removing the Lever: шаг 2, изображение 1 из 2 Daisy Model 10 Carbine Firing Mechanism Spring Replacement, Removing the Lever: шаг 2, изображение 2 из 2
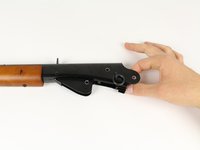
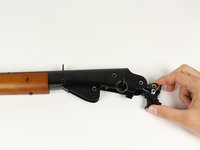
    • Remove the cocking lever by placing your dominant hand’s fingers through the cocking lever handle.

    • With your fingers in the handle, slide the lever towards the butt of the carbine.

    • Finally, pull the cocking lever and carbine in opposite directions to replace the cocking lever.

    Спросите у FixBot
  3. Daisy Model 10 Carbine Firing Mechanism Spring Replacement, Removing Side Screws: шаг 3, изображение 1 из 2 Daisy Model 10 Carbine Firing Mechanism Spring Replacement, Removing Side Screws: шаг 3, изображение 2 из 2
    • Once the cocking lever is removed, place the carbine with the saddle ring facing upwards.

    • Locate the screws on either side of the saddle ring.

    • Using a #2 Phillips Screwdriver, twist in a counter-clockwise motion.

    • Completely remove the two screws.

    • Be wary of the two washers on the other side of the Carbine. Be sure to keep track of them once they fall out after the screws are removed

    Спросите у FixBot
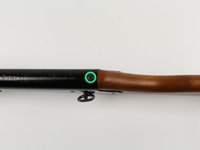
  4. Daisy Model 10 Carbine Firing Mechanism Spring Replacement, Removing Top Screw: шаг 4, изображение 1 из 2 Daisy Model 10 Carbine Firing Mechanism Spring Replacement, Removing Top Screw: шаг 4, изображение 2 из 2
    • Now rotate your carbine so the top of the carbine is visible.

    • Locate the screw located above the saddle ring where the black metal meets the wooden butt.

    • Using the same #2 Phillips Screwdriver, twist in a counter-clockwise motion.

    • Completely remove the screw.

    • Be wary that this screw is a different length, and that there is no washer attached to it.

    Спросите у FixBot
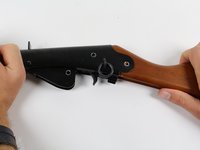
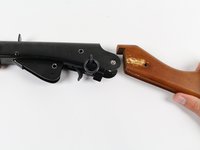
  5. Daisy Model 10 Carbine Firing Mechanism Spring Replacement, Removing the Butt: шаг 5, изображение 1 из 2 Daisy Model 10 Carbine Firing Mechanism Spring Replacement, Removing the Butt: шаг 5, изображение 2 из 2
    • Place your dominant hand on the wooden butt and your other hand on the metal barrel.

    • Slide the butt away from the Carbine until it is free of the metal tongs.

    • The butt will not slide out quickly. The metal tongs grip the butt so that it is a tight fit.

    Спросите у FixBot
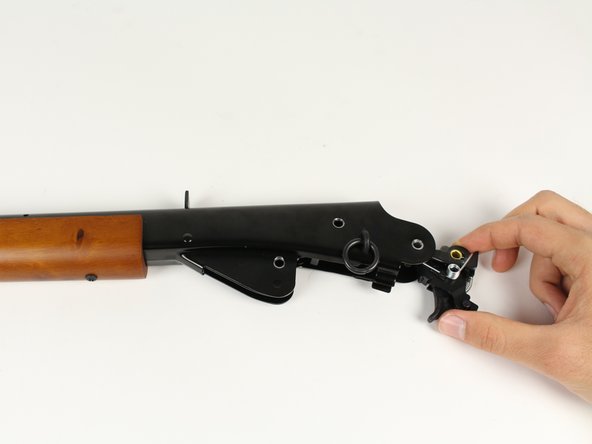
  6. Daisy Model 10 Carbine Firing Mechanism Spring Replacement, Remove the Firing Mechanism: шаг 6, изображение 1 из 3 Daisy Model 10 Carbine Firing Mechanism Spring Replacement, Remove the Firing Mechanism: шаг 6, изображение 2 из 3 Daisy Model 10 Carbine Firing Mechanism Spring Replacement, Remove the Firing Mechanism: шаг 6, изображение 3 из 3
    • Wiggling the firing mechanism and pull it out of the back opening of the carbine.

    • There is oil on the firing mechanism and it may be slippery.

    • The firing mechanism may take some maneuvering and time to get out of the gun.

    Спросите у FixBot
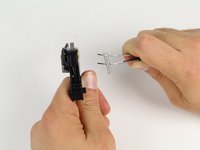
  7. Daisy Model 10 Carbine Firing Mechanism Spring Replacement, Removing the Damaged Spring: шаг 7, изображение 1 из 2 Daisy Model 10 Carbine Firing Mechanism Spring Replacement, Removing the Damaged Spring: шаг 7, изображение 2 из 2
    Инструмент, используемый на этом этапе:
    Tweezers
    $4.99
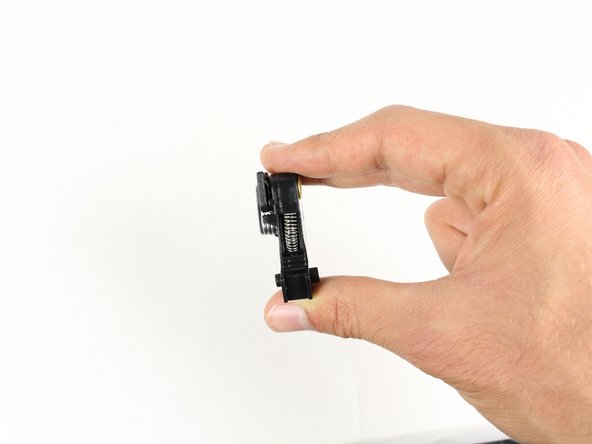
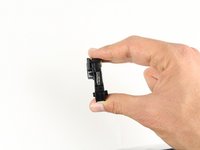
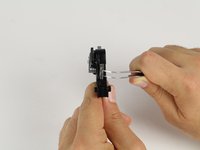
    • Hold the firing mechanism so that the trigger is pointed away from you.

    • Locate the damaged spring attached to the firing mechanism.

    • Locate your tweezers and place one tong near the top of the spring.

    • Place the other tong of the tweezers towards the bottom of the spring.

    • Push your tweezers into the spring about a centimeter, allowing the tweezers to penetrate the spring slightly.

    • Push the tweezers together, compressing the spring, until the spring is free from the firing mechanism.

    • The spring can potentially fly out if not removed carefully!

    • The spring is small and can easily be lost.

    Спросите у FixBot
Заключение

To reassemble your device, follow these instructions in reverse order.

Еще один человек закончил это руководство.

Trelawney Bullis

Участник с: 10/12/14

488 Репутация

Автор 3 руководств

0 Комментарии к руководству

Добавить комментарий

Статистика просмотров:

За последние 24 часов: 1

За последние 7 дней: 11

За последние 30 дней: 45

За всё время: 1,559