Введение
If a damaged wire is causing electrical supply issues to a device, component or applience, use this guide to replace the damaged section of the wire.
Many electronic devices use wires as a means of transferring electrical power to an appliance enableing it to work. However, wires can be worn down over time. A severed wire will cut off electrial supply to the wire itself. Exposed wires can cause injury due to electrical shock, fire or electricution.
Before using this guide, confirm that the damaged wire is the problem. Begin by determining if the device/applience is recieving any power at all. After unplugging/disconnecting the wire, throughly inspect it for any inconsistancies or suspected problem areas that could be causing issues.
Step 3 involves the task of stripping wires while steps 4-7 also require the use of heat shrink tubing. Be sure to familiarise yourself with these techniques beforehand.
Note: In these guide the cable is not soldered. An additional soldered connection can increase safety.
Before starting, it is important to make sure that the wire you will be conducting the repair on is unpluged/unconnected so that no electrical current will be running through it.
Выберете то, что вам нужно
-
-
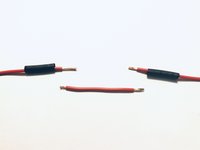
Using pliers, trim away the damaged portion of the wire.
-
You should be left with two neatly trimmed wire ends.
-
-
-
Cut a new replacement section of wire. This section will be connected between the two wires in the previous step.
-
-
-
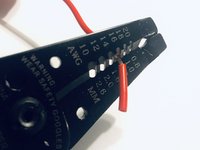
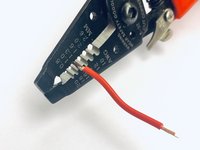
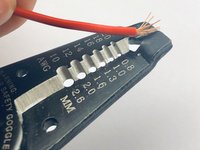
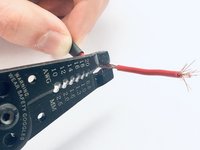
Using the wire strippers, strip roughly the first 1-2cm of wire insulation on each end.
-
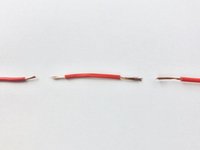
The result should look as illustrated in the third picture.
-
-
-
-
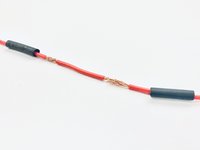
Slide a piece heat shrink tubing onto both ends of the main wires.
-
-
-
Using pliers, slightly fray the ends of each of the exposed wires.
-
-
-
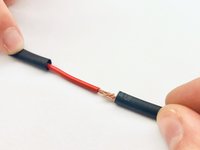
Using the pliers, connect each of the wire segments by intertwining and twisting them together.
-
Once done, lightly crimp each of the connections with the pliers.
-
-
-
Slide the heat shrink tubing over the exposed wires.
-
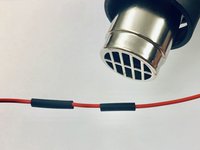
Using the heat gun, slowly go back and forth over the shrink wrap, allowing for even heat distribution and the wrap to close.
-
-
-
Throughly check for any exposed wires and the heat shrink tubing is tight around the wire.
-


After inspecting the replaced section, the repair is complete and the wire is ready to be tested.
Отменить: Я не выполнил это руководство.
46 человек успешно провели ремонт по этому руководству.
6 Комментарии к руководству
Muito ruim!!
Heat shrink is for strain relief - not joining cables. I'd suggest solder sleeves. You'd need a heat gun either way, but this method solders the connection and provides an environmental shield on both ends.
The wires really should be soldered together before putting the heat shrink over the connection. A connection made with this guide could rather easily be broken with a slight pull on the cable. In the worst case, it could cause an electric shock to the user.
Bonjour,
Vous pouvez aussi souder les deux câbles ensemble avant de mettre la gaine thermo en utilisant des connecteurs auto-soudeur que vous pouvez retrouver en cliquant ici.
Merci
何必多間中間那一段 只需要將毀損的部位修平 再將兩頭末端連接即可 多那段有點多餘