Перейти к основному содержанию
Присоединяйся к сообществу ремонтников - Создай аккаунт

Dell Inspiron 11-3152 Screen Replacement

Выберете то, что вам нужно

    1. Dell Inspiron 11-3152 Screen Replacement, Back Panel: шаг 1, изображение 1 из 2 Dell Inspiron 11-3152 Screen Replacement, Back Panel: шаг 1, изображение 2 из 2
      • Flip the computer over.

      Спросите у FixBot

      Добавить комментарий

    2. Dell Inspiron 11-3152 Screen Replacement: шаг 2, изображение 1 из 2 Dell Inspiron 11-3152 Screen Replacement: шаг 2, изображение 2 из 2
      • Remove all nine 5mm Phillips head screws from the back cover using #0 Phillips head.

      Спросите у FixBot

      Добавить комментарий

    3. Dell Inspiron 11-3152 Screen Replacement: шаг 3, изображение 1 из 1
      • Gently use a spudger to pull the cover away from the rest of the laptop. The cover will come off after you use the tool on two or three sides.

      Спросите у FixBot

      Добавить комментарий

    1. Dell Inspiron 11-3152 Screen Replacement, Battery: шаг 4, изображение 1 из 1
      • Make sure that the power is off.

      • After taking off the back panel, you will see the battery located at the bottom of the computer system. It's black and is clearly labeled "dell battery".

      Спросите у FixBot

      Добавить комментарий

    2. Dell Inspiron 11-3152 Screen Replacement: шаг 5, изображение 1 из 2 Dell Inspiron 11-3152 Screen Replacement: шаг 5, изображение 2 из 2
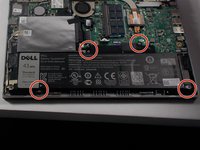
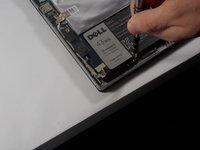
      • Locate the battery at the bottom of the computer and remove the four 3mm screws with a Phillips #0 head that hold the battery down.

      Спросите у FixBot

      Добавить комментарий

    3. Dell Inspiron 11-3152 Screen Replacement: шаг 6, изображение 1 из 1
      • Remove the Solid State Drive wire from the battery clip by detaching the wire.

      • This can be done by gently pulling the connector away from the battery clip.

      Спросите у FixBot

      Добавить комментарий

    4. Dell Inspiron 11-3152 Screen Replacement: шаг 7, изображение 1 из 1
      • Remove the battery from the computer system by gently lifting it from the side.

      Спросите у FixBot

      Добавить комментарий

    1. Dell Inspiron 11-3152 Screen Replacement, Screen: шаг 8, изображение 1 из 1
      • Unscrew the brackets in the top right and top left of the laptop. Unscrew the two 1mm screw from both of the brackets on both sides with #0 phillips head.

      Спросите у FixBot

      Добавить комментарий

    2. Dell Inspiron 11-3152 Screen Replacement: шаг 9, изображение 1 из 1
      • Disconnect the aerial cables from the wireless controller by pulling them away from the laptop.

      Спросите у FixBot

      Добавить комментарий

    3. Dell Inspiron 11-3152 Screen Replacement: шаг 10, изображение 1 из 1
      • Push the brackets up on both sides with your hands or spudger.

      Спросите у FixBot

      Добавить комментарий

    4. Dell Inspiron 11-3152 Screen Replacement: шаг 11, изображение 1 из 2 Dell Inspiron 11-3152 Screen Replacement: шаг 11, изображение 2 из 2
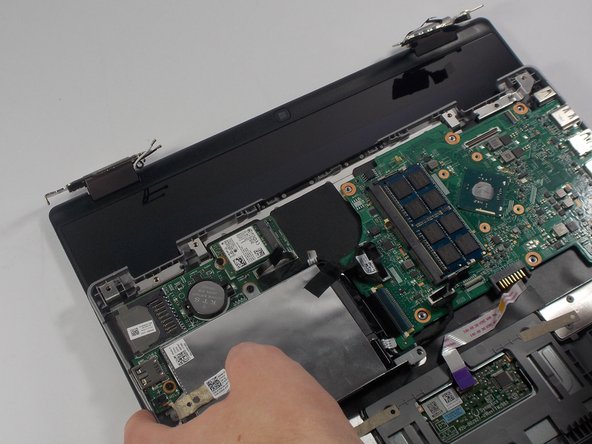
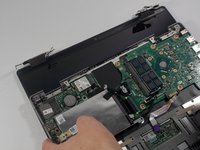
      • At this point you can pull the bottom half of the computer away from the screen.

      • The screen is now fully detached and ready to be replaced!

      Спросите у FixBot

      Добавить комментарий

Заключение

To reassemble your device, follow these instructions in reverse order.

Отменить: Я не выполнил это руководство.

Еще один человек закончил это руководство.

Matthew Duncan

Участник с: 03/10/16

481 Репутация

Автор 4 руководств

Команда

UMass Dartmouth, Team 4-6, Catania Spring 2016 Участник UMass Dartmouth, Team 4-6, Catania Spring 2016

UMASSD-CATANIA-S16S4G6

3 членов

Автор 49 руководств

0 Комментарии к руководству

Добавить комментарий

Статистика просмотров:

За последние 24 часов: 1

За последние 7 дней: 5

За последние 30 дней: 16

За всё время: 772