Перейти к основному содержанию
Присоединяйся к сообществу ремонтников - Создай аккаунт

Dell Inspiron 1526 Keyboard Replacement

Выберете то, что вам нужно

    1. Dell Inspiron 1526 Keyboard Replacement, Battery: шаг 1, изображение 1 из 3 Dell Inspiron 1526 Keyboard Replacement, Battery: шаг 1, изображение 2 из 3 Dell Inspiron 1526 Keyboard Replacement, Battery: шаг 1, изображение 3 из 3
      • Slide the unlock button to the left to release the battery.

      • Slide the battery away from the laptop to remove.

      • The unlock button is located on the bottom of the laptop.

      Спросите у FixBot

      Добавить комментарий

    1. Dell Inspiron 1526 Keyboard Replacement, Keyboard: шаг 2, изображение 1 из 1
      • Loosen the two 3.5mm Phillips #1 screws in the battery bay.

      Спросите у FixBot

      Добавить комментарий

    2. Dell Inspiron 1526 Keyboard Replacement: шаг 3, изображение 1 из 1
      • Flip the laptop over.

      • Lift the control cover by prying the right side of the cover with an iFixit opening tool.

      Спросите у FixBot

      Добавить комментарий

    3. Dell Inspiron 1526 Keyboard Replacement: шаг 4, изображение 1 из 1
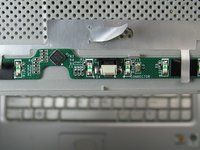
      • Carefully lift the control cover up and forward to reveal a single ribbon cable.

      Спросите у FixBot

      Добавить комментарий

    4. Dell Inspiron 1526 Keyboard Replacement: шаг 5, изображение 1 из 1
      Инструмент, используемый на этом этапе:
      Tweezers
      $4.99
      • Use tweezers to squeeze the tabs on the connector and remove the ribbon cable.

      Спросите у FixBot

      Добавить комментарий

    5. Dell Inspiron 1526 Keyboard Replacement: шаг 6, изображение 1 из 2 Dell Inspiron 1526 Keyboard Replacement: шаг 6, изображение 2 из 2
      • Remove the control cover.

      Спросите у FixBot

      Добавить комментарий

    6. Dell Inspiron 1526 Keyboard Replacement: шаг 7, изображение 1 из 1
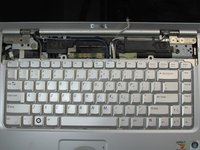
      • Remove the two 3mm Phillips #1 screws at the top of the keyboard where the control cover was.

      Спросите у FixBot

      Добавить комментарий

    7. Dell Inspiron 1526 Keyboard Replacement: шаг 8, изображение 1 из 1
      • Lift the keyboard gently from the top, but do not remove completely.

      • Looking under the keyboard, towards the touch-pad in the center, lift up the black tab on the connector with tweezers for the keyboard ribbon cable.

      Спросите у FixBot

      Добавить комментарий

    8. Dell Inspiron 1526 Keyboard Replacement: шаг 9, изображение 1 из 2 Dell Inspiron 1526 Keyboard Replacement: шаг 9, изображение 2 из 2
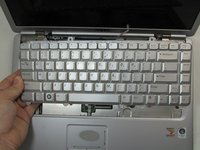
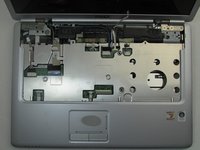
      • Remove the keyboard.

      Спросите у FixBot

      Добавить комментарий

Заключение

To reassemble your device, follow these instructions in reverse order.

Отменить: Я не выполнил это руководство.

Joshua Busick

Участник с: 09/17/19

291 Репутация

Автор 2 руководств

Команда

0 Комментарии к руководству

Добавить комментарий

Статистика просмотров:

За последние 24 часов: 4

За последние 7 дней: 13

За последние 30 дней: 34

За всё время: 451