Перейти к основному содержанию
Присоединяйся к сообществу ремонтников - Создай аккаунт

Dell Inspiron 600m LCD Replacement

Выберете то, что вам нужно

    1. Dell Inspiron 600m LCD Replacement, Battery: шаг 1, изображение 1 из 3 Dell Inspiron 600m LCD Replacement, Battery: шаг 1, изображение 2 из 3 Dell Inspiron 600m LCD Replacement, Battery: шаг 1, изображение 3 из 3
      • Flip laptop upside down and locate the battery as shown in the images.

      • Push in the tab on the battery and lift up. The battery should detach very easily.

      Спросите у FixBot

      Добавить комментарий

    1. Dell Inspiron 600m LCD Replacement, LCD: шаг 2, изображение 1 из 2 Dell Inspiron 600m LCD Replacement, LCD: шаг 2, изображение 2 из 2
      • Using fingernails or a spudger, push any direction on the rubber dots to remove them from the plastic cover.

      • Underneath each rubber dot will be a screw. Remove these screws with the Phillips #00 screwdriver.

      Спросите у FixBot

      Добавить комментарий

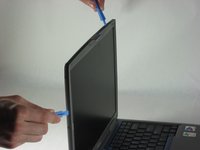
    2. Dell Inspiron 600m LCD Replacement: шаг 3, изображение 1 из 2 Dell Inspiron 600m LCD Replacement: шаг 3, изображение 2 из 2
      • Use the IFixit Opening Tool to un-clip the plastic cover, detaching it from the rest of the screen.

      • There are clips about every inch around the right, left, and top of the plastic cover. Be sure that all of them are unclipped.

      Спросите у FixBot

      Добавить комментарий

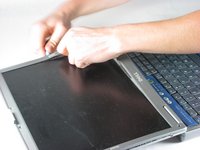
    3. Dell Inspiron 600m LCD Replacement: шаг 4, изображение 1 из 1
      • Pull straight up on the cover to lift the cover off of the rest of the screen.

      • The bottom part of the plastic is a little sticky.

      Спросите у FixBot

      Добавить комментарий

    4. Dell Inspiron 600m LCD Replacement: шаг 5, изображение 1 из 1
      • Remove four screws (two on each side of the screen) with the Phillips #00 screwdriver.

      • The middle screw does not need to be removed.

      Спросите у FixBot

      Добавить комментарий

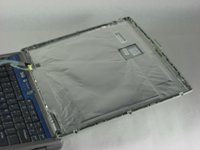
    5. Dell Inspiron 600m LCD Replacement: шаг 6, изображение 1 из 1
      • Gently lift the LCD panel off of the base.

      • The LCD is still attached to the computer. Do not pull too hard or you could break the cable.

      Спросите у FixBot

      Добавить комментарий

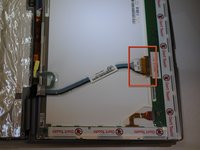
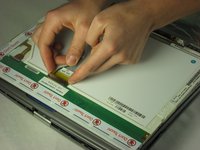
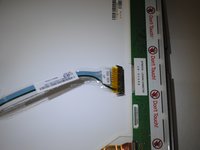
    6. Dell Inspiron 600m LCD Replacement: шаг 7, изображение 1 из 3 Dell Inspiron 600m LCD Replacement: шаг 7, изображение 2 из 3 Dell Inspiron 600m LCD Replacement: шаг 7, изображение 3 из 3
      • Flip the LCD panel over.

      • Do not touch on or near the back of the panel where it says "Don't Touch." LCD panels contain mercury which is hazardous to humans.

      • Remove the cable by squeezing each side of the connector and gently pulling straight out.

      Спросите у FixBot

      Добавить комментарий

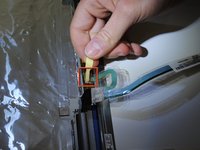
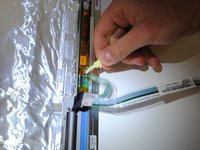
    7. Dell Inspiron 600m LCD Replacement: шаг 8, изображение 1 из 3 Dell Inspiron 600m LCD Replacement: шаг 8, изображение 2 из 3 Dell Inspiron 600m LCD Replacement: шаг 8, изображение 3 из 3
      • Remove the cable at the base of the laptop by pulling up on the yellow tab attached to the cable.

      Спросите у FixBot

      Добавить комментарий

Заключение

To reassemble your device, follow these instructions in reverse order.

Отменить: Я не выполнил это руководство.

4 человек успешно провели ремонт по этому руководству.

Alex Klimaj

Участник с: 04/01/11

143 Репутация

1 руководство автора

Команда

Cal Poly, Team 10-40, Forte Spring 2011 Участник Cal Poly, Team 10-40, Forte Spring 2011

CPSU-FORTE-S11S10G40

5 членов

Автор 53 руководств

0 Комментарии к руководству

Добавить комментарий

Статистика просмотров:

За последние 24 часов: 6

За последние 7 дней: 14

За последние 30 дней: 58

За всё время: 7,391