Перейти к основному содержанию
Присоединяйся к сообществу ремонтников - Создай аккаунт

Dell Inspiron 7568 Display Assembly Replacement Guide

Выберете то, что вам нужно

    1. Dell Inspiron 7568 Display Assembly Replacement Guide, Battery: шаг 1, изображение 1 из 2 Dell Inspiron 7568 Display Assembly Replacement Guide, Battery: шаг 1, изображение 2 из 2
      • Remove the ten 7mm Phillips #1 screws on the bottom cover.

      • Remove the bottom cover.

      Спросите у FixBot

      Добавить комментарий

    2. Dell Inspiron 7568 Display Assembly Replacement Guide: шаг 2, изображение 1 из 2 Dell Inspiron 7568 Display Assembly Replacement Guide: шаг 2, изображение 2 из 2
      • Remove the four 3mm Phillips #1 screws holding the battery.

      • Unhinge the connector cable to the battery.

      • Remove the battery.

      Спросите у FixBot

      Добавить комментарий

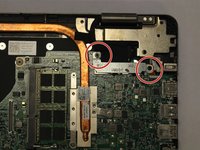
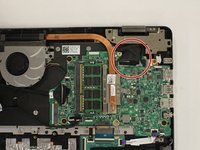
    1. Dell Inspiron 7568 Display Assembly Replacement Guide, Display Assembly: шаг 3, изображение 1 из 2 Dell Inspiron 7568 Display Assembly Replacement Guide, Display Assembly: шаг 3, изображение 2 из 2
      • Unscrew & remove the two 3mm screws (using a ph1 screwdriver bit) and the cable bracket, above the motherboard

      • Doing this will allow one to access the LCD-motherboard connector cables.

      Спросите у FixBot

      Добавить комментарий

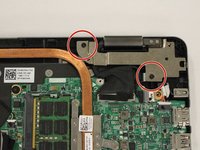
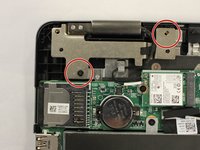
    2. Dell Inspiron 7568 Display Assembly Replacement Guide: шаг 4, изображение 1 из 2 Dell Inspiron 7568 Display Assembly Replacement Guide: шаг 4, изображение 2 из 2
      • Unscrew the 7mm screws that secure the left and right hinges (using a ph1 screwdriver bit).

      Спросите у FixBot

      Добавить комментарий

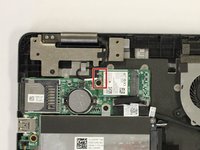
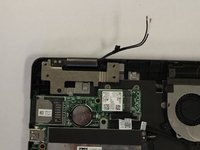
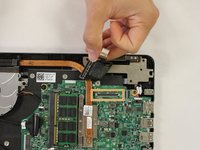
    3. Dell Inspiron 7568 Display Assembly Replacement Guide: шаг 5, изображение 1 из 3 Dell Inspiron 7568 Display Assembly Replacement Guide: шаг 5, изображение 2 из 3 Dell Inspiron 7568 Display Assembly Replacement Guide: шаг 5, изображение 3 из 3
      • Disconnect the antenna cable (under the left hinge)

      • Disconnect the LCD and Touchscreen display cables under the right hinge.

      • These are a set of two cables. For better image see image two in step one of this guide.

      Спросите у FixBot

      Добавить комментарий

    4. Dell Inspiron 7568 Display Assembly Replacement Guide: шаг 6, изображение 1 из 1
      • Carefully separate the screen from the bottom half of the device.

      Спросите у FixBot

      Добавить комментарий

Заключение

To reassemble your device, follow these instructions in reverse order.

Отменить: Я не выполнил это руководство.

2 человек успешно провели ремонт по этому руководству.

Yash Samant

Участник с: 02/22/17

406 Репутация

Автор 3 руководств

Команда

USF Tampa, Team S2-G2, Lacy Spring 2017 Участник USF Tampa, Team S2-G2, Lacy Spring 2017

USFT-LACY-S17S2G2

4 членов

Автор 45 руководств

0 Комментарии к руководству

Добавить комментарий

Статистика просмотров:

За последние 24 часов: 1

За последние 7 дней: 12

За последние 30 дней: 36

За всё время: 1,311