Перейти к основному содержанию
Присоединяйся к сообществу ремонтников - Создай аккаунт

Dell Inspiron N5030 RAM Replacement

Выберете то, что вам нужно

    1. Dell Inspiron N5030 RAM Replacement, Battery: шаг 1, изображение 1 из 2 Dell Inspiron N5030 RAM Replacement, Battery: шаг 1, изображение 2 из 2
      • Turn the computer over on its back so the battery compartment faces towards you.

      • Place your fingers on the small buttons with arrows pointing outwards.

      • Push and slide the buttons outward to unlock the battery compartment.

      Спросите у FixBot

      Добавить комментарий

    2. Dell Inspiron N5030 RAM Replacement: шаг 2, изображение 1 из 2 Dell Inspiron N5030 RAM Replacement: шаг 2, изображение 2 из 2
      • Grab the battery and pull it towards yourself.

      • Remove the battery.

      Спросите у FixBot

      Добавить комментарий

    1. Dell Inspiron N5030 RAM Replacement, Keyboard: шаг 3, изображение 1 из 1
      • Use a Phillips #0 screwdriver to unscrew the sixteen 0.6 mm screws on the back panel.

      Спросите у FixBot

      Добавить комментарий

    2. Dell Inspiron N5030 RAM Replacement: шаг 4, изображение 1 из 1
      • Flip over the laptop and open it so that the screen faces you.

      Спросите у FixBot

      Добавить комментарий

    3. Dell Inspiron N5030 RAM Replacement: шаг 5, изображение 1 из 1
      • Use the plastic opening tool and your fingers to pry off the top panel.

      • Pry the panel off starting at any one of the corners and then continue around the edges of the computer.

      Спросите у FixBot

      Добавить комментарий

    4. Dell Inspiron N5030 RAM Replacement: шаг 6, изображение 1 из 1
      • Be careful when lifting off the keyboard panel. There are multiple delicate cables connecting the panel to the motherboard.

      • Pull up on the blue plastic tab connected by the white strip to unhook the keyboard panel from the motherboard.

      Спросите у FixBot

      Добавить комментарий

    5. Dell Inspiron N5030 RAM Replacement: шаг 7, изображение 1 из 1
      • Flip up the small locking flap on the keyboard cable ZIF socket and disconnect the keyboard ribbon cable.

      Спросите у FixBot

      Добавить комментарий

    6. Dell Inspiron N5030 RAM Replacement: шаг 8, изображение 1 из 1
      • Pull up on the wire tab with the blue, white, black, and red wires to detach the speakers from the motherboard.

      Спросите у FixBot

      Добавить комментарий

    7. Dell Inspiron N5030 RAM Replacement: шаг 9, изображение 1 из 1
      • Remove the top keyboard panel.

      Спросите у FixBot

      Добавить комментарий

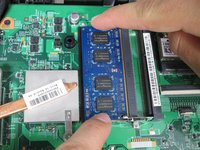
    1. Dell Inspiron N5030 RAM Replacement, RAM: шаг 10, изображение 1 из 1
      • Place your fingers on the two metal tabs on the edges of the RAM.

      • Push on the tabs in the opposite direction.

      • The top RAM board will pop up after you push on the metal tabs.

      Спросите у FixBot

      Добавить комментарий

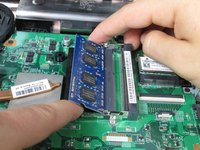
    2. Dell Inspiron N5030 RAM Replacement: шаг 11, изображение 1 из 1
      • Pull the top RAM board out with your fingers.

      Спросите у FixBot

      Добавить комментарий

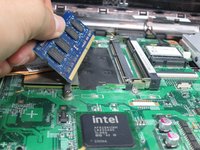
    3. Dell Inspiron N5030 RAM Replacement: шаг 12, изображение 1 из 3 Dell Inspiron N5030 RAM Replacement: шаг 12, изображение 2 из 3 Dell Inspiron N5030 RAM Replacement: шаг 12, изображение 3 из 3
      • Repeat the above RAM board steps for the second RAM board.

      Спросите у FixBot

      Добавить комментарий

Заключение

To reassemble your device, follow these instructions in reverse order.

Отменить: Я не выполнил это руководство.

5 человек успешно провели ремонт по этому руководству.

Rodrigo Perez

Участник с: 04/23/14

230 Репутация

1 руководство автора

Команда

Cal Poly, Team 10-59, Amido Spring 2014 Участник Cal Poly, Team 10-59, Amido Spring 2014

CPSU-AMIDO-S14S10G59

4 членов

Автор 20 руководств

3 Комментарии к руководству

Looking at the Dell service manual. You dont need to remove any screws, but only the keyboard, and if your careful you dont need to remove the ribbon cable. Its all in the service manual you can download free from Dell.

swestonj - Ответить Поделиться

swestonj is incorrect. The manual clearly states that you must remove the screws:

Service Manual

Removing the Keyboard

1. Follow the instructions in Before You Begin.

2. Remove the battery (see Removing the Battery).

3. Remove the two screws that secure the keyboard to the computer base.

etc.

mike - Ответить Поделиться

зависит от целей. озу можно поменять не разбирая всё. а вот пзу придется все разобрать. я так и не понял сьёмный тут проц или припаян. вроде есть защелка

артемий Александровна троицкий - Ответить Поделиться

Добавить комментарий

Статистика просмотров:

За последние 24 часов: 2

За последние 7 дней: 10

За последние 30 дней: 37

За всё время: 6,101