Перейти к основному содержанию
Присоединяйся к сообществу ремонтников - Создай аккаунт

Dell Latitude D620 CD Drive Replacement

Выберете то, что вам нужно

    1. Dell Latitude D620 CD Drive Replacement, Keyboard: шаг 1, изображение 1 из 1
      • Power down the laptop and remove the battery.

      • Open the laptop cover all of the way.

      Спросите у FixBot

      Добавить комментарий

    2. Dell Latitude D620 CD Drive Replacement: шаг 2, изображение 1 из 3 Dell Latitude D620 CD Drive Replacement: шаг 2, изображение 2 из 3 Dell Latitude D620 CD Drive Replacement: шаг 2, изображение 3 из 3
      • Locate the notch under the cover at the top of the keyboard

      • Using the spudger as a lever, lift the plastic covering

      • Carefully remove the rest of the covering from right to left

      Спросите у FixBot
      Добавить комментарий

    3. Dell Latitude D620 CD Drive Replacement: шаг 3, изображение 1 из 1
      • Unscrew the top portion of the keyboard using a #00 screwdriver

      Спросите у FixBot

      Добавить комментарий

    4. Dell Latitude D620 CD Drive Replacement: шаг 4, изображение 1 из 1
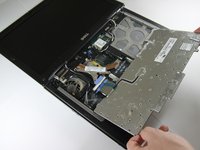
      • Hold keyboard from the top and gently pull towards the LCD screen to remove the keyboard from the case

      • Don't pull on the keyboard too forcefully because it is attached to the motherboard with a short, thin ribbon cable

      Спросите у FixBot

      Добавить комментарий

    5. Dell Latitude D620 CD Drive Replacement: шаг 5, изображение 1 из 2 Dell Latitude D620 CD Drive Replacement: шаг 5, изображение 2 из 2
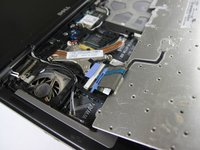
      • Once keyboard is out of the case, lay it face-down on the track pad

      Спросите у FixBot

      Добавить комментарий

    6. Dell Latitude D620 CD Drive Replacement: шаг 6, изображение 1 из 2 Dell Latitude D620 CD Drive Replacement: шаг 6, изображение 2 из 2
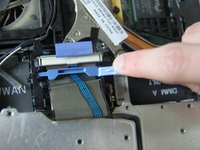
      • Using a small spudger, pull back on the black bar to release the blue lever

      Спросите у FixBot

      Добавить комментарий

    7. Dell Latitude D620 CD Drive Replacement: шаг 7, изображение 1 из 1
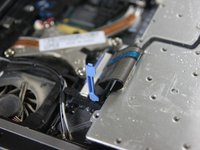
      • Pull up on the metal bar connected to the socket to detach the ribbon cable

      Спросите у FixBot

      Добавить комментарий

    1. Dell Latitude D620 CD Drive Replacement, CD Drive: шаг 8, изображение 1 из 2 Dell Latitude D620 CD Drive Replacement, CD Drive: шаг 8, изображение 2 из 2
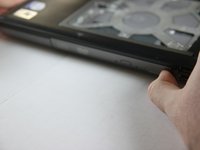
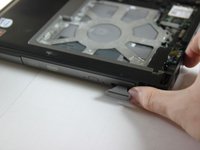
      • Press in the tab on the bottom right side of the CD drive

      • The tab comes out on its own; there is no need to pull it out manually.

      Спросите у FixBot

      Добавить комментарий

    2. Dell Latitude D620 CD Drive Replacement: шаг 9, изображение 1 из 1
      • Gently pull the tab to remove the disk tray.

      Спросите у FixBot

      Добавить комментарий

Заключение

To reassemble your device, follow these instructions in reverse order.

Отменить: Я не выполнил это руководство.

10 человек успешно провели ремонт по этому руководству.

Ivan

Участник с: 04/15/10

203 Репутация

1 руководство автора

Команда

Cal Poly, Team 24-35, Regan Spring 2010 Участник Cal Poly, Team 24-35, Regan Spring 2010

CPSU-REGAN-S10S24G35

4 членов

Автор 36 руководств

0 Комментарии к руководству

Добавить комментарий

Статистика просмотров:

За последние 24 часов: 2

За последние 7 дней: 11

За последние 30 дней: 62

За всё время: 9,068