Перейти к основному содержанию
Присоединяйся к сообществу ремонтников - Создай аккаунт

Dell Latitude D620 RAM Replacement

Выберете то, что вам нужно

    1. Dell Latitude D620 RAM Replacement, Keyboard: шаг 1, изображение 1 из 1
      • Power down the laptop and remove the battery.

      • Open the laptop cover all of the way.

      Спросите у FixBot

      Добавить комментарий

    2. Dell Latitude D620 RAM Replacement: шаг 2, изображение 1 из 3 Dell Latitude D620 RAM Replacement: шаг 2, изображение 2 из 3 Dell Latitude D620 RAM Replacement: шаг 2, изображение 3 из 3
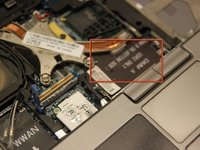
      • Locate the notch under the cover at the top of the keyboard

      • Using the spudger as a lever, lift the plastic covering

      • Carefully remove the rest of the covering from right to left

      Спросите у FixBot
      Добавить комментарий

    3. Dell Latitude D620 RAM Replacement: шаг 3, изображение 1 из 1
      • Unscrew the top portion of the keyboard using a #00 screwdriver

      Спросите у FixBot

      Добавить комментарий

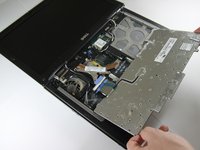
    4. Dell Latitude D620 RAM Replacement: шаг 4, изображение 1 из 1
      • Hold keyboard from the top and gently pull towards the LCD screen to remove the keyboard from the case

      • Don't pull on the keyboard too forcefully because it is attached to the motherboard with a short, thin ribbon cable

      Спросите у FixBot

      Добавить комментарий

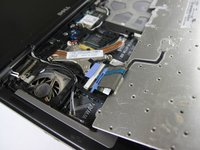
    5. Dell Latitude D620 RAM Replacement: шаг 5, изображение 1 из 2 Dell Latitude D620 RAM Replacement: шаг 5, изображение 2 из 2
      • Once keyboard is out of the case, lay it face-down on the track pad

      Спросите у FixBot
      Добавить комментарий

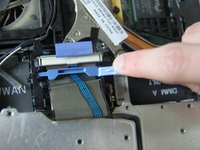
    6. Dell Latitude D620 RAM Replacement: шаг 6, изображение 1 из 2 Dell Latitude D620 RAM Replacement: шаг 6, изображение 2 из 2
      • Using a small spudger, pull back on the black bar to release the blue lever

      Спросите у FixBot
      Добавить комментарий

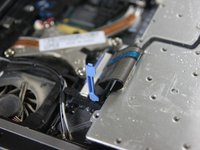
    7. Dell Latitude D620 RAM Replacement: шаг 7, изображение 1 из 1
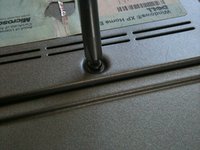
      • Pull up on the metal bar connected to the socket to detach the ribbon cable

      Спросите у FixBot
      Добавить комментарий

    1. Dell Latitude D620 RAM Replacement, RAM: шаг 8, изображение 1 из 2 Dell Latitude D620 RAM Replacement, RAM: шаг 8, изображение 2 из 2
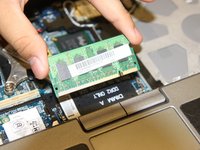
      • With the keyboard removed, you should be able to see ram slot A.

      • Place new ram into the slot making sure it is aligned

      Спросите у FixBot

      Добавить комментарий

    2. Dell Latitude D620 RAM Replacement: шаг 9, изображение 1 из 1
      • Replace the keyboard by following the previous steps in reverse

      • Close the laptop, and flip it over onto its backside

      Спросите у FixBot

      Добавить комментарий

    3. Dell Latitude D620 RAM Replacement: шаг 10, изображение 1 из 2 Dell Latitude D620 RAM Replacement: шаг 10, изображение 2 из 2
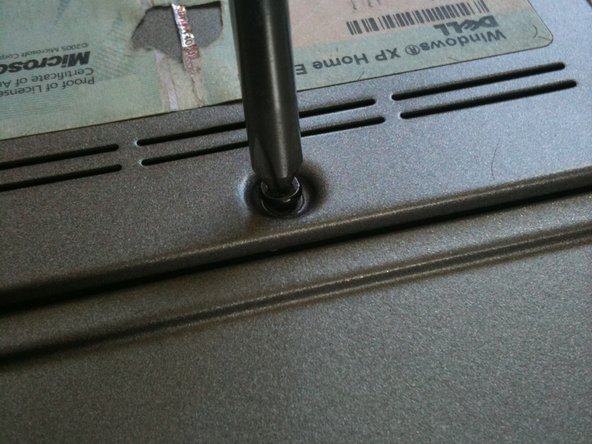
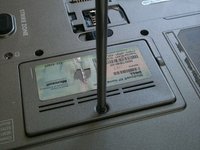
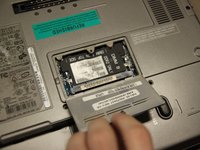
      • Loosen the screw that holds the RAM cover in place.

      • The screw cannot be fully removed since it is attached to the RAM cover.

      Спросите у FixBot
      Добавить комментарий

    4. Dell Latitude D620 RAM Replacement: шаг 11, изображение 1 из 2 Dell Latitude D620 RAM Replacement: шаг 11, изображение 2 из 2
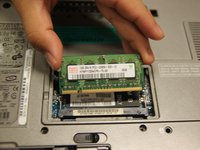
      • Insert new ram into slot B

      Спросите у FixBot
      Добавить комментарий

Заключение

To reassemble your device, follow these instructions in reverse order.

Отменить: Я не выполнил это руководство.

26 человек успешно провели ремонт по этому руководству.

Miguel Wong

Участник с: 04/15/10

565 Репутация

Автор 3 руководств

Команда

Cal Poly, Team 24-35, Regan Spring 2010 Участник Cal Poly, Team 24-35, Regan Spring 2010

CPSU-REGAN-S10S24G35

4 членов

Автор 16 руководств

2 Комментарии к руководству

If you are increasing the amount of RAM installed -> On first power on after installing the RAM, system on boot up will complain about memory size changed, and to reseat the memory. Wait for about 60 - 90 seconds, and you will receive a few additional messages about F1 to continue or F2 for Setup. Go into Setup and verify that the system sees all memory installed. If installing 2 x 2GB DDR2, max possible, 4GB. BIOS setup should report 4GB installed, of which 3.37GB usable.

Michael Erwin - Ответить Поделиться

J’étais inquiet, mais en lisant votre commentaire, me voilà rassuré et j’ai donc suivi vos instructions. Ca fonctionne 2X2 GO …Merci

ppgauchard - Ответить Поделиться

Добавить комментарий

Статистика просмотров:

За последние 24 часов: 2

За последние 7 дней: 8

За последние 30 дней: 63

За всё время: 35,346