Перейти к основному содержанию
Присоединяйся к сообществу ремонтников - Создай аккаунт

Dell Optiplex SX280 Hard Drive Replacement

    1. Dell Optiplex SX280 Hard Drive Replacement, Panel Cover: шаг 1, изображение 1 из 1
      • Make sure the computer is turned off, by selecting the start menu and choosing “Shut Down”.

      • Ensure all cables, speakers and other devices are unplugged and turned off before opening the computer case.

      Спросите у FixBot

      Добавить комментарий

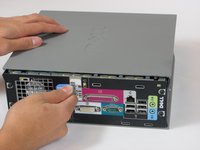
    2. Dell Optiplex SX280 Hard Drive Replacement: шаг 2, изображение 1 из 2 Dell Optiplex SX280 Hard Drive Replacement: шаг 2, изображение 2 из 2
      • Lay the computer on its side; you will see a blue knob.

      • Turn this knob 90 deg clockwise.

      Спросите у FixBot

      Добавить комментарий

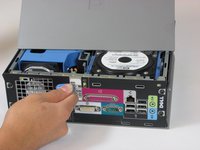
    3. Dell Optiplex SX280 Hard Drive Replacement: шаг 3, изображение 1 из 2 Dell Optiplex SX280 Hard Drive Replacement: шаг 3, изображение 2 из 2
      • Slide the panel case forward about 1/2 inch while knob is turned.

      • Lift panel case off computer.

      Спросите у FixBot

      Добавить комментарий

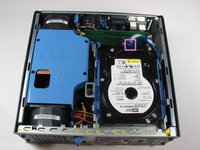
    1. Dell Optiplex SX280 Hard Drive Replacement, Hard Drive: шаг 4, изображение 1 из 2 Dell Optiplex SX280 Hard Drive Replacement, Hard Drive: шаг 4, изображение 2 из 2
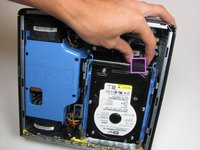
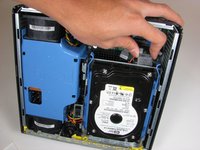
      • Unplug the blue cable that connects the hard drive to the motherboard.

      Спросите у FixBot

      Добавить комментарий

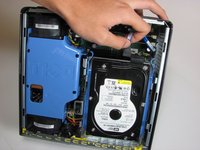
    2. Dell Optiplex SX280 Hard Drive Replacement: шаг 5, изображение 1 из 2 Dell Optiplex SX280 Hard Drive Replacement: шаг 5, изображение 2 из 2
      • Unplug the power supply, distinguished by its red and yellow wires (yellow wire obscured from view).

      Спросите у FixBot

      Добавить комментарий

    3. Dell Optiplex SX280 Hard Drive Replacement: шаг 6, изображение 1 из 1
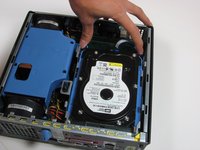
      • Squeeze the release tabs on either side of the hard drive.

      Спросите у FixBot

      Добавить комментарий

    4. Dell Optiplex SX280 Hard Drive Replacement: шаг 7, изображение 1 из 2 Dell Optiplex SX280 Hard Drive Replacement: шаг 7, изображение 2 из 2
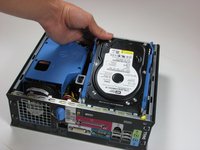
      • Slide the Hard Drive out while squeezing the tabs.

      Спросите у FixBot

      Добавить комментарий

Заключение

To reassemble your device, follow these instructions in reverse order.

Отменить: Я не выполнил это руководство.

6 человек успешно провели ремонт по этому руководству.

Wyatt

Участник с: 10/06/10

784 Репутация

Автор 6 руководств

Команда

Cal Poly, Team 22-4, Maness Fall 2010 Участник Cal Poly, Team 22-4, Maness Fall 2010

CPSU-MANESS-F10S22G4

4 членов

Автор 86 руководств

2 Комментарии к руководству

Thanks for great tutorial.

Politers - Ответить Поделиться

Yeah great tutorial!

Rebinas - Ответить Поделиться

Добавить комментарий

Статистика просмотров:

За последние 24 часов: 2

За последние 7 дней: 7

За последние 30 дней: 29

За всё время: 6,339