Перейти к основному содержанию
Присоединяйся к сообществу ремонтников - Создай аккаунт

Dell Studio 1537 Hard Drive Replacement

Выберете то, что вам нужно

    1. Dell Studio 1537 Hard Drive Replacement, Battery: шаг 1, изображение 1 из 2 Dell Studio 1537 Hard Drive Replacement, Battery: шаг 1, изображение 2 из 2
      • Ensure the laptop is turned off and unplugged before attempting to remove any piece.

      • Place the laptop lid down so the underside is visible.

      • Pull battery release switch and gently pull the battery directly away from the switch.

      Спросите у FixBot

      Добавить комментарий

    1. Dell Studio 1537 Hard Drive Replacement, Back Cover: шаг 2, изображение 1 из 1
      • Identify the back cover of the laptop.

      Спросите у FixBot

      Добавить комментарий

    2. Dell Studio 1537 Hard Drive Replacement: шаг 3, изображение 1 из 1
      • Unscrew and remove all of the 6.0mm screws with a Phillips #1 screwdriver.

      Спросите у FixBot

      Добавить комментарий

    3. Dell Studio 1537 Hard Drive Replacement: шаг 4, изображение 1 из 1
      • Lift the back cover off of the laptop.

      Спросите у FixBot

      Добавить комментарий

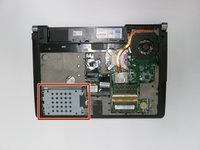
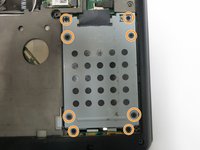
    1. Dell Studio 1537 Hard Drive Replacement, Hard Drive: шаг 5, изображение 1 из 2 Dell Studio 1537 Hard Drive Replacement, Hard Drive: шаг 5, изображение 2 из 2
      • Unscrew all of the 6.0 mm screws with a Phillips #1 screwdriver holding the hard drive cage on the computer.

      Спросите у FixBot

      Добавить комментарий

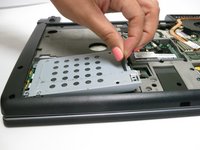
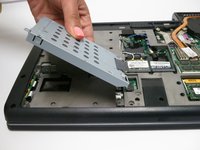
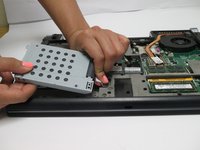
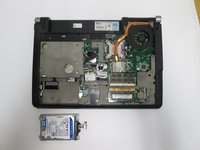
    2. Dell Studio 1537 Hard Drive Replacement: шаг 6, изображение 1 из 2 Dell Studio 1537 Hard Drive Replacement: шаг 6, изображение 2 из 2
      • Lift the hard drive cage out of the laptop.

      Спросите у FixBot

      Добавить комментарий

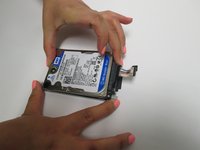
    3. Dell Studio 1537 Hard Drive Replacement: шаг 7, изображение 1 из 3 Dell Studio 1537 Hard Drive Replacement: шаг 7, изображение 2 из 3 Dell Studio 1537 Hard Drive Replacement: шаг 7, изображение 3 из 3
      • Pull tab to unplug the drive from the computer

      • Pull the hard drive out of the hard drive tray.

      Спросите у FixBot

      Добавить комментарий

Заключение

To reassemble your device, follow these instructions in reverse order.

Отменить: Я не выполнил это руководство.

3 человек успешно провели ремонт по этому руководству.

Zach Dylag

Участник с: 03/24/15

575 Репутация

Автор 4 руководств

Команда

Baylor, Team 6-2, Shaver Spring 2015 Участник Baylor, Team 6-2, Shaver Spring 2015

BU-SHAVER-S15S6G2

3 членов

Автор 8 руководств

1 Комментарий к руководству

Straightforward process with step by step guide. Thank you Zach.

Katharine Church - Ответить Поделиться

Добавить комментарий

Статистика просмотров:

За последние 24 часов: 0

За последние 7 дней: 4

За последние 30 дней: 26

За всё время: 2,828