Введение
RAM can be responsible for bluescreens and other difficult-to-diagnose errors; this guide will instruct you how to replace, remove, or add RAM to your Laptop
Выберете то, что вам нужно
-
-
Slide the battery release slider all the way to the right and push the battery straight out of the back of the computer
 Спросите у FixBot
-
-
-
-
Unscrew the 8 Phillips head screws marked in the photo.
-
Use a plastic opening tool to pry the panel away from the laptop body.
-
Lift the panel up and away.
-
-
-
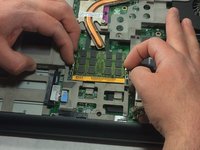
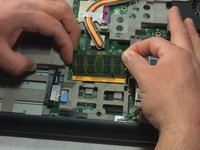
Release RAM sticks by pulling clips out in opposite directions of each other.
-
Pull RAM stick up and out.
-


To reassemble your device, follow these instructions in reverse order.
Отменить: Я не выполнил это руководство.
2 человек успешно провели ремонт по этому руководству.
Команда

UMass Dartmouth, Team S8-G4, Catania Spring 2017 Участник UMass Dartmouth, Team S8-G4, Catania Spring 2017
UMASSD-CATANIA-S17S8G4
3 членов
Автор 8 руководств