Введение
If you need to reinstall a new joystick unit, access the daughterboard with this guide. Since the daughterboard communicates with the motherboard, you can also replace the daughterboard if your controller does not carry out its functions properly. For this guide, you will need a plastic opening tool and a Phillips #0 screwdriver head. You will not need to do any difficult steps, but open the ZIF connectors carefully.
Выберете то, что вам нужно
-
-
Orient your controller so that the black ring is on the bottom and the buttons are facing away from yourself.
-
Place your thumb on the small arrow that is on the controller's battery cover and firmly push upwards.
-
Slide the cover off and separate it from the controller.
 Спросите у FixBot
-
-
-
Remove the right battery by pushing the positive end down and pulling the battery out toward yourself.
-
Repeat the procedure for the left battery.
-
-
-
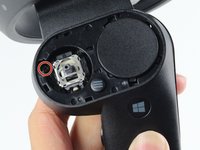
Hold the joystick down with your left thumb to make space for the plastic opening tool.
-
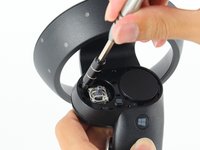
Insert the plastic opening tool into the circle above the joystick and pry upwards to lift the front panel.
-
Slide the plastic opening tool around the perimeter until you can lift the front panel.
-
-
-
Grab the joystick and pull away from the controller to remove it.
-
-
-
-
Turn your controller over and orient it so that the thin side is on the top.
-
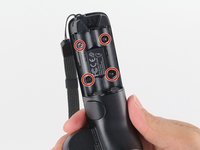
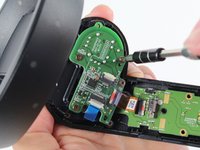
Remove four 4mm Phillips #0 screws.
-
-
-
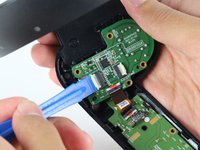
Turn your controller 90 degrees clockwise and insert a blue plastic opening tool into the crease of the back panel.
-
Push down on the end of the plastic opening tool closest to you to lift the panel up.
-
Slide the plastic opening tool around the perimeter of the back panel until you can remove it.
-
-
-
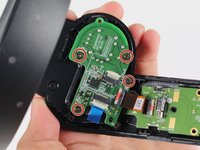
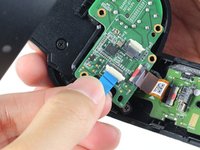
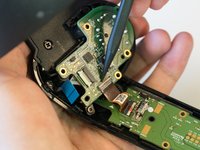
Use the tip of the blue plastic opening tool or your fingernail to gently flip-up the white locking flap.
-
Grab the blue cable and pull away from the socket.
-
-
-
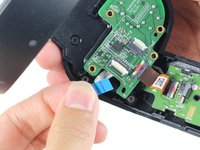
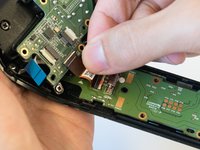
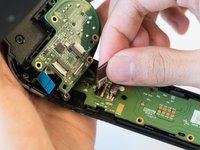
Use the tip of a spudger or your fingernail to gently flip-up the small white flap holding the orange ribbon cable.
-
Grab the orange cable and pull away from the socket.
-
-
-
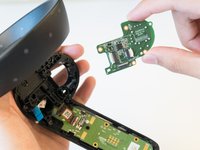
Place two fingers on the perimeter of the daughterboard and lift it away from the controller.
-


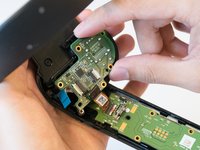
To reassemble your device, follow these instructions in reverse order.
Отменить: Я не выполнил это руководство.
22 человек успешно провели ремонт по этому руководству.
Команда

Cal Poly, Team S18-G3, Livingston Spring 2018 Участник Cal Poly, Team S18-G3, Livingston Spring 2018
CPSU-LIVINGSTON-S18S18G3
4 членов
Автор 10 руководств