Перейти к основному содержанию
Присоединяйся к сообществу ремонтников - Создай аккаунт

Dell XPS M1730 Screen Replacement

Выберете то, что вам нужно

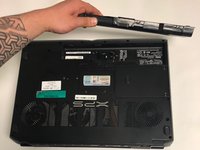
  1. Dell XPS M1730 Screen Replacement, Battery: шаг 1, изображение 1 из 1
    • Push the sliding button near the battery compartment.

    Спросите у FixBot
  2. Dell XPS M1730 Screen Replacement: шаг 2, изображение 1 из 1
    • Slide the button next to the battery and lift up on the lip of the battery edge.

    Спросите у FixBot
  3. Dell XPS M1730 Screen Replacement: шаг 3, изображение 1 из 2 Dell XPS M1730 Screen Replacement: шаг 3, изображение 2 из 2
    • Lift and remove the battery.

    Спросите у FixBot
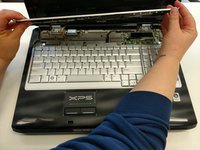
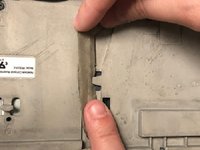
  4. Dell XPS M1730 Screen Replacement, Keyboard: шаг 4, изображение 1 из 3 Dell XPS M1730 Screen Replacement, Keyboard: шаг 4, изображение 2 из 3 Dell XPS M1730 Screen Replacement, Keyboard: шаг 4, изображение 3 из 3
    • Remove the plastic trim at the base of the screen screen. Start from the tab on the right side and work to the left side.

    Спросите у FixBot
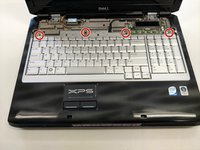
  5. Dell XPS M1730 Screen Replacement: шаг 5, изображение 1 из 2 Dell XPS M1730 Screen Replacement: шаг 5, изображение 2 из 2
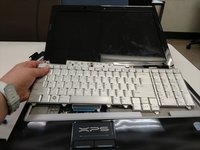
    • Remove the four screws from the top of the keyboard bracket.

    Спросите у FixBot
  6. Dell XPS M1730 Screen Replacement: шаг 6, изображение 1 из 3 Dell XPS M1730 Screen Replacement: шаг 6, изображение 2 из 3 Dell XPS M1730 Screen Replacement: шаг 6, изображение 3 из 3
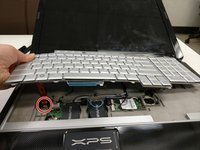
    • Remove the keyboard by sliding it forward, off of the clips, and then lifting up.

    Спросите у FixBot
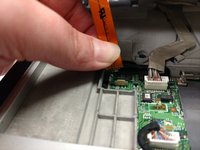
  7. Dell XPS M1730 Screen Replacement: шаг 7, изображение 1 из 3 Dell XPS M1730 Screen Replacement: шаг 7, изображение 2 из 3 Dell XPS M1730 Screen Replacement: шаг 7, изображение 3 из 3
    • Lift the keyboard about 2 inches up from the laptop platform.

    • From this angle the keyboard ribbon connector can be seen and disconnected.

    Спросите у FixBot
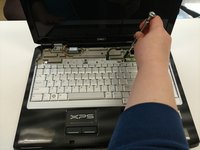
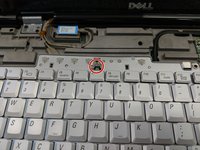
  8. Dell XPS M1730 Screen Replacement, LCD Screen Display: шаг 8, изображение 1 из 1
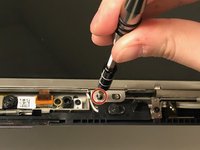
    • Remove 2 M2x3mm screws that are located at the bottom of the plastic bezel with a PH0 screwdriver.

    Спросите у FixBot
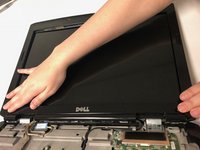
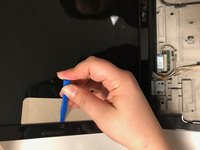
  9. Dell XPS M1730 Screen Replacement: шаг 9, изображение 1 из 3 Dell XPS M1730 Screen Replacement: шаг 9, изображение 2 из 3 Dell XPS M1730 Screen Replacement: шаг 9, изображение 3 из 3
    • Use iFixit plastic tool and a cutout of cardboard to pry out the plastic bezel around the edges of the LCD screen

    Спросите у FixBot
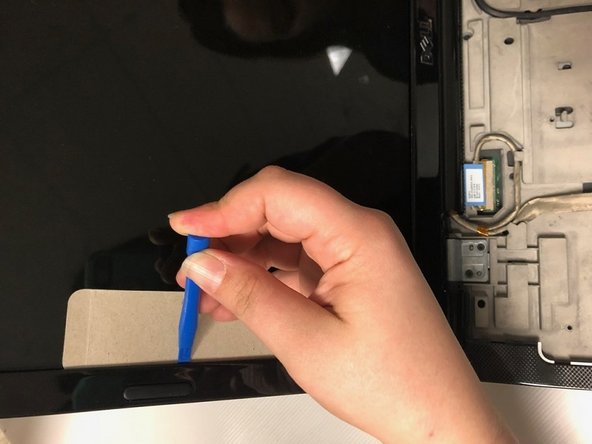
  10. Dell XPS M1730 Screen Replacement: шаг 10, изображение 1 из 3 Dell XPS M1730 Screen Replacement: шаг 10, изображение 2 из 3 Dell XPS M1730 Screen Replacement: шаг 10, изображение 3 из 3
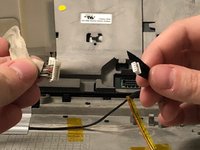
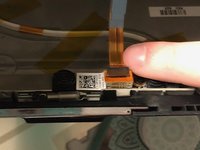
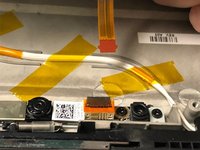
    • Disconnect the display connectors by removing them from the grooves and unplugging them.

    Спросите у FixBot
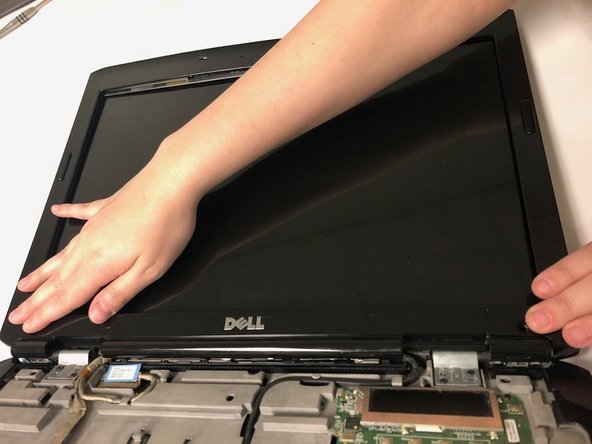
  11. Dell XPS M1730 Screen Replacement: шаг 11, изображение 1 из 3 Dell XPS M1730 Screen Replacement: шаг 11, изображение 2 из 3 Dell XPS M1730 Screen Replacement: шаг 11, изображение 3 из 3
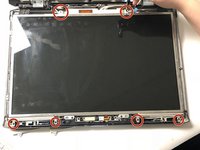
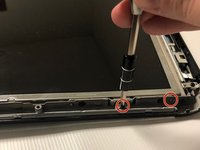
    • Remove 12 M2x3mm screws along the edge of the screen frame with a PH0 screwdriver.

    Спросите у FixBot
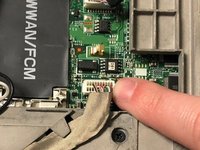
  12. Dell XPS M1730 Screen Replacement: шаг 12, изображение 1 из 2 Dell XPS M1730 Screen Replacement: шаг 12, изображение 2 из 2
    • Disconnect the display connector behind the top of the screen.

    Спросите у FixBot
Заключение

To reassemble your device, follow these instructions in reverse order.

2 человек успешно провели ремонт по этому руководству.

Ethan Teel

Участник с: 02/13/18

176 Репутация

1 руководство автора

Команда

University of North Texas, Team S2-G6, Thomas Spring 2018 Участник University of North Texas, Team S2-G6, Thomas Spring 2018

UNT-THOMAS-S18S2G6

5 членов

Автор 5 руководств

0 Комментарии к руководству

Добавить комментарий

Статистика просмотров:

За последние 24 часов: 2

За последние 7 дней: 8

За последние 30 дней: 54

За всё время: 1,572